Using the API
An overview of Sevco's REST-based API. This article reviews how to generate and manage API keys, authenticate API requests, and configure environment variables.
Overview
Sevco's REST-based API allows users to programmatically access and manage their data in Sevco. These endpoints can be used to integrate with systems such as SIEM and SOAR solutions, enhancing visibility with real-time information and streamlining security workflows. Additionally, Sevco also provides endpoints that allow users to send data to their instance of Sevco.
Creating an API Key
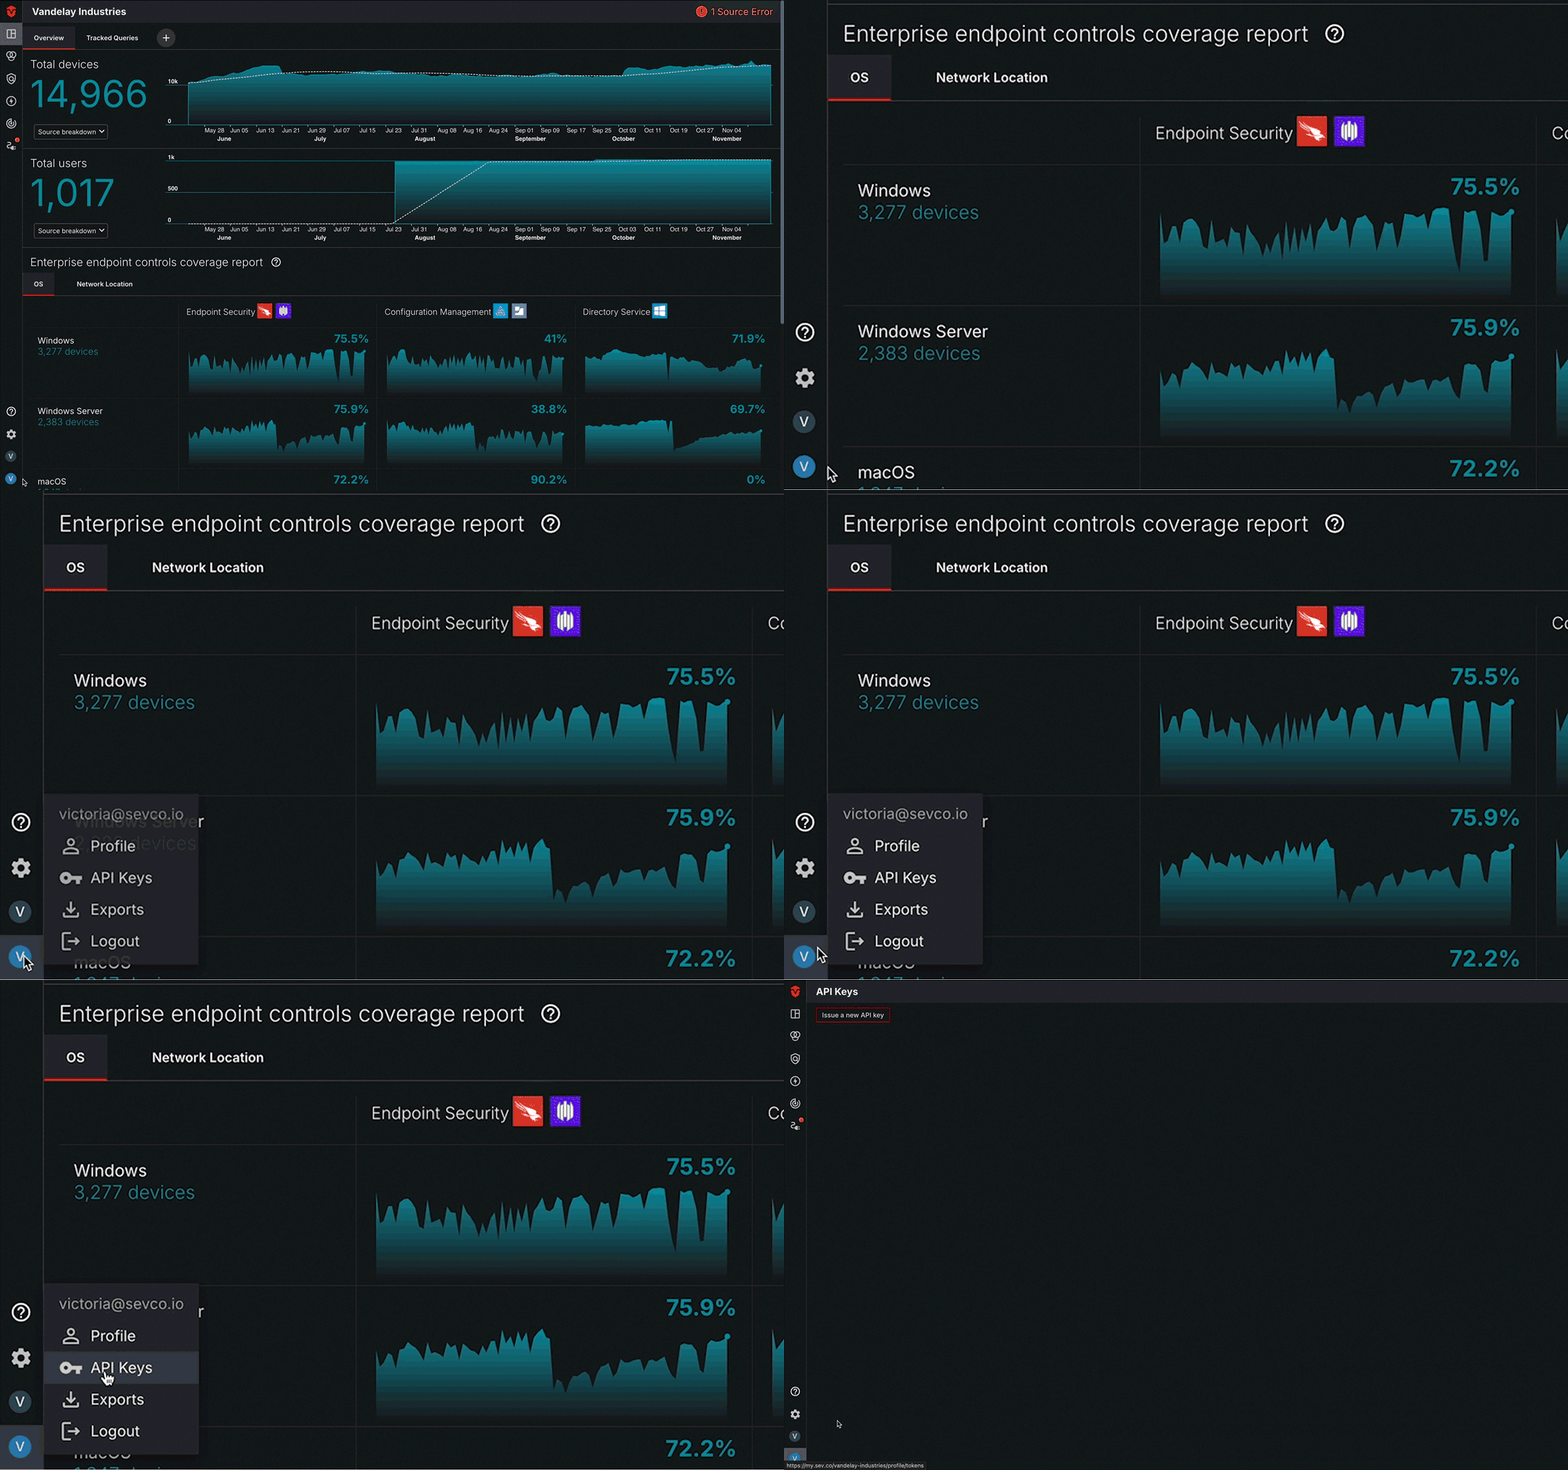
Sevco API keys can be generated from the API Keys page. Select the API Keys link from the User menu at the bottom-left corner of the page.

From the API Key page, select the Issue a new API key button. A popup will appear. Enter a name for your API key in the Key Name field then select the Create button.
Once your API key has been generated, it will appear on the page.

Copying an API Key
Note: Once an API Key has been created, it will only be visible for 15 seconds. We recommend copying this key immediately and saving it in a secure location.
From the API Keys page, select the Copy Key button that corresponds to the API key you would like to copy.

Authentication
All Sevco APIs are REST APIs over HTTPS and use token-based authentication. User API tokens are per-user, carry the same rights and privileges as the associated user. To obtain a token, first create an API key.
Next, include your token in the Authorization header as Token $SEVCO_API_KEY.
In addition to passing the token via the Authorization header for each request, you will also need to specify the Org ID of your organization using the HTTP header x-sevco-target-org. To obtain your Org ID, contact your customer success representative.
You can interact with the APIs using any HTTP interface such as wget or curl.
An example request using curl:
curl -H 'authorization: Token $SEVCO_API_KEY'
     -H 'x-sevco-target-org: 00000000-0000-0000-0000-00000000000'
     'https://api.sev.co/v1/admin/org'
An example JSON response for the above request:
{
  "orgs": [
    {
      "id": "00000000-0000-0000-0000-000000000000",
      "org_name": "Company",
      "org_slug": "company",
      "created": "2022-04-22T20:36:16.814Z",
      "mfa_enabled": true,
      "mfa_enforced": true
    },
    {
      "id": "12345678-abcd-efgh-9101-0987654321gh",
      "org_name": "Organization",
      "org_slug": "organization",
      "created": "2021-12-14T19:17:33.213Z",
      "mfa_enabled": false,
      "mfa_enforced": false
    }
  ]
}
Setting up an Environment Variable
Setting your API token as an environment variable allows you to securely manage it while interacting with Sevco's API. This allows your token to be accessible for API requests without hardcoding it into your scripts or commands.
Windows
Powershell
Set the SEVCO_API_TOKEN environment variable for your current session using the following command. Replace your-token with your API token.
$env:SEVCO_API_TOKEN = "your-token"Example API Request
After setting the variable, you can use it in your scripts and API requests. For example:
curl -H "Authorization: Token $env:SEVCO_API_TOKEN" \
     -H "x-sevco-target-org: 00000000-0000-0000-0000-00000000000" \
     "https://api.sev.co/v1/admin/org"
Command Prompt
Set the SEVCO_API_TOKEN environment variable for your current session using the following command. Replace your-token with your API token.
set SEVCO_API_TOKEN=your-tokenExample API Request
After setting the variable, you can use it in your scripts and API requests. For example:
curl -H "Authorization: Token %SEVCO_API_TOKEN%" \
     -H "x-sevco-target-org: 00000000-0000-0000-0000-00000000000" \
     "https://api.sev.co/v1/admin/org"
Linux / MacOS
Bash
Set the SEVCO_API_TOKEN environment variable for your current session using the following command. Replace your-token with your API token.
export SEVCO_API_TOKEN="your-token"Example API Request
After setting the variable, you can use it in your scripts and API requests. For example:
curl -H "Authorization: Token $SEVCO_API_TOKEN" \
     -H "x-sevco-target-org: 00000000-0000-0000-0000-00000000000" \
     "https://api.sev.co/v1/admin/org"
Updated 11 months ago
