Configuring Actions for Saved Queries
Overview
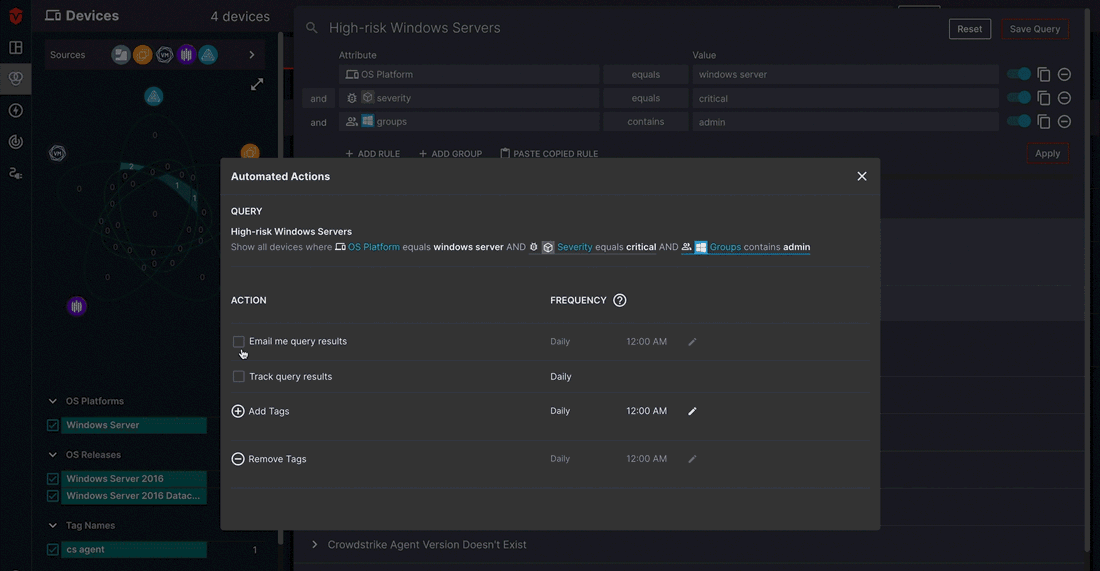
Once a query has been saved, you can set up the following query actions from the Query Actions Panel:
- Schedule daily or weekly emails of query results
- Add the query to the Tracked Queries Dashboard
- Apply tagging actions to add or remove tags from all assets in your query results
Accessing the Actions Panel
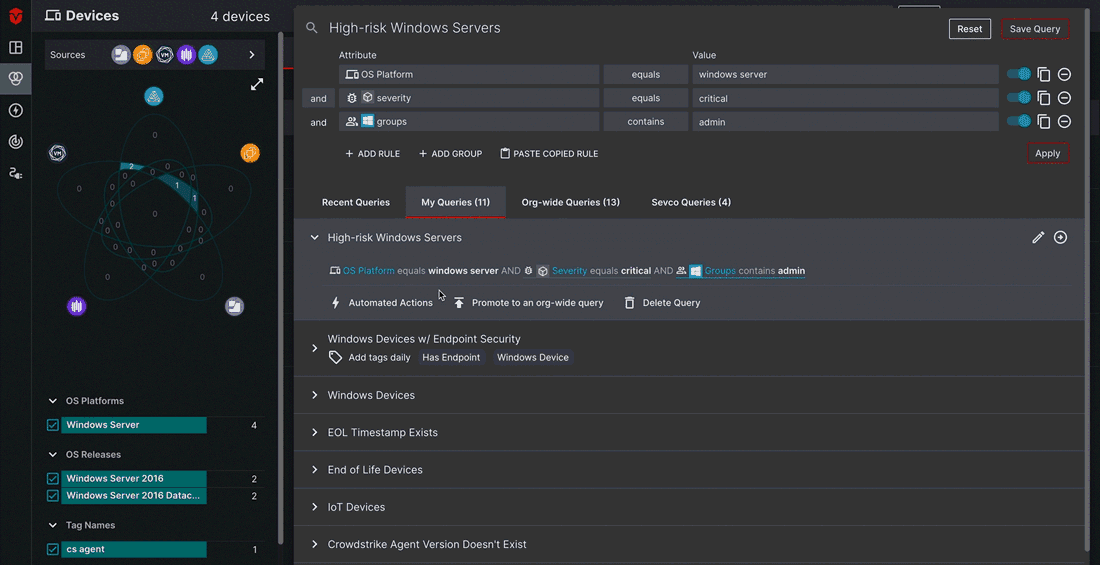
To access the Query Actions Panel, your query must be saved to either the My Queries or Org-wide Queries tab in the query builder.
- Queries saved to the My Queries list are only viewable to you.
- Queries saved to the Org-wide Queries list are viewable to all members in your Organization.
- All actions applied to Org-wide queries will be visible to other members in your Organization, with the exception of scheduled query-results emails.
There are two ways to do this:
Option 1
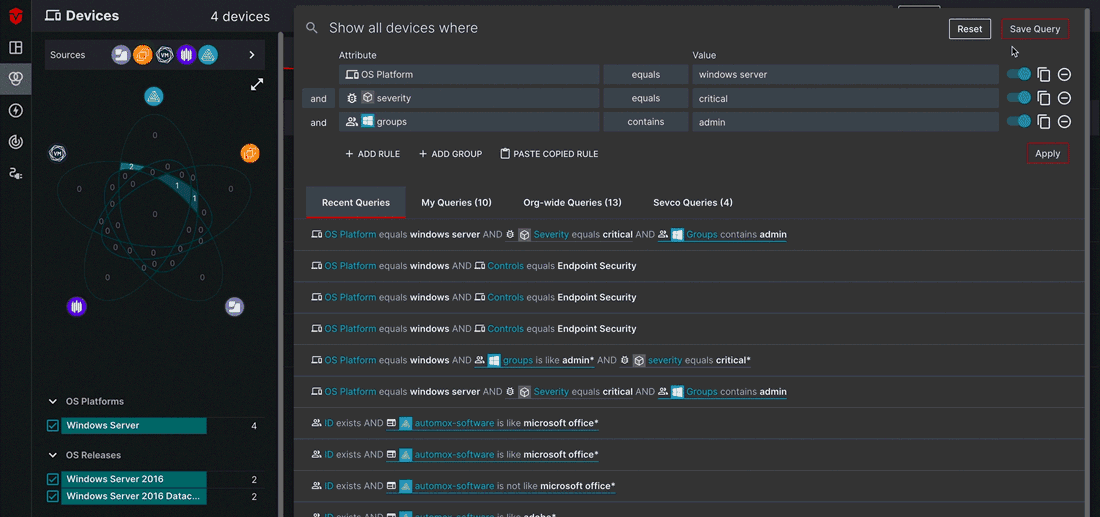
You can save a query by selecting the Save Query button in the top-right corner of the query builder to add it to the My Queries or Org-wide Queries tab.
Option 2
If you've already run your query, you can save it from the Recent Queries tab. Hover over the query you'd like to save and select the Save button to add it.

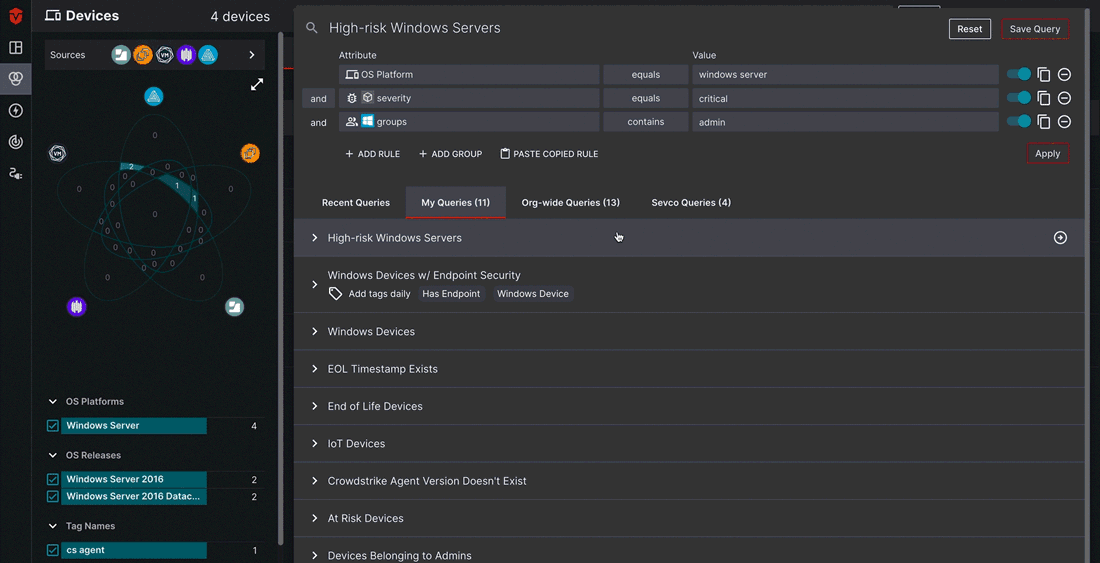
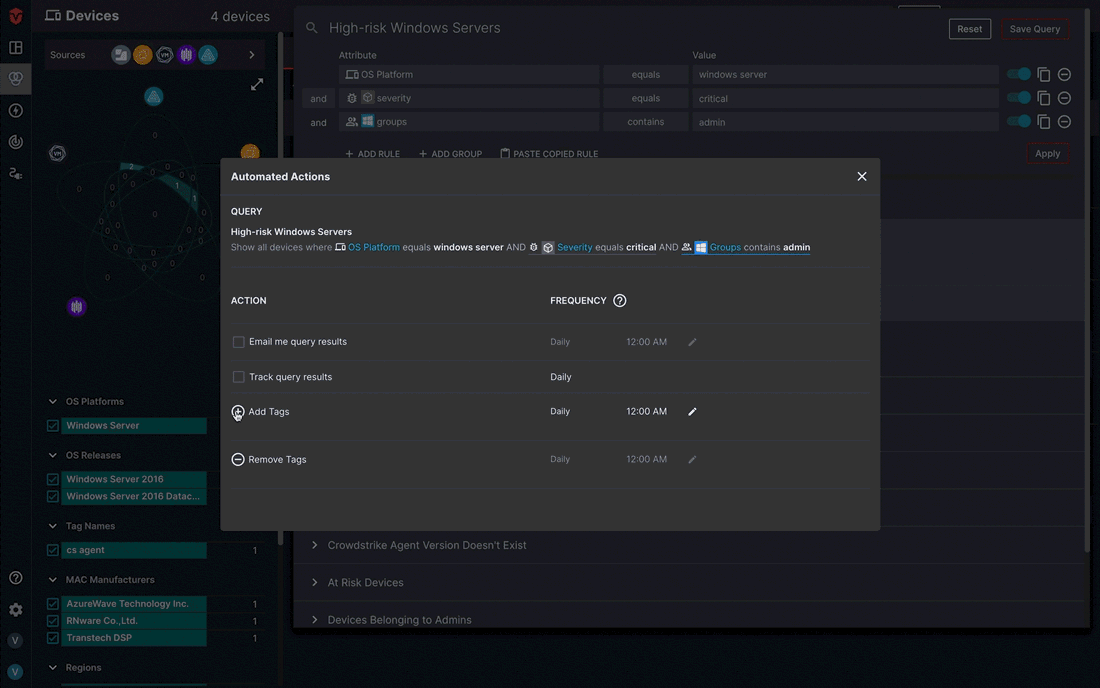
Once your query has been saved, you can access the Actions Panel by clicking on the from the query list and selecting its corresponding Automated Actions button.
Scheduled Query-results Emails
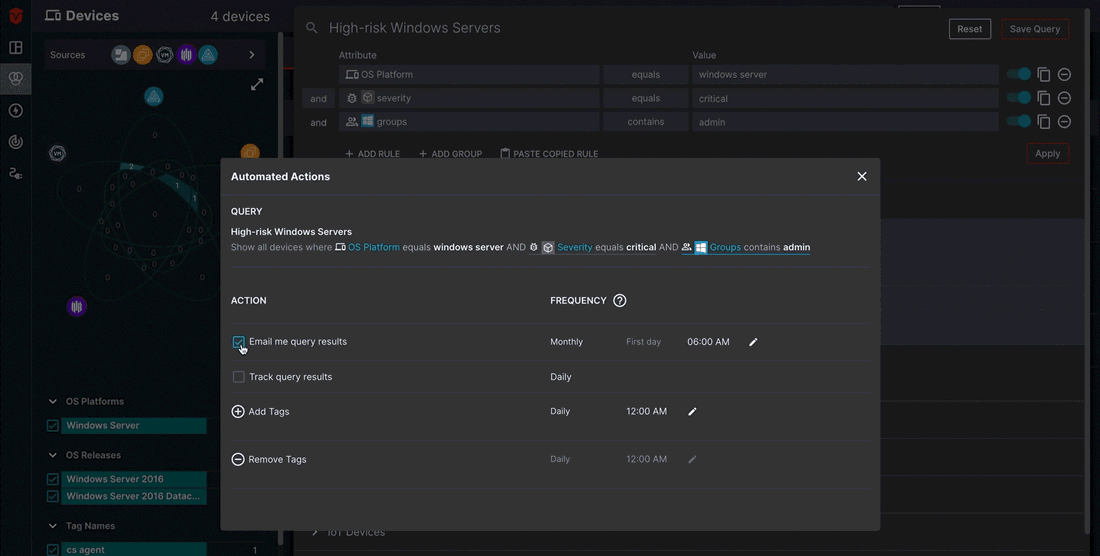
Unlike other query actions, scheduled query-results emails will only be sent to the email address associated with your account. These emails can be sent on a daily, weekly, or monthly basis at a time of your choosing.
You can schedule an email by selecting the Email me query results checkbox. Next, select the edit ( ) icon to schedule your emails
- Select Daily, Weekly, or Monthly from the dropdown.
- For weekly emails, select what day of the week you would like to receive your results email on.
- Monthly emails will always default to the first of the month.
- Specify what time you would like to receive the email at.
Once you have finished setting up your email alert schedule, click the save ( ) icon.
To stop receiving emails, simply uncheck the checkbox.
Tracked Queries
Note: Please refer to our article on tracked queries for more information.
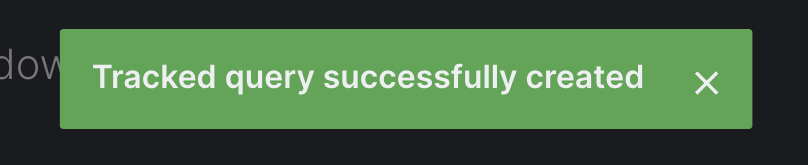
To add a query to the Tracked Queries page, select the Track query results checkbox.
- Queries saved to the My Queries tab will only be visible to you on the Query Reports page.
- Org-wide queries will be visible to all members of your organization.
Once you've selected the checkbox, a "Tracked query successfully created" message will appear at the top of the screen to confirm that your query has been added to the Tracked Queries page.
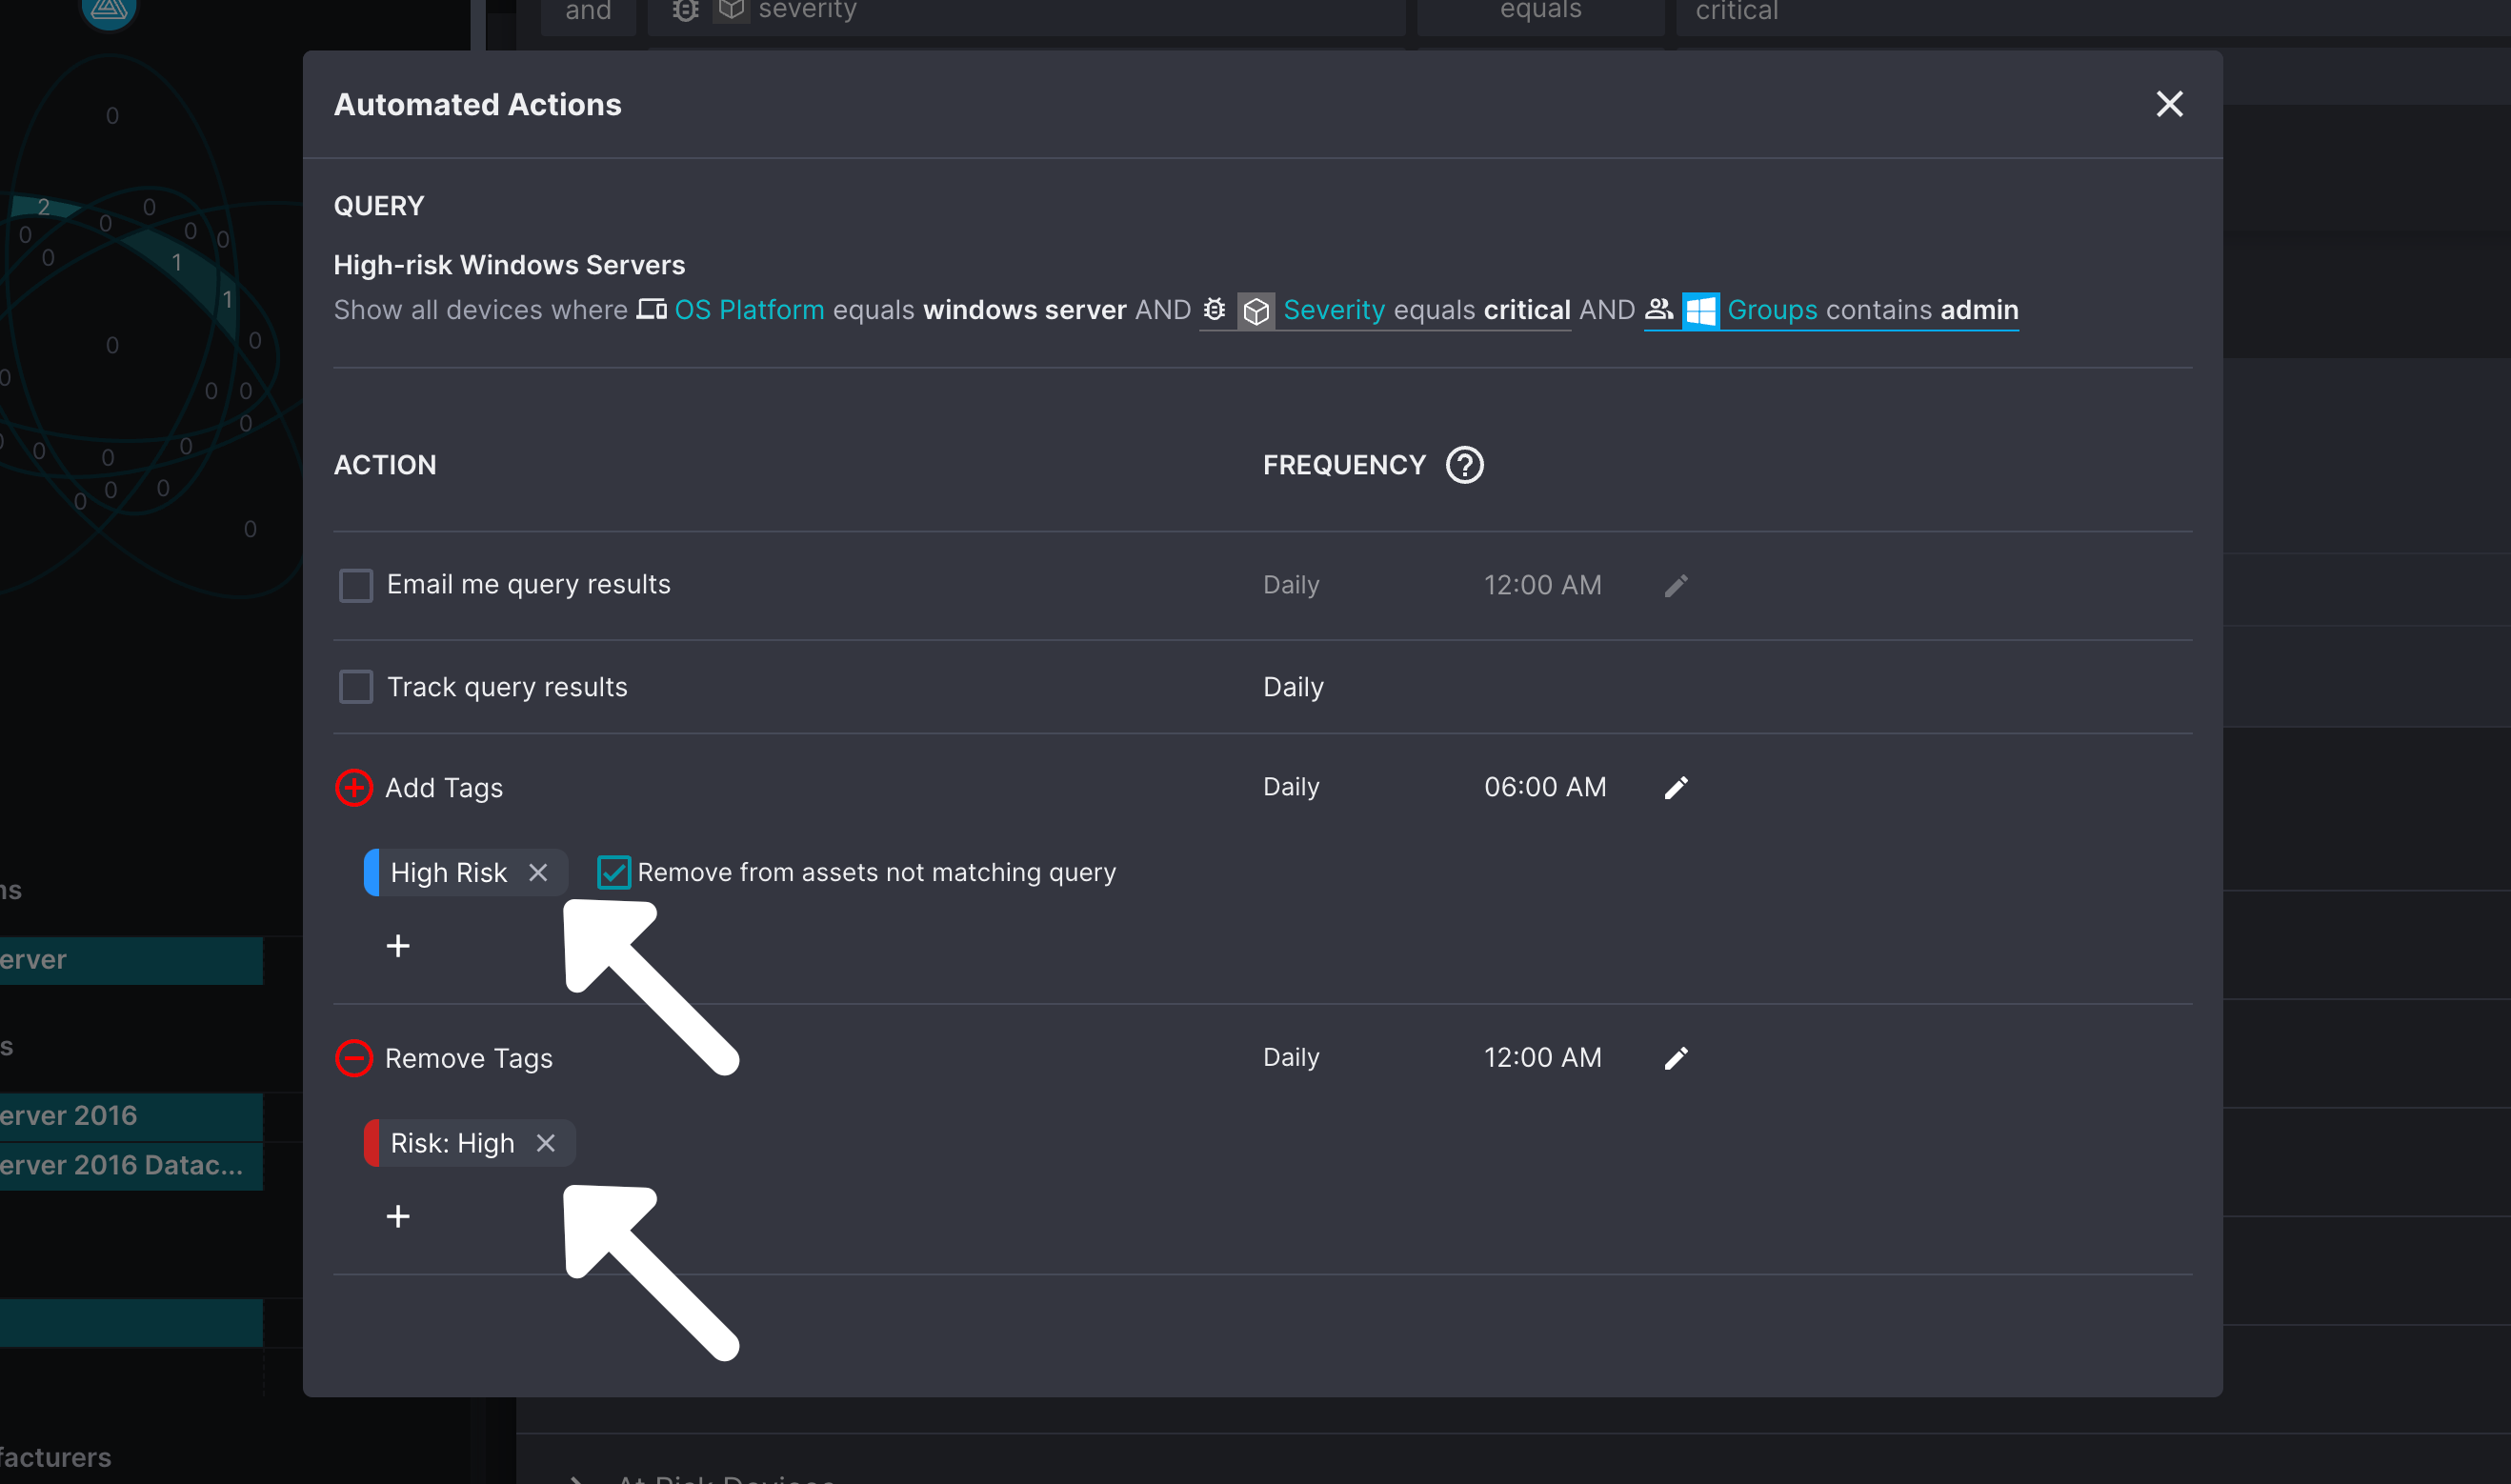
Tagging Actions
Tagging Actions allow you to manage tags for assets associated with an Org-wide saved query.
- Adding a tag to an Org-wide saved query will automatically apply it to any asset appearing in your query results.
- Likewise, removing a tag or tagging action from an Org-wide saved query will remove it from those same assets.
Adding a Tagging Action
Add Tags
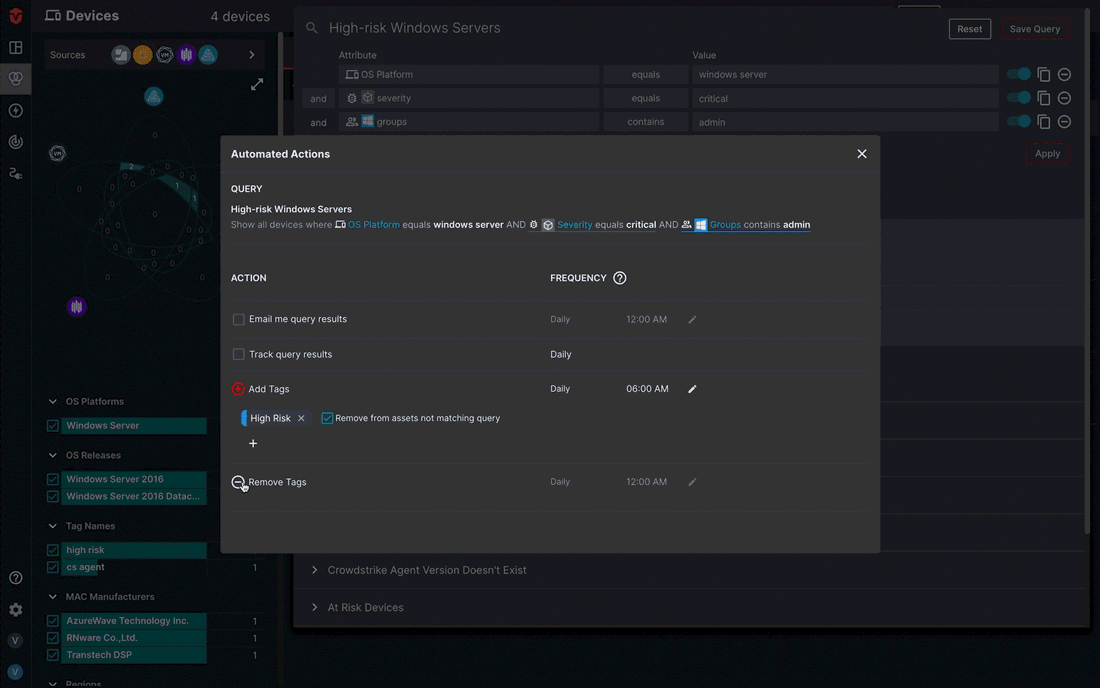
Select the Add Tags icon ( ). From here, you can choose from a list of existing tags or create a new tag in the Tag name field. Add an optional tag value if desired.
Check the Remove this tag from any assets that do not match the query checkbox if you would like to remove the tag you are applying from any assets that may have previously been tagged with it that do not meet the requirements of your query.
Additionally, you can set a frequency for when the tag is automatically applied to assets by selecting the frequency edit () icon.
Once you have finished, select the Apply Tag button to add the tagging action to your query.
Remove Tags
To remove tags not associated with your saved query, select the Remove Tags icon ( ) and search for the tag you would like to remove in the Tag name field.
Once you have finished, select the Apply Tag button to apply the query action to your query. Moving forward, the tag you've selected will be removed from any assets associated with your saved query results.
Removing a Tagging Action
To remove a tagging action associated with a saved query, simply select the delete button to the right of the tag. This will tell the system to no longer apply or remove the specific tag to assets associated with your query results.
Updated 3 months ago