Tour the Aurora ASM Platform
Overview
The purpose of this article is to provide a general overview of the Aurora ASM platform's pages and functionality. This walk through assumes that you have already completed the initial setup for your Organization and are already collecting asset data. If you have not already done so, please refer to our Quick Start Guide for instructions.
The Aurora ASM platform is rapidly evolving, as we continue adding new features and making improvements to existing ones. As such, supporting documentation may lag behind from time to time. If you are unable to find information about a particular page or feature, please don't hesitate to reach out to us at [email protected] or utilize our in-app Support Chat.
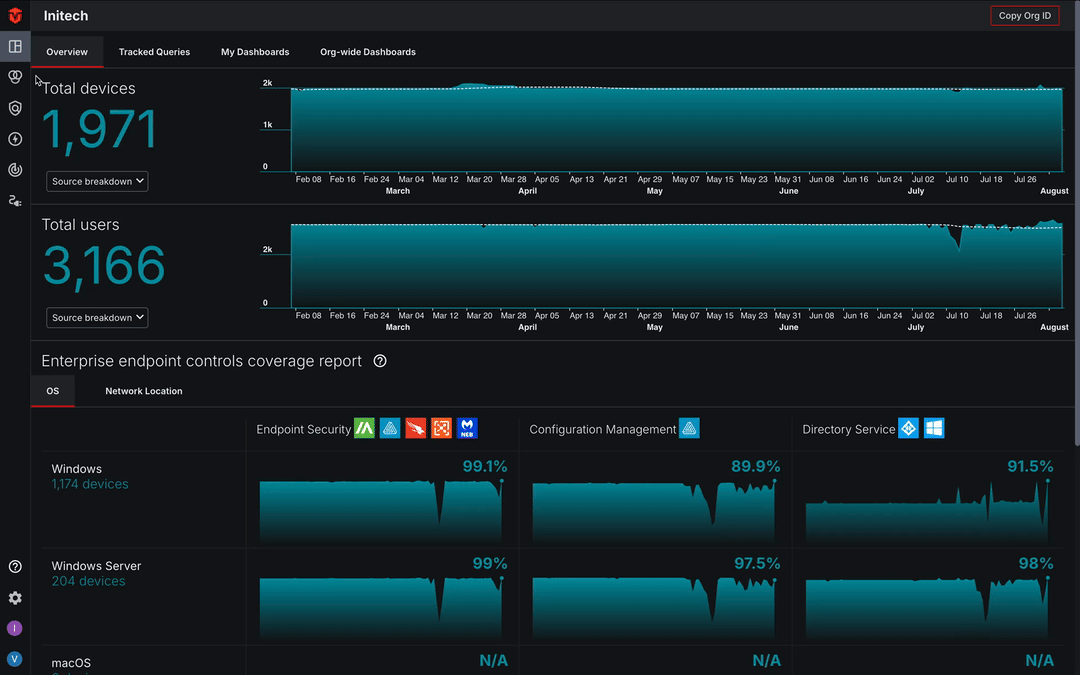
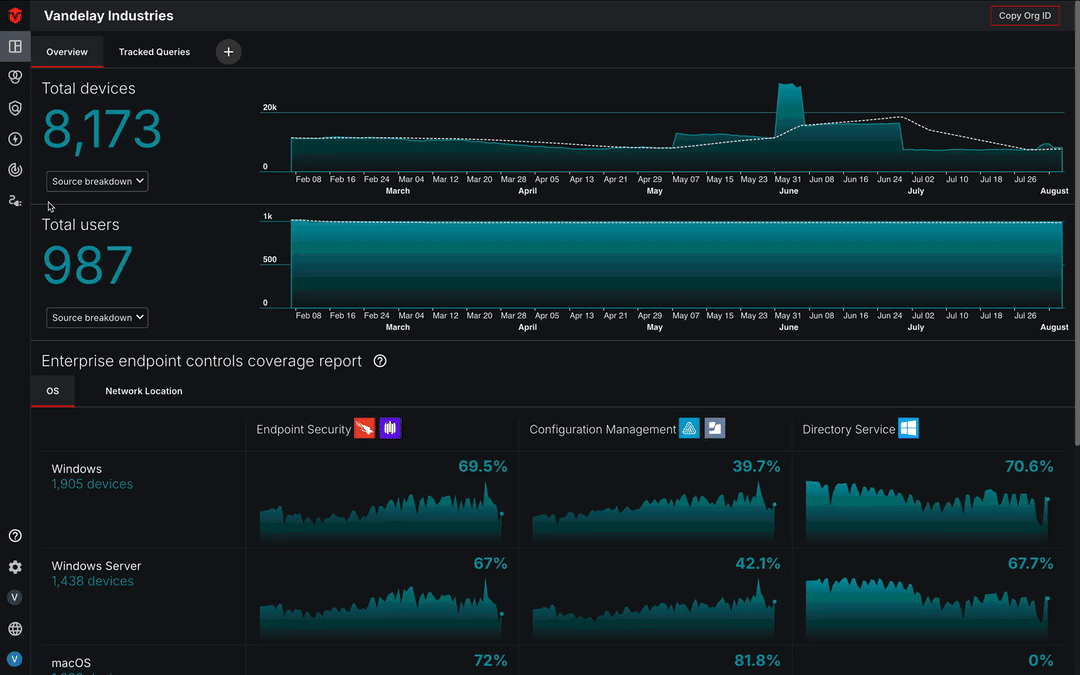
Dashboard
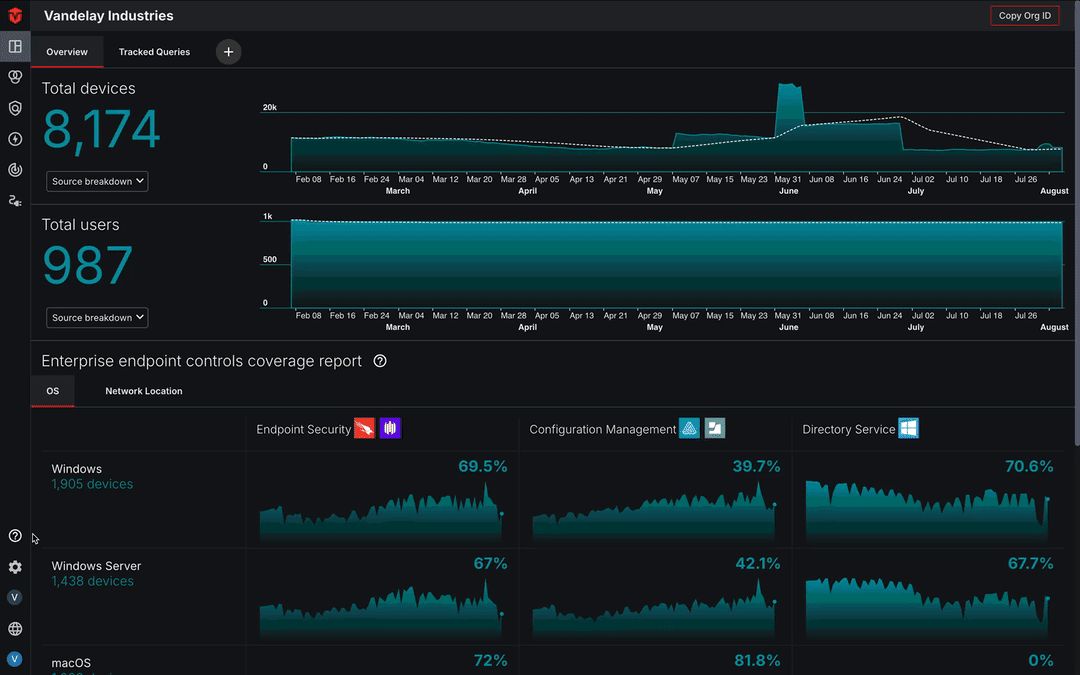
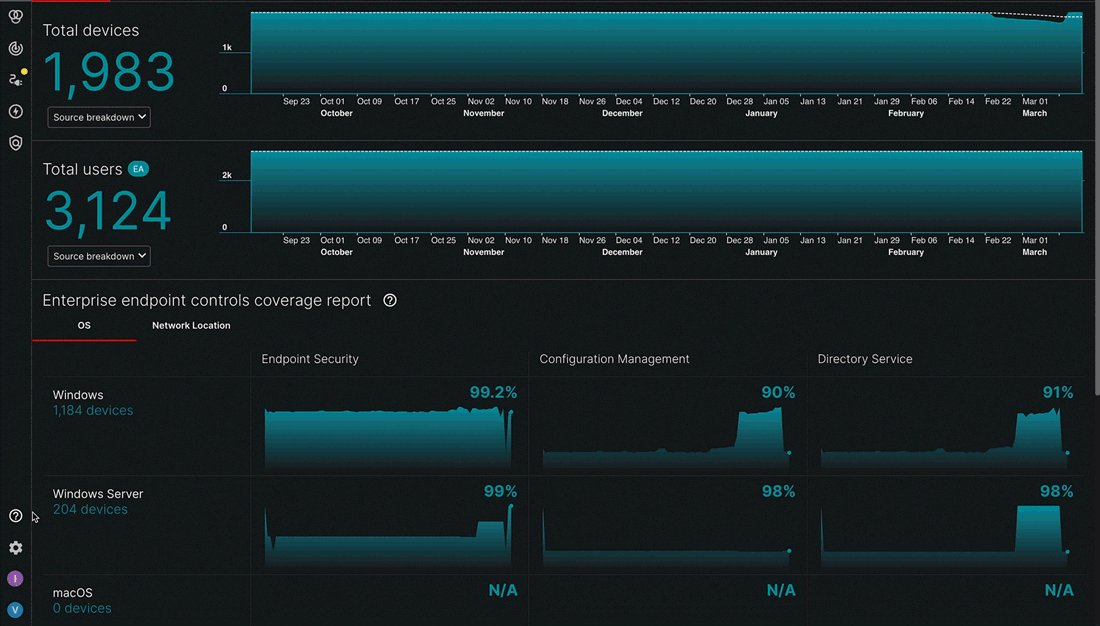
Dashboard pages provide a centralized, high-level view of your organization's asset inventory and Source integration status within the Aurora ASM platform. From current and historical asset counts to detailed processing metrics, the Dashboard helps you understand how your data is collected, deduplicated, and correlated across your Sources. Interactive visuals such as the Asset Processing Pipeline and Enterprise Endpoint Controls Coverage Report make it easy to identify coverage gaps and explore trends over time. Additionally, you can use these pages to view information about Source health, create Custom Dashboards tailored to your organization's priorities, and access information about any queries you are tracking.
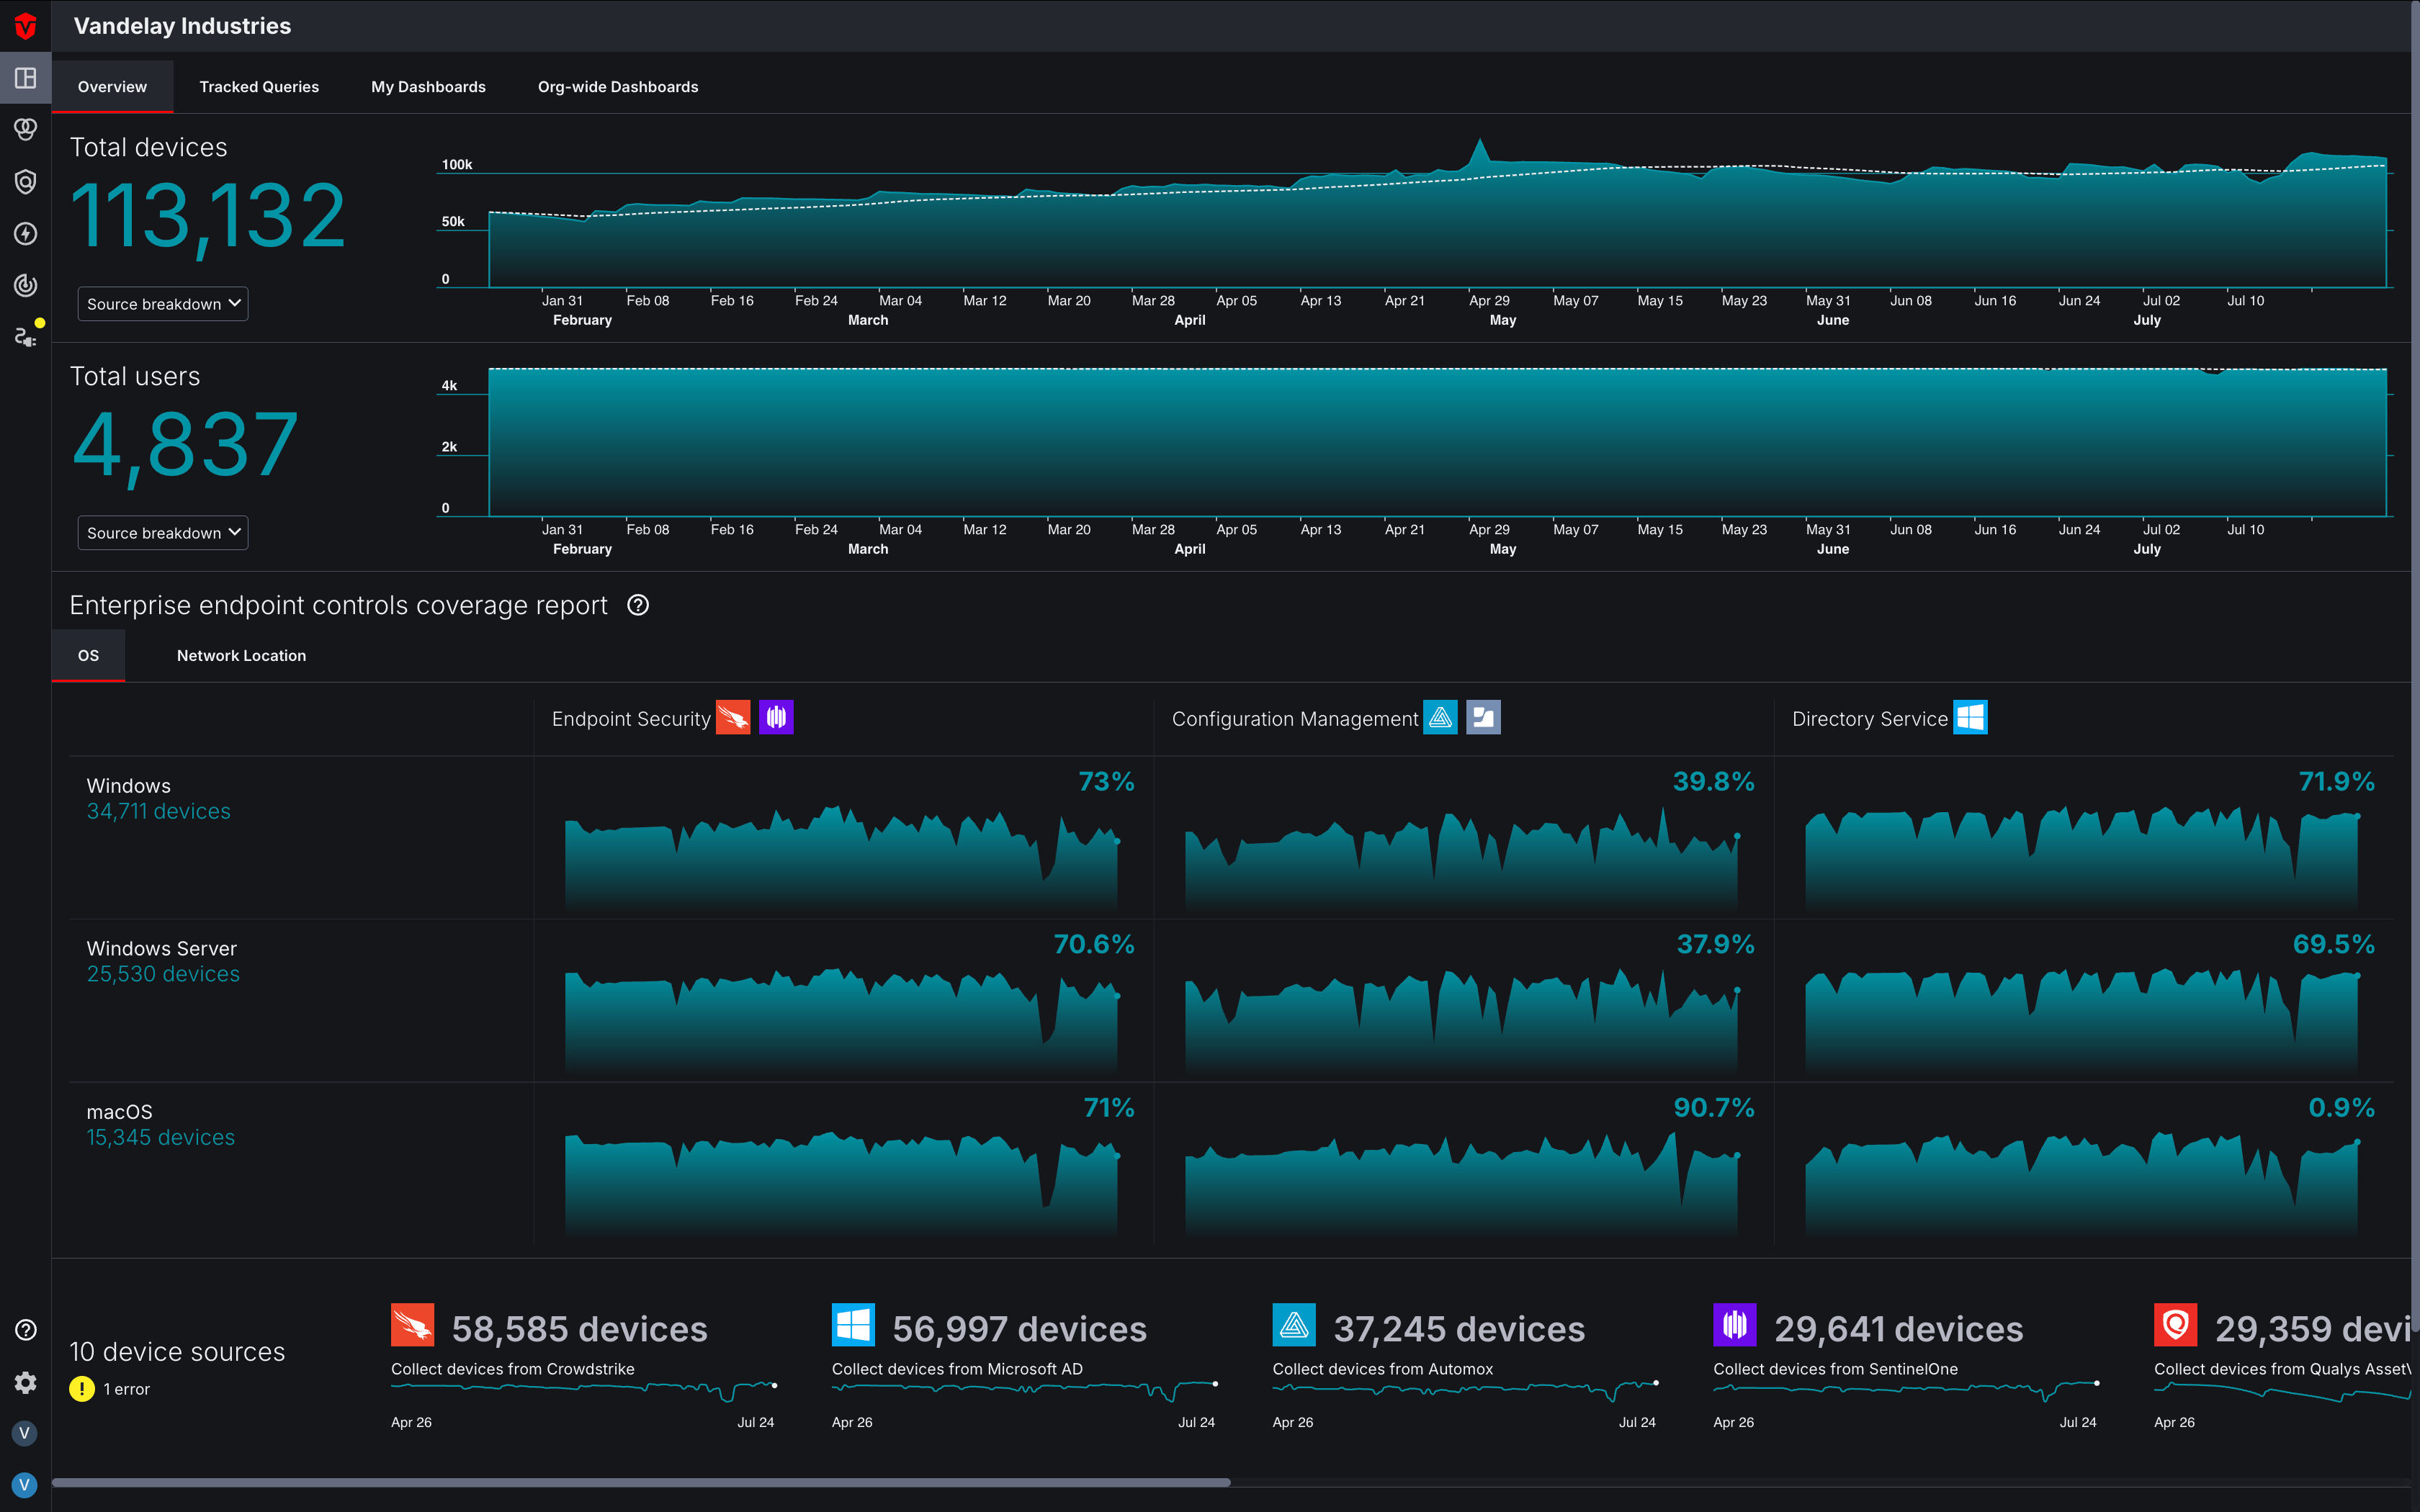
Click here to learn more about the Aurora ASM Dashboard.
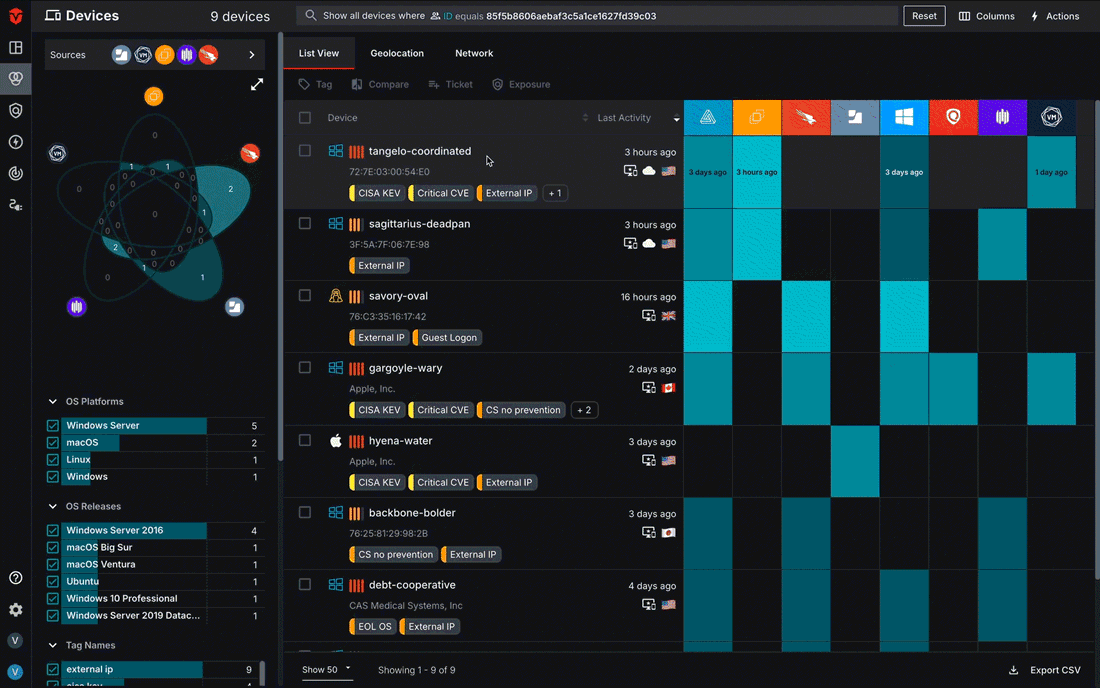
Live Inventory
The Live Inventory page provides an aggregated view of all of your Device and User Assets. This page has several search features that allow you to filter and view information about specific assets including:
- Multiple ways to view your assets, including in a List, by Location, and by Network.
- A Venn Diagram tool for comparing asset coverage between different Source Integration platforms
- Attribute filters
- A robust query builder for complex searches
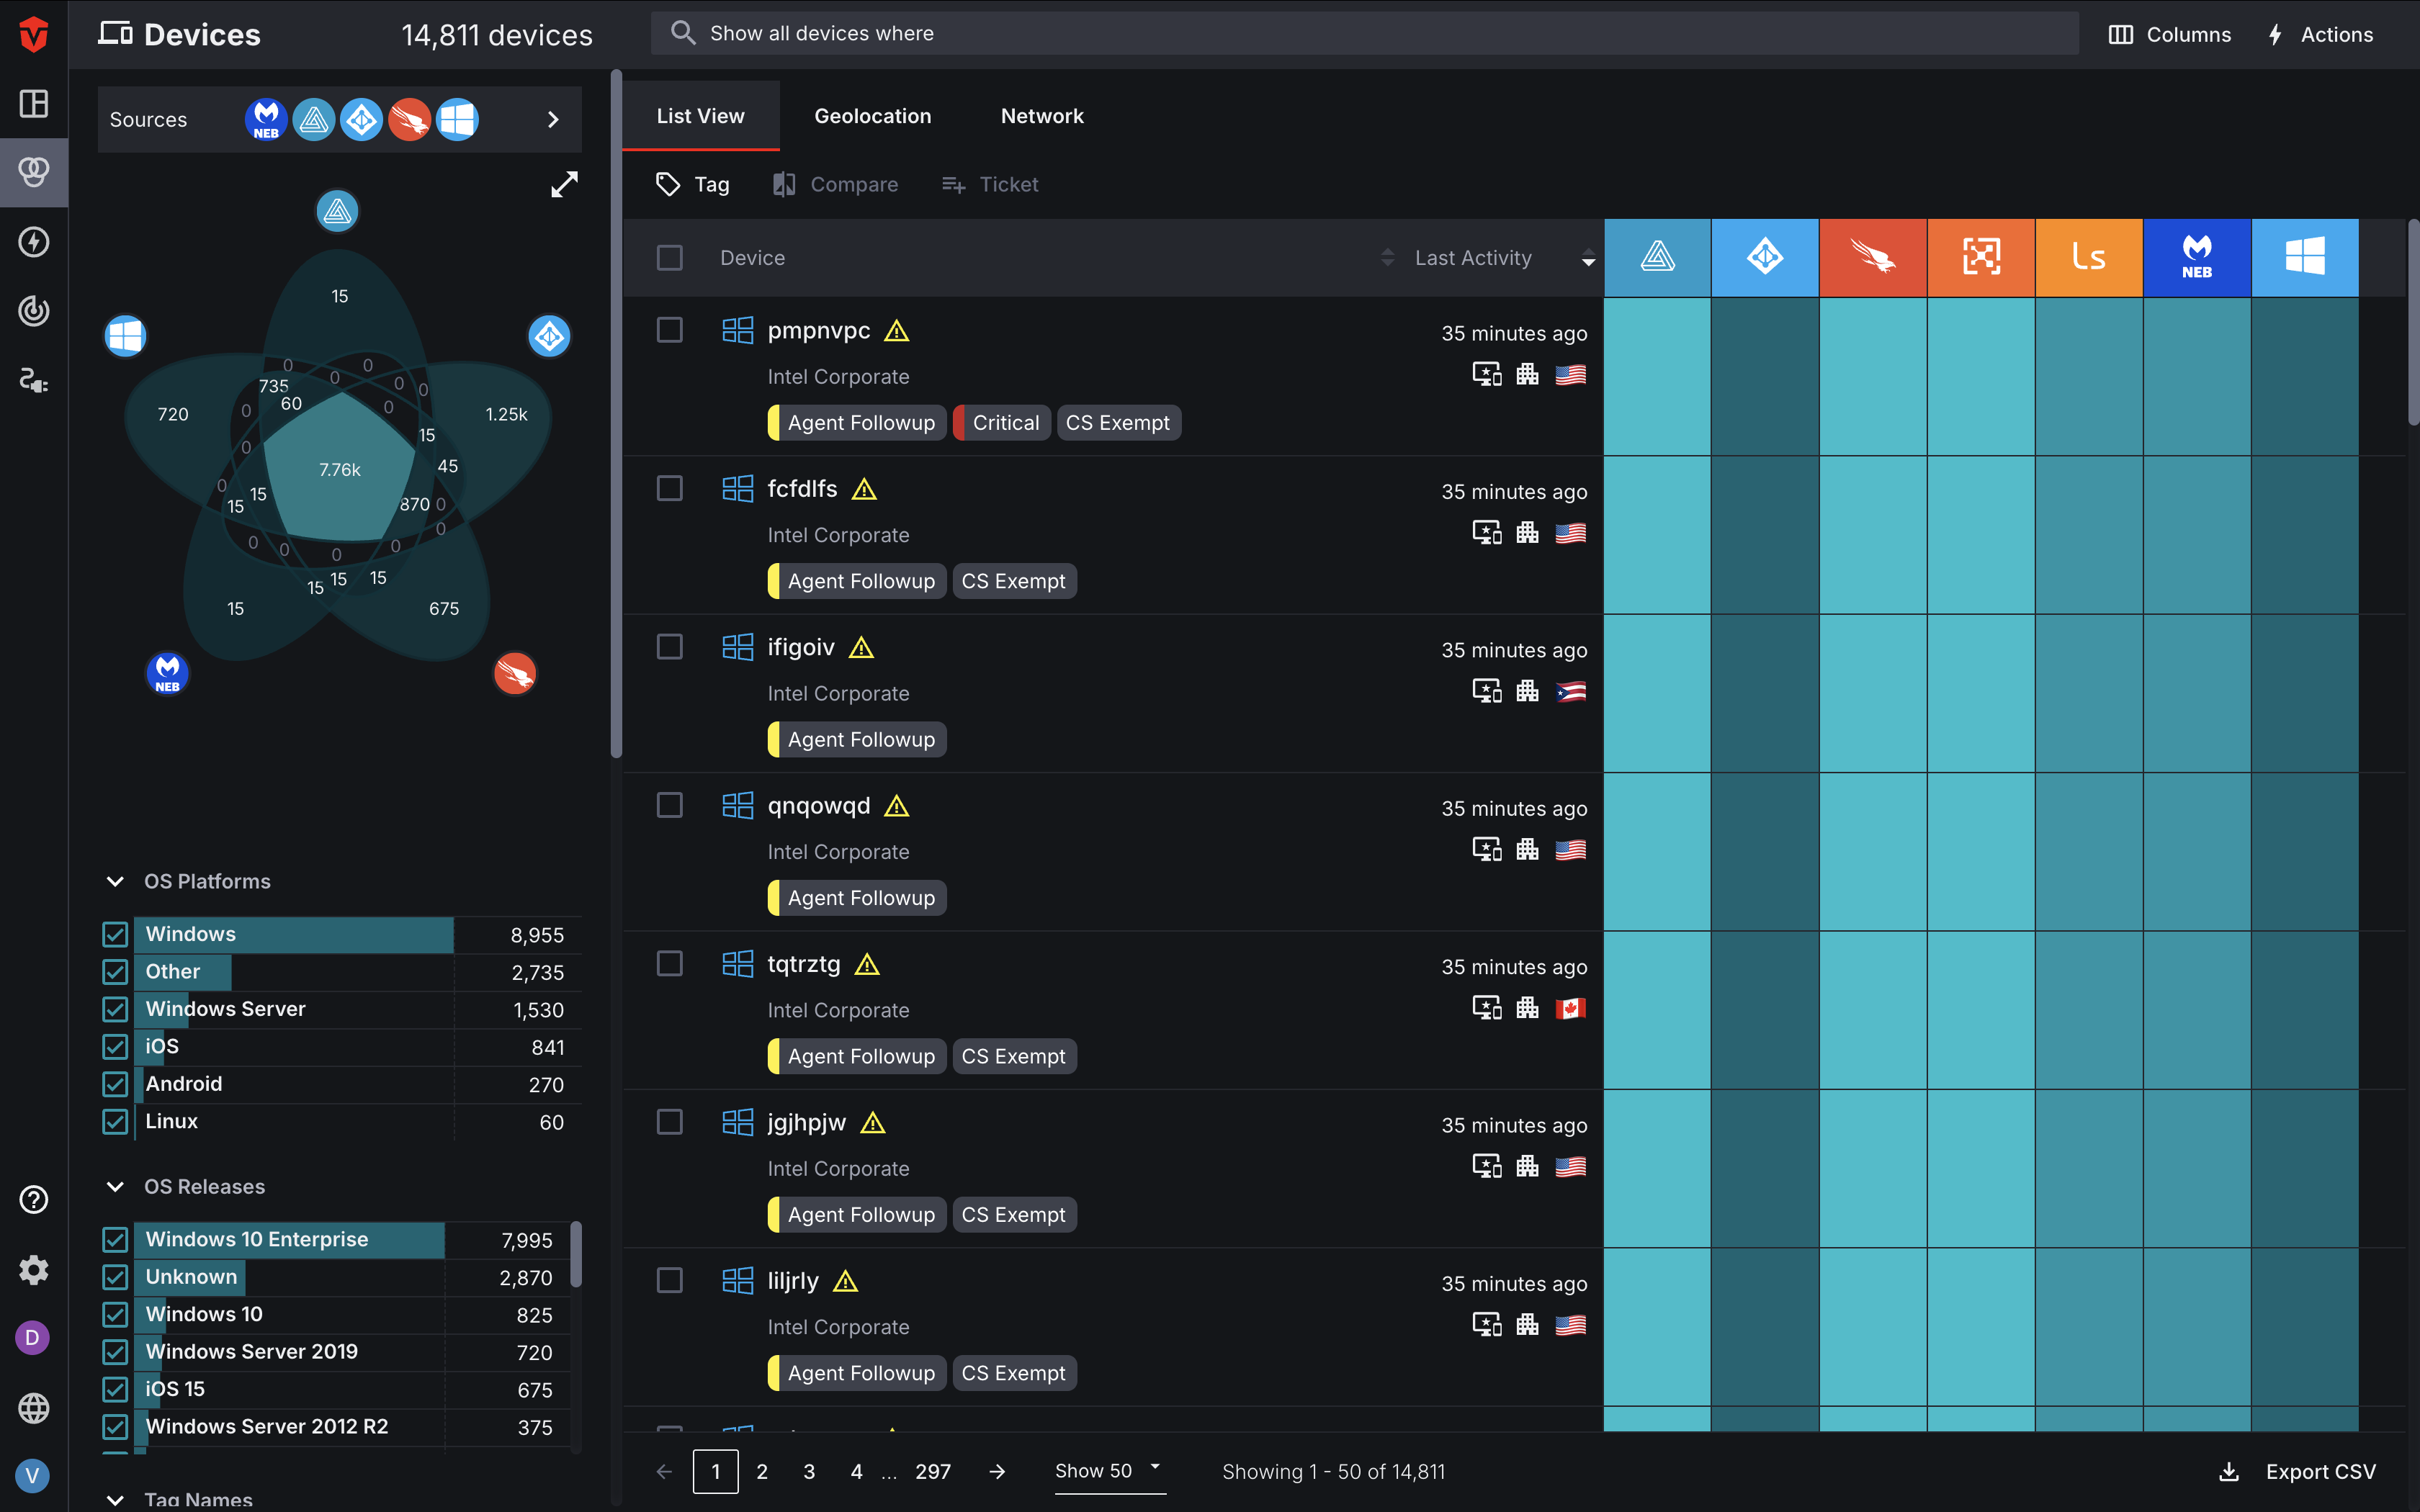
You can access the Live Inventory page by selecting the Live Inventory icon on the Navigation bar and clicking the link for the asset class you would like to view from the dropdown.
Click here to learn more about the Live Inventory page.
Telemetry
While the Live Inventory page provides a snapshot of the current state of your assets, the Telemetry page tracks assets at the event level and shows how their attributes have changed in the time leading up to that point.
- On the left side of the page, you will find several filters that can be used to search for specific telemetry events by Source, Attribute, and Event Type.
- The right side of the page contains a responsive Event History that provides a visual representation of your events overtime.
- Like the Live Inventory page, the Telemetry page also features a query builder that can be used to run complex searches.
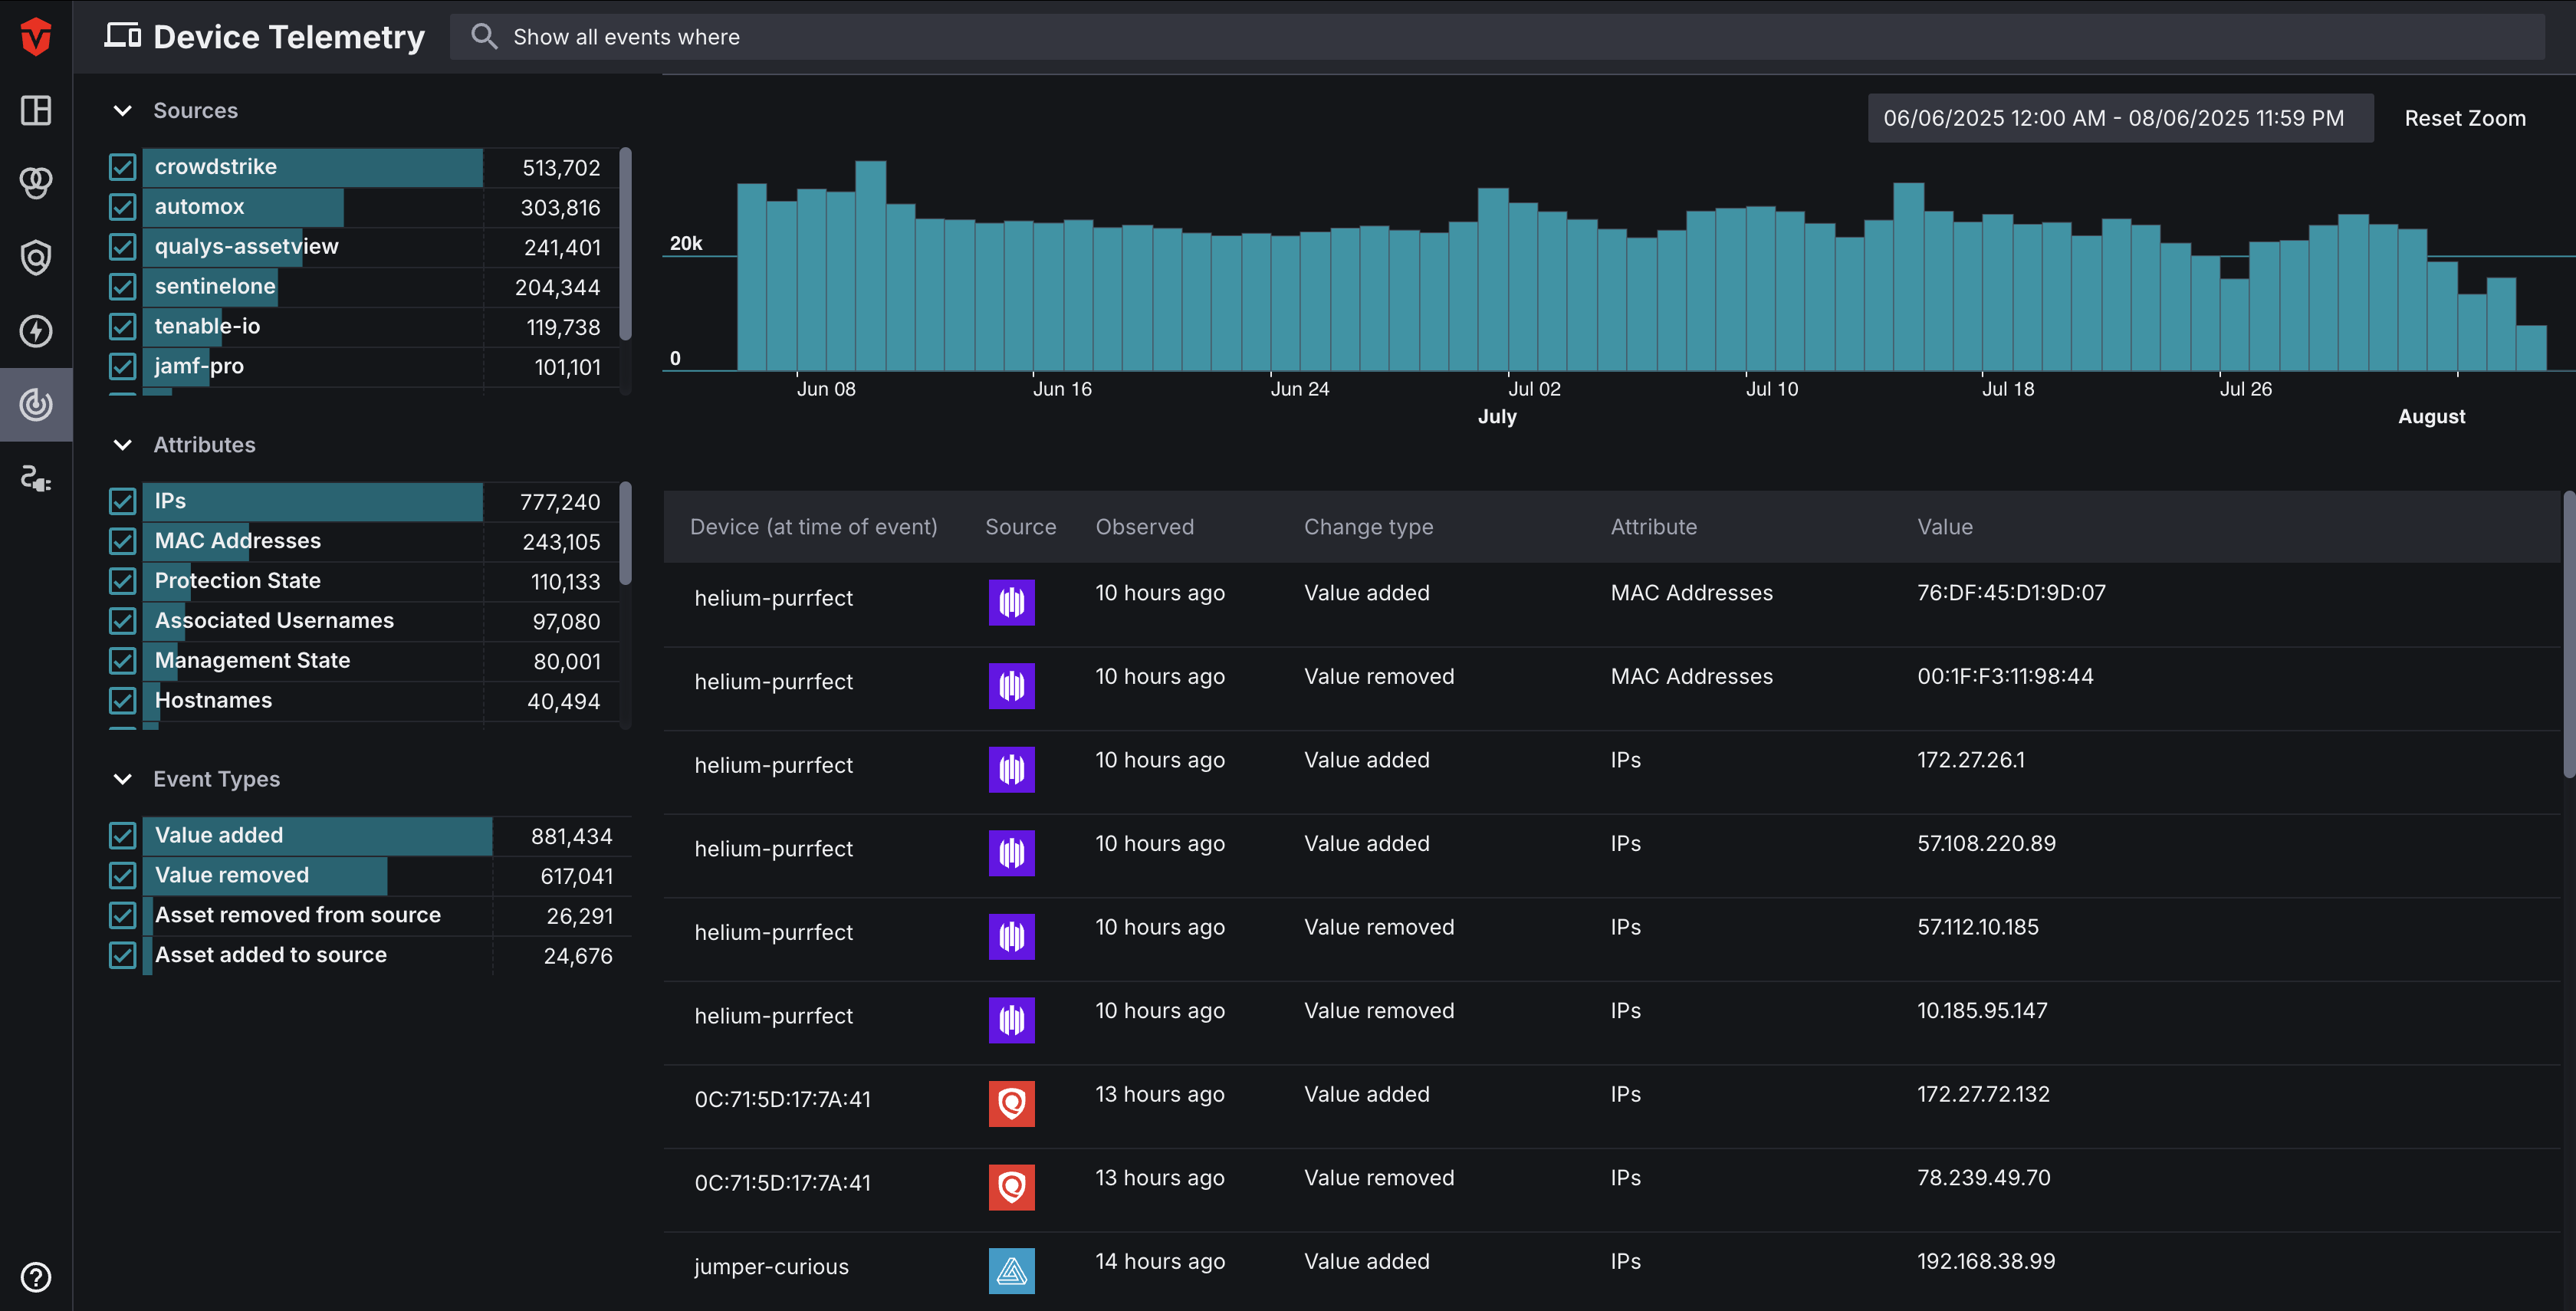
Click here to learn more about the Telemetry page.
Asset Details
In addition to the information found on the Live Inventory page, you can also view additional information about specific assets on their Details page.
Asset Details page can be accessed by identifying the asset you would like to view in the Asset List on the Live Inventory page, opening its dropdown, and selecting the See Details link.
Click here to learn more about the Asset Details page.
Source Inventory
Source Inventory pages are integration-specific and only display asset data from a single Source integration-type. Source Inventory pages can be used to search for an monitor assets associated with a Source. Additionally, you can also review information about a Source's configuration health (Status) and reconfigure it as-needed.
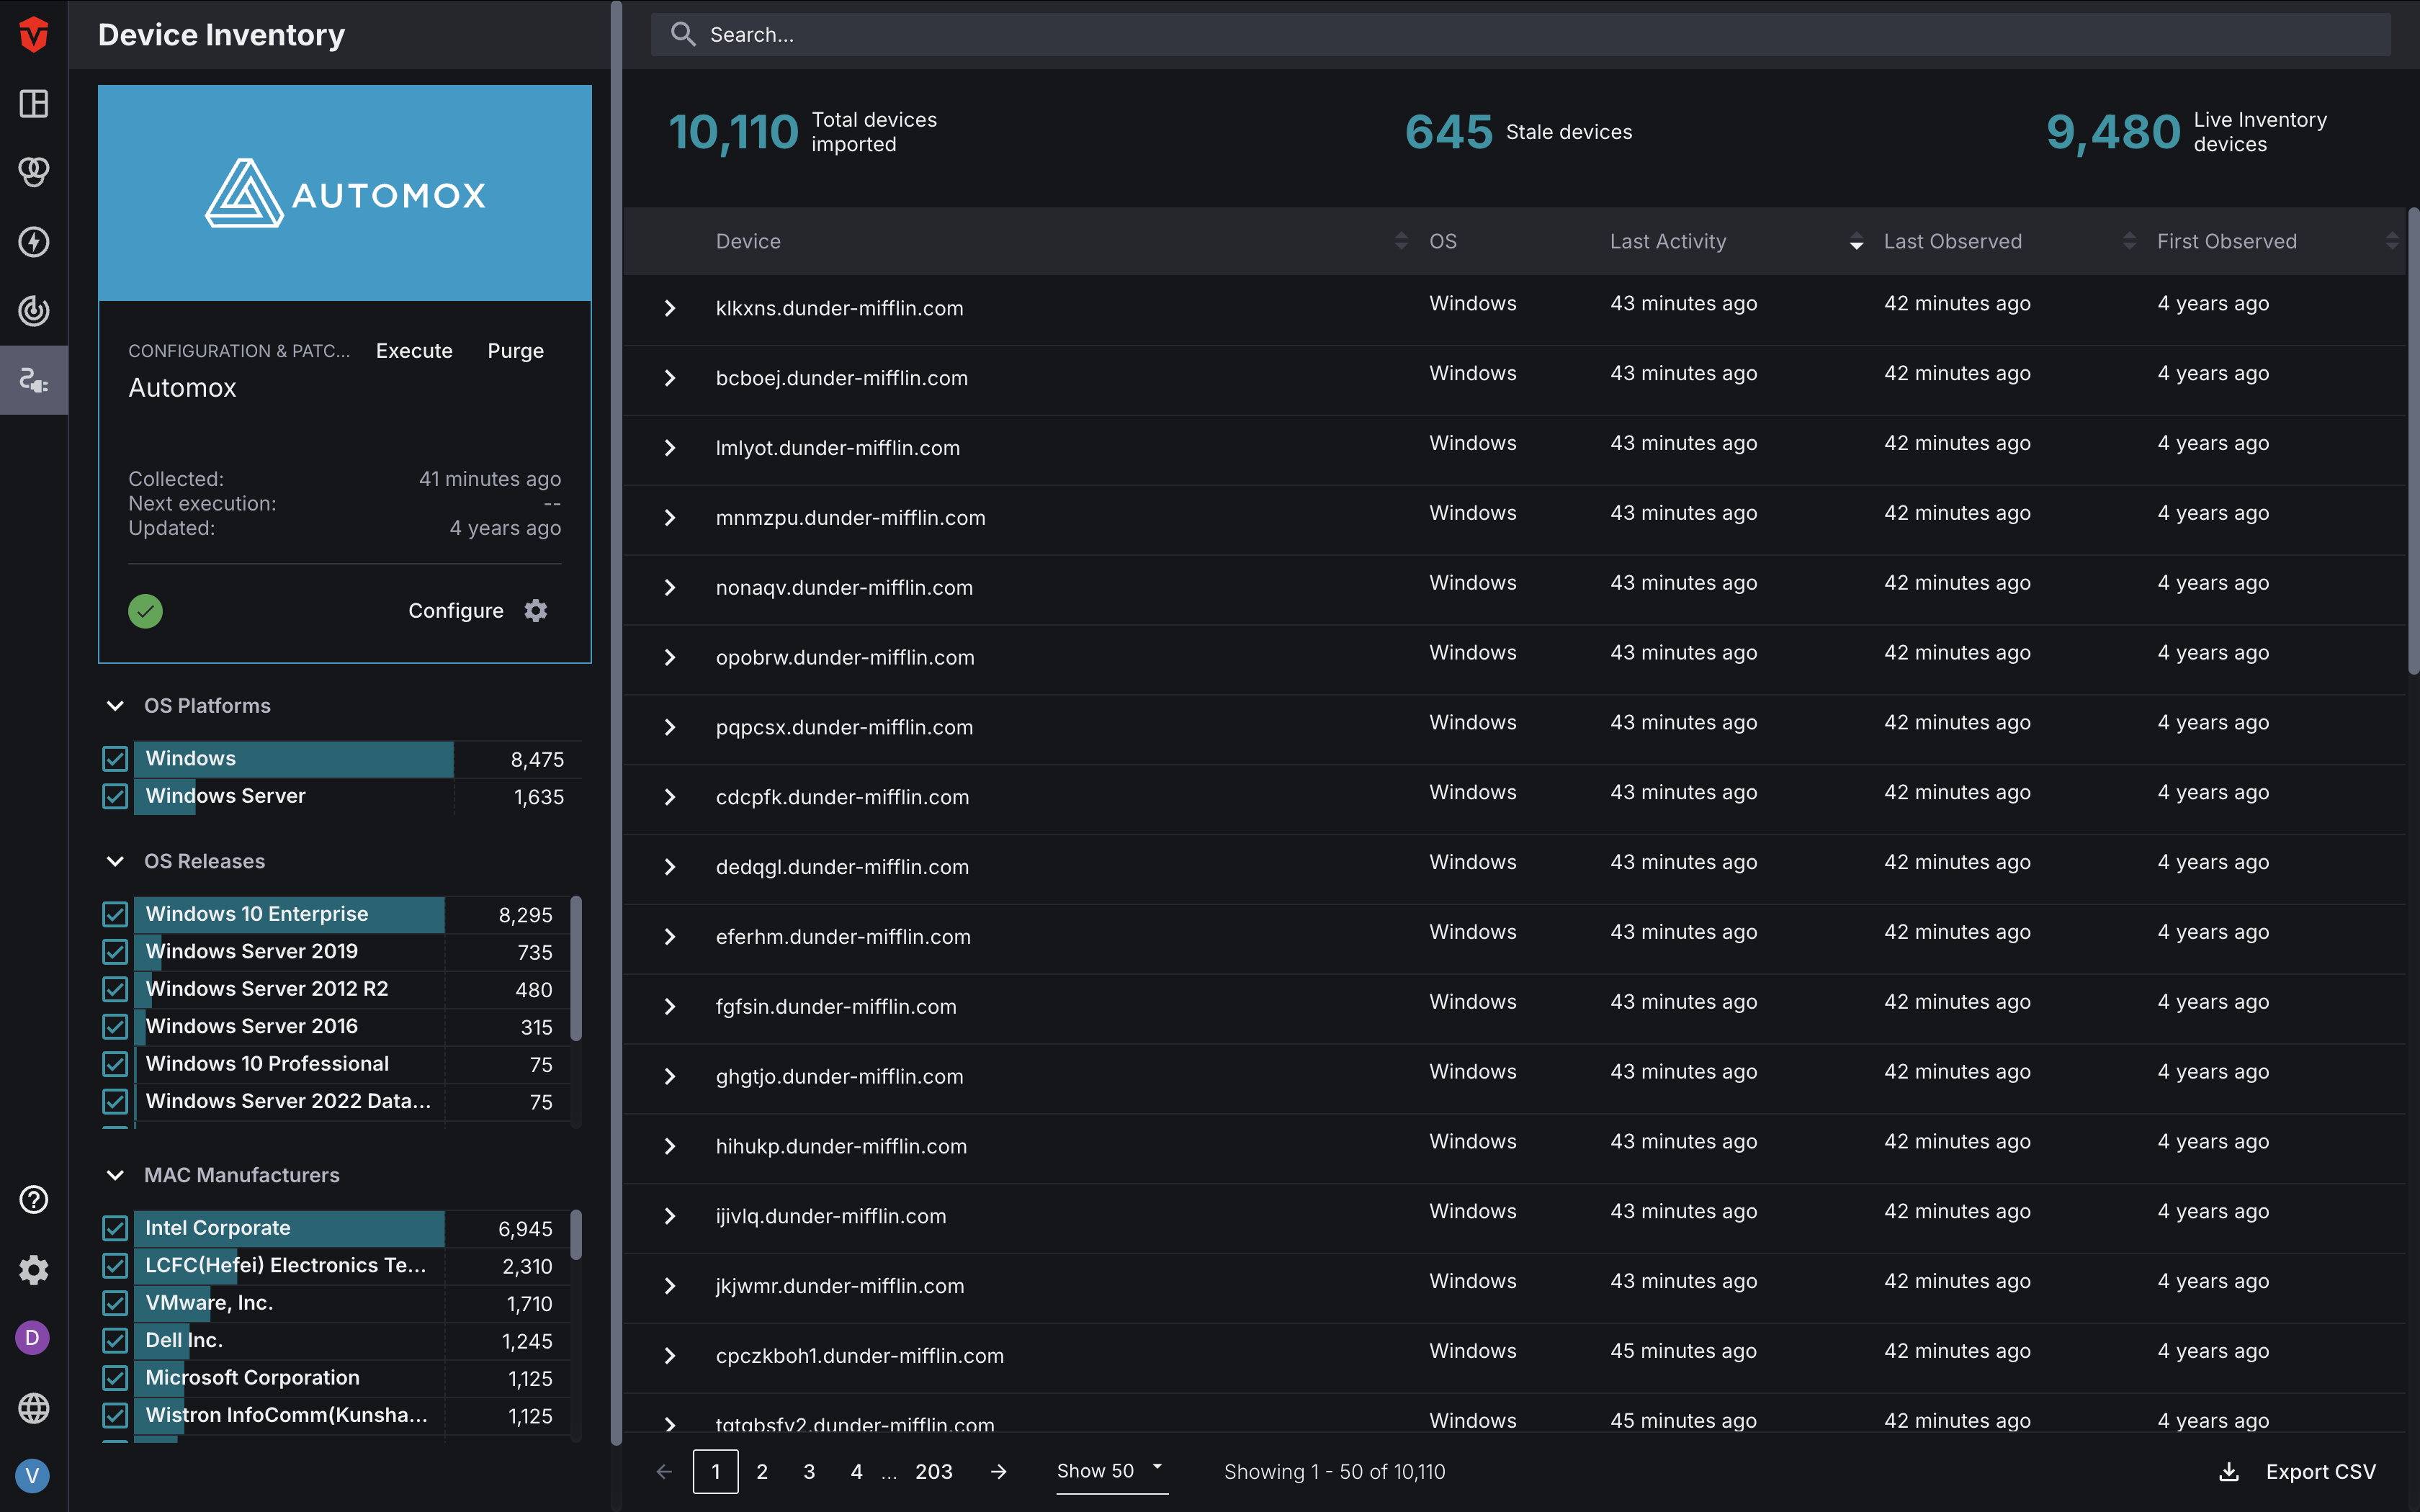
To access an Source Inventory page, select the Source Inventory icon on the Navigation bar then select the Integration you would like to view information about from the dropdown.
Make sure to pay attention to the Devices, Users, and Software tabs at the top of the Source Inventory dropdown, as Integrations are separated by asset type.
Click here to learn more about the Source Inventory page.
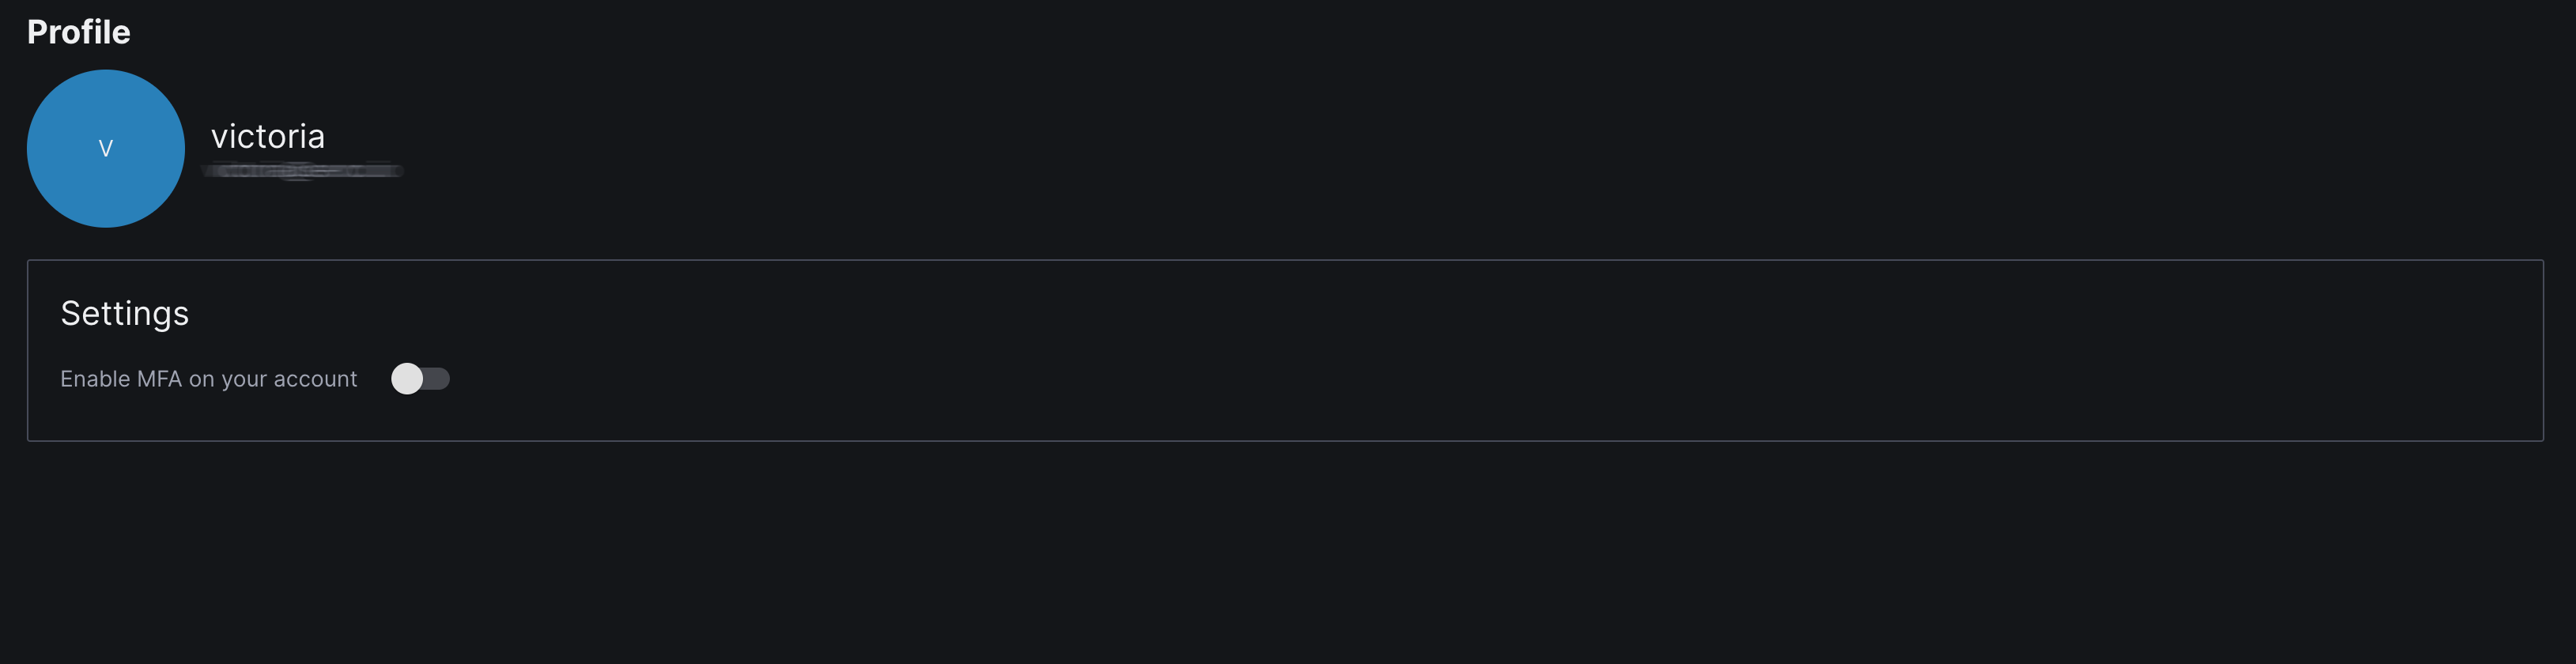
Profile
The Profile menu contains links to pages where you can manage your MFA settings, API Keys, and CSV Exports. These pages can be accessed from the Profile menu on the Navigation Bar.
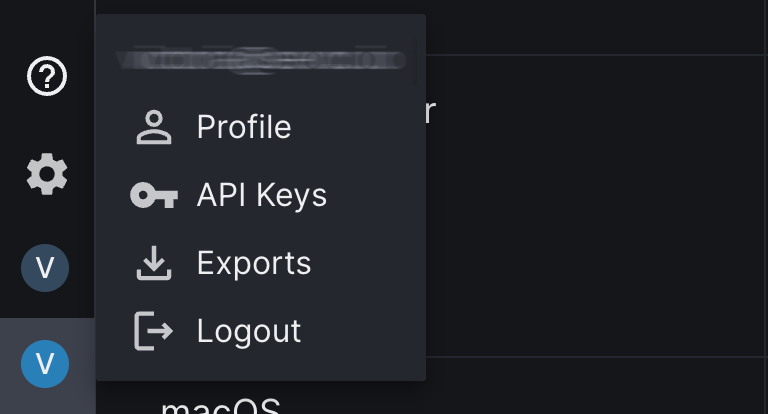
Profile
The Profile page can be used to manage MFA settings for your profile such as enabling and disabling the requirement and resetting your MFA token.
API Key
The API Key page is where you can generate and manage your API Keys.

Exports
The Exports page allows you to view a list of any exports you have made in the last seven days. You can also also perform actions on these exports such as:
- Redownloading CSV exports (
 )
) - Canceling exports while they are in progress (
 )
) - Rerunning queries related to exports (
 )
)
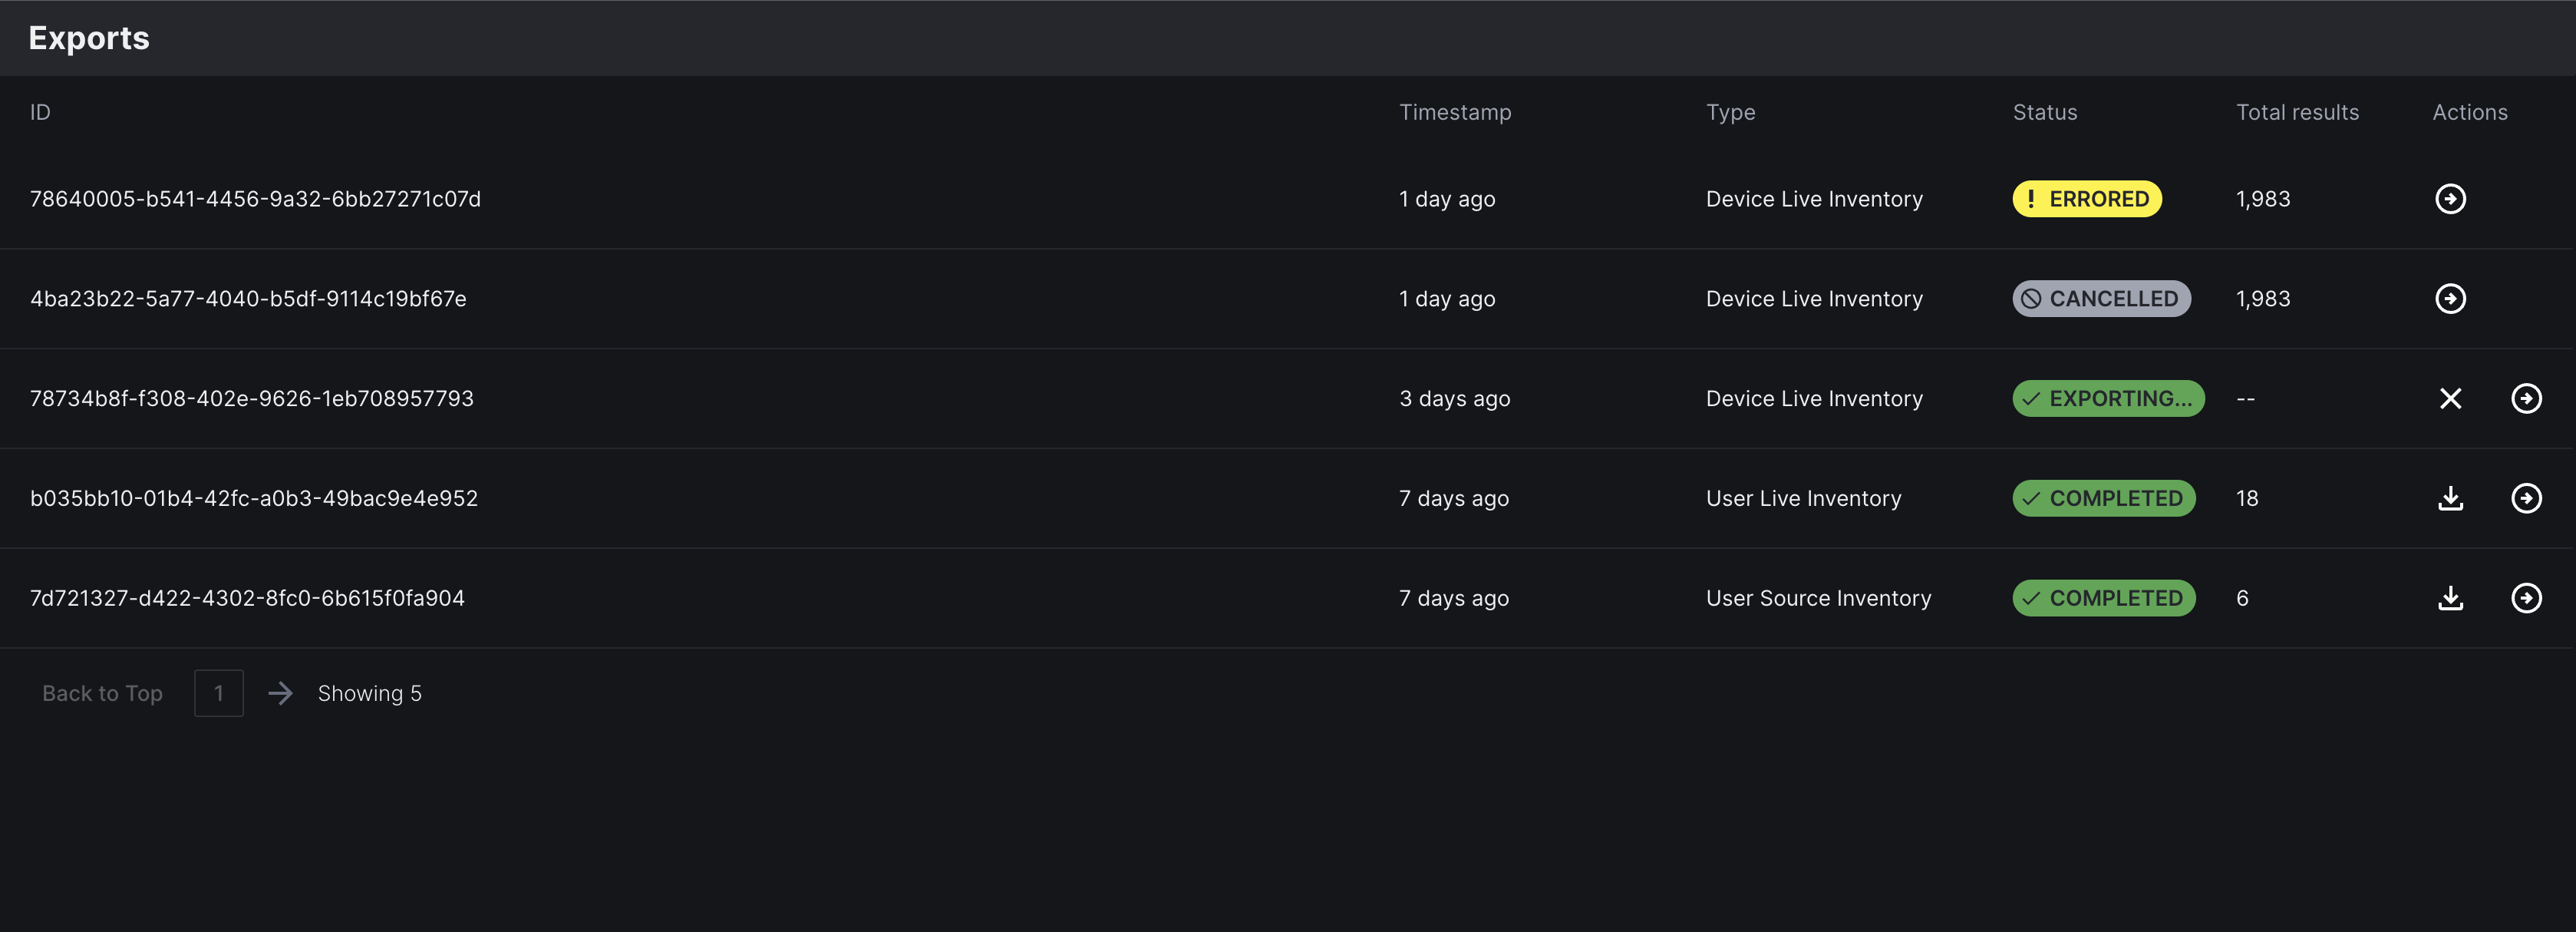
Additionally, you may also wish to use this page to check the status of any exports you have initiated.
Exports can be in the following statuses:
| Status | Definition |
|---|---|
 Completed | The export has been successfully completed. |
 Exporting | Exporting is currently in progress. |
 Errored | An error occurred during export. |
 Cancelled | The export has been cancelled. |
Admin
Pages covered in this section are only accessible to users with Admin accounts. If your account is Read Only, you will need to contact an Admin to view them.
Integrations
The Integrations page can be accessed by selecting the Admin icon ( ) on the Navigation bar and clicking the Integrations link from the dropdown.
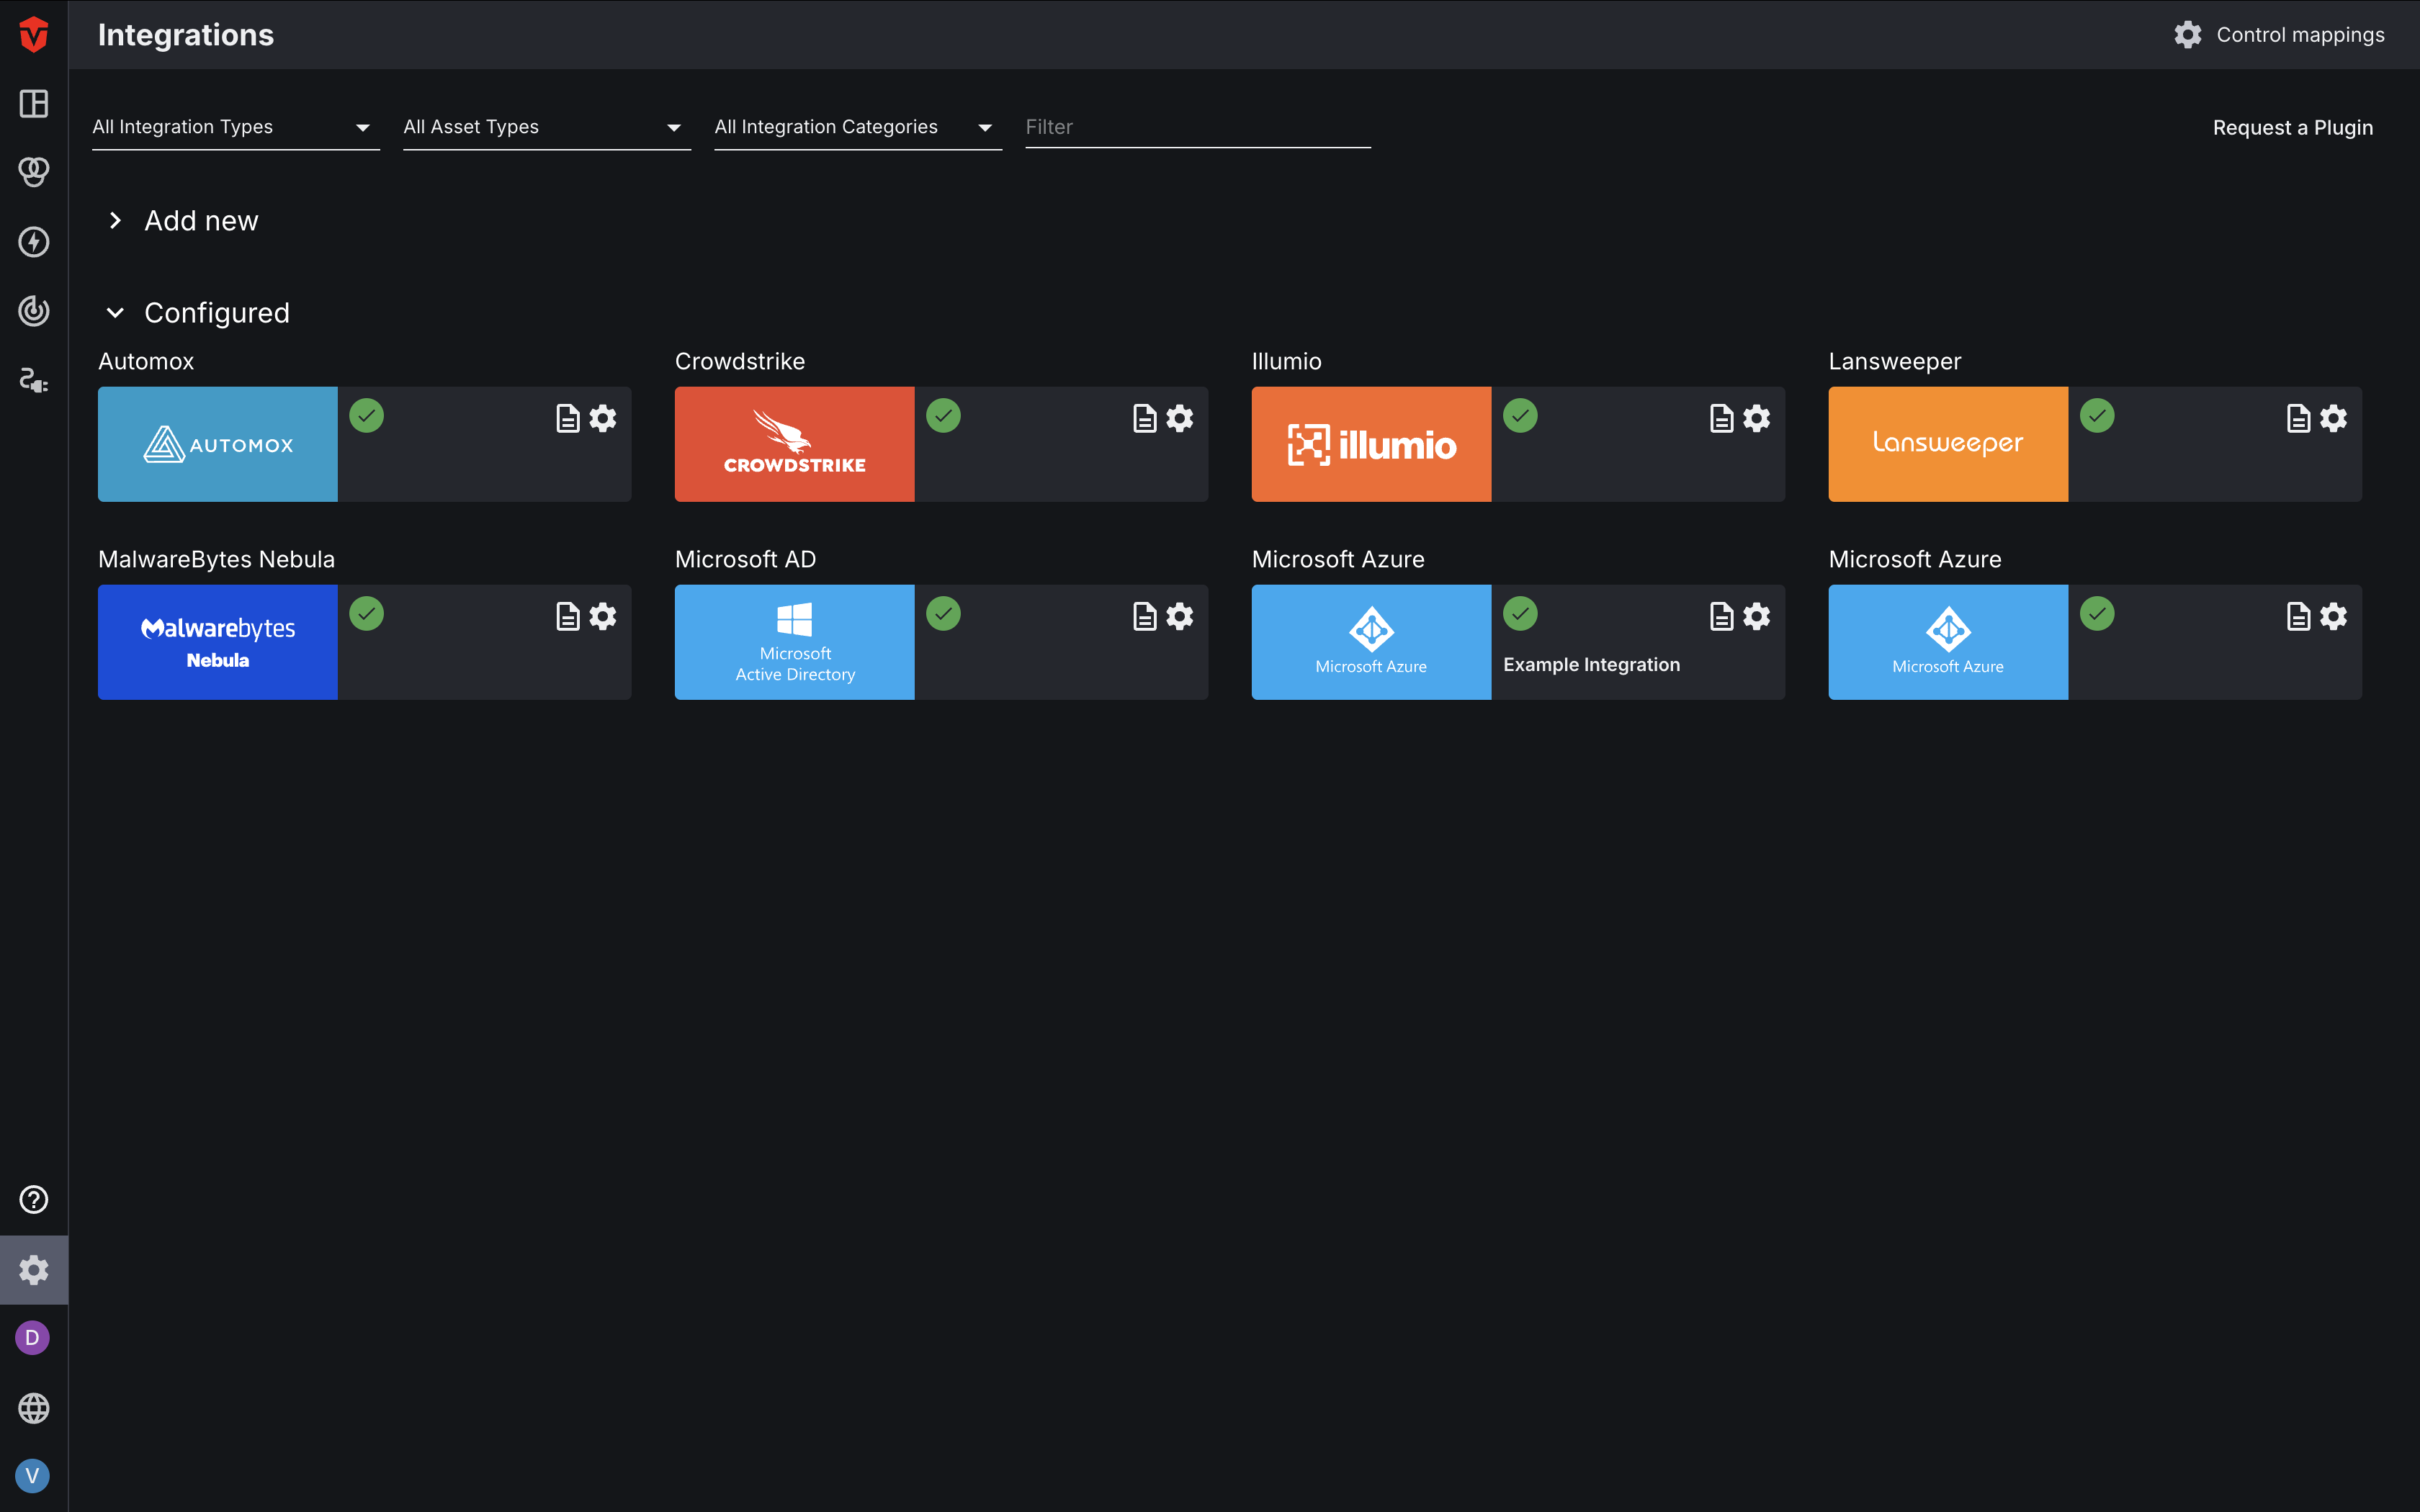
Once you are on the Integrations page, you can access a list of all Integrations currently supported by the Aurora ASM platform by selecting the Add new button at the top-left corner of the page.
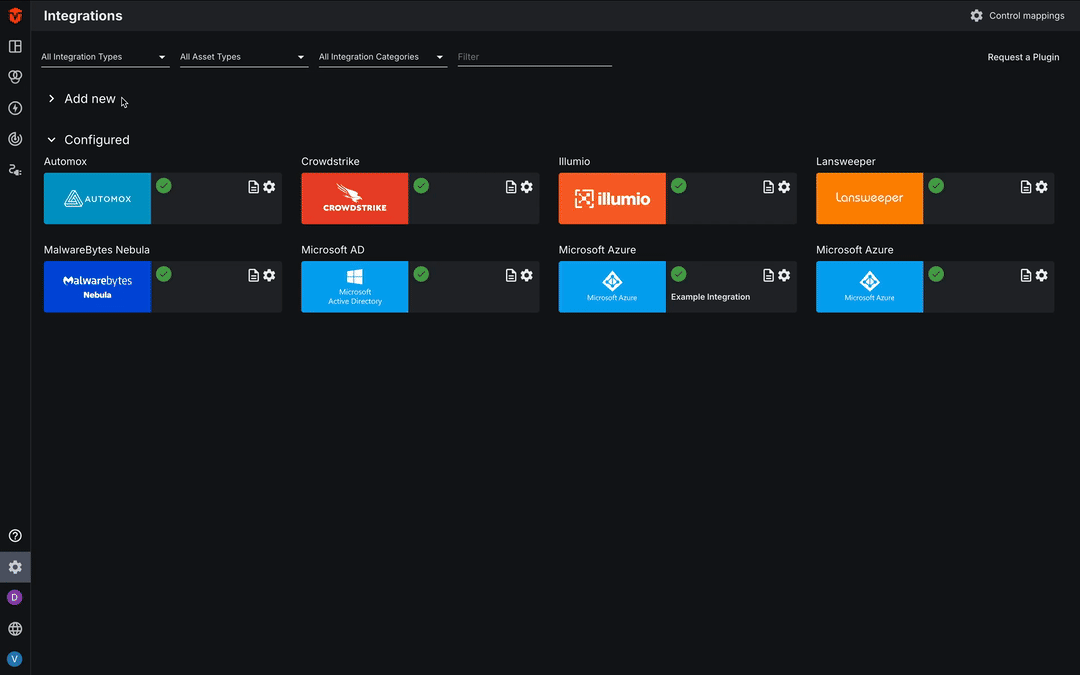
This is also where you can monitor the health of the Integrations you've already configured.
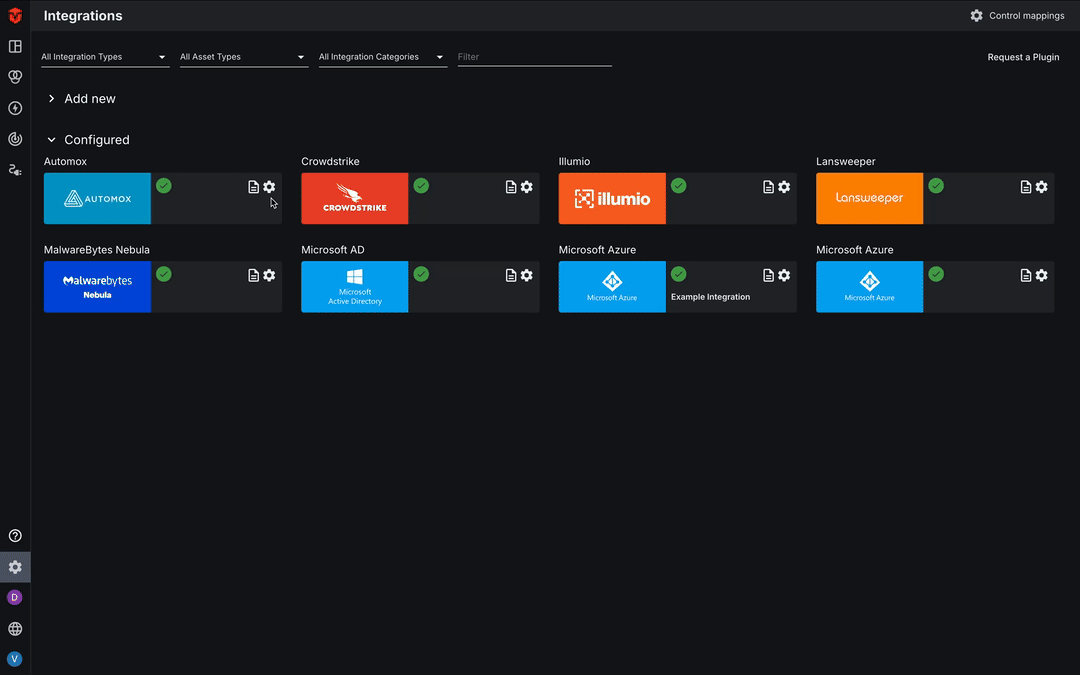
Click here to learn more about this page.
Members
The Members page is used to manage User (Member) accounts in your Organization. Here you can view and make changes to the existing accounts as well as invite new users to join your Organization. This page can be accessed by clicking the Admin icon () on the Navigation bar then select the Members link from the dropdown menu.
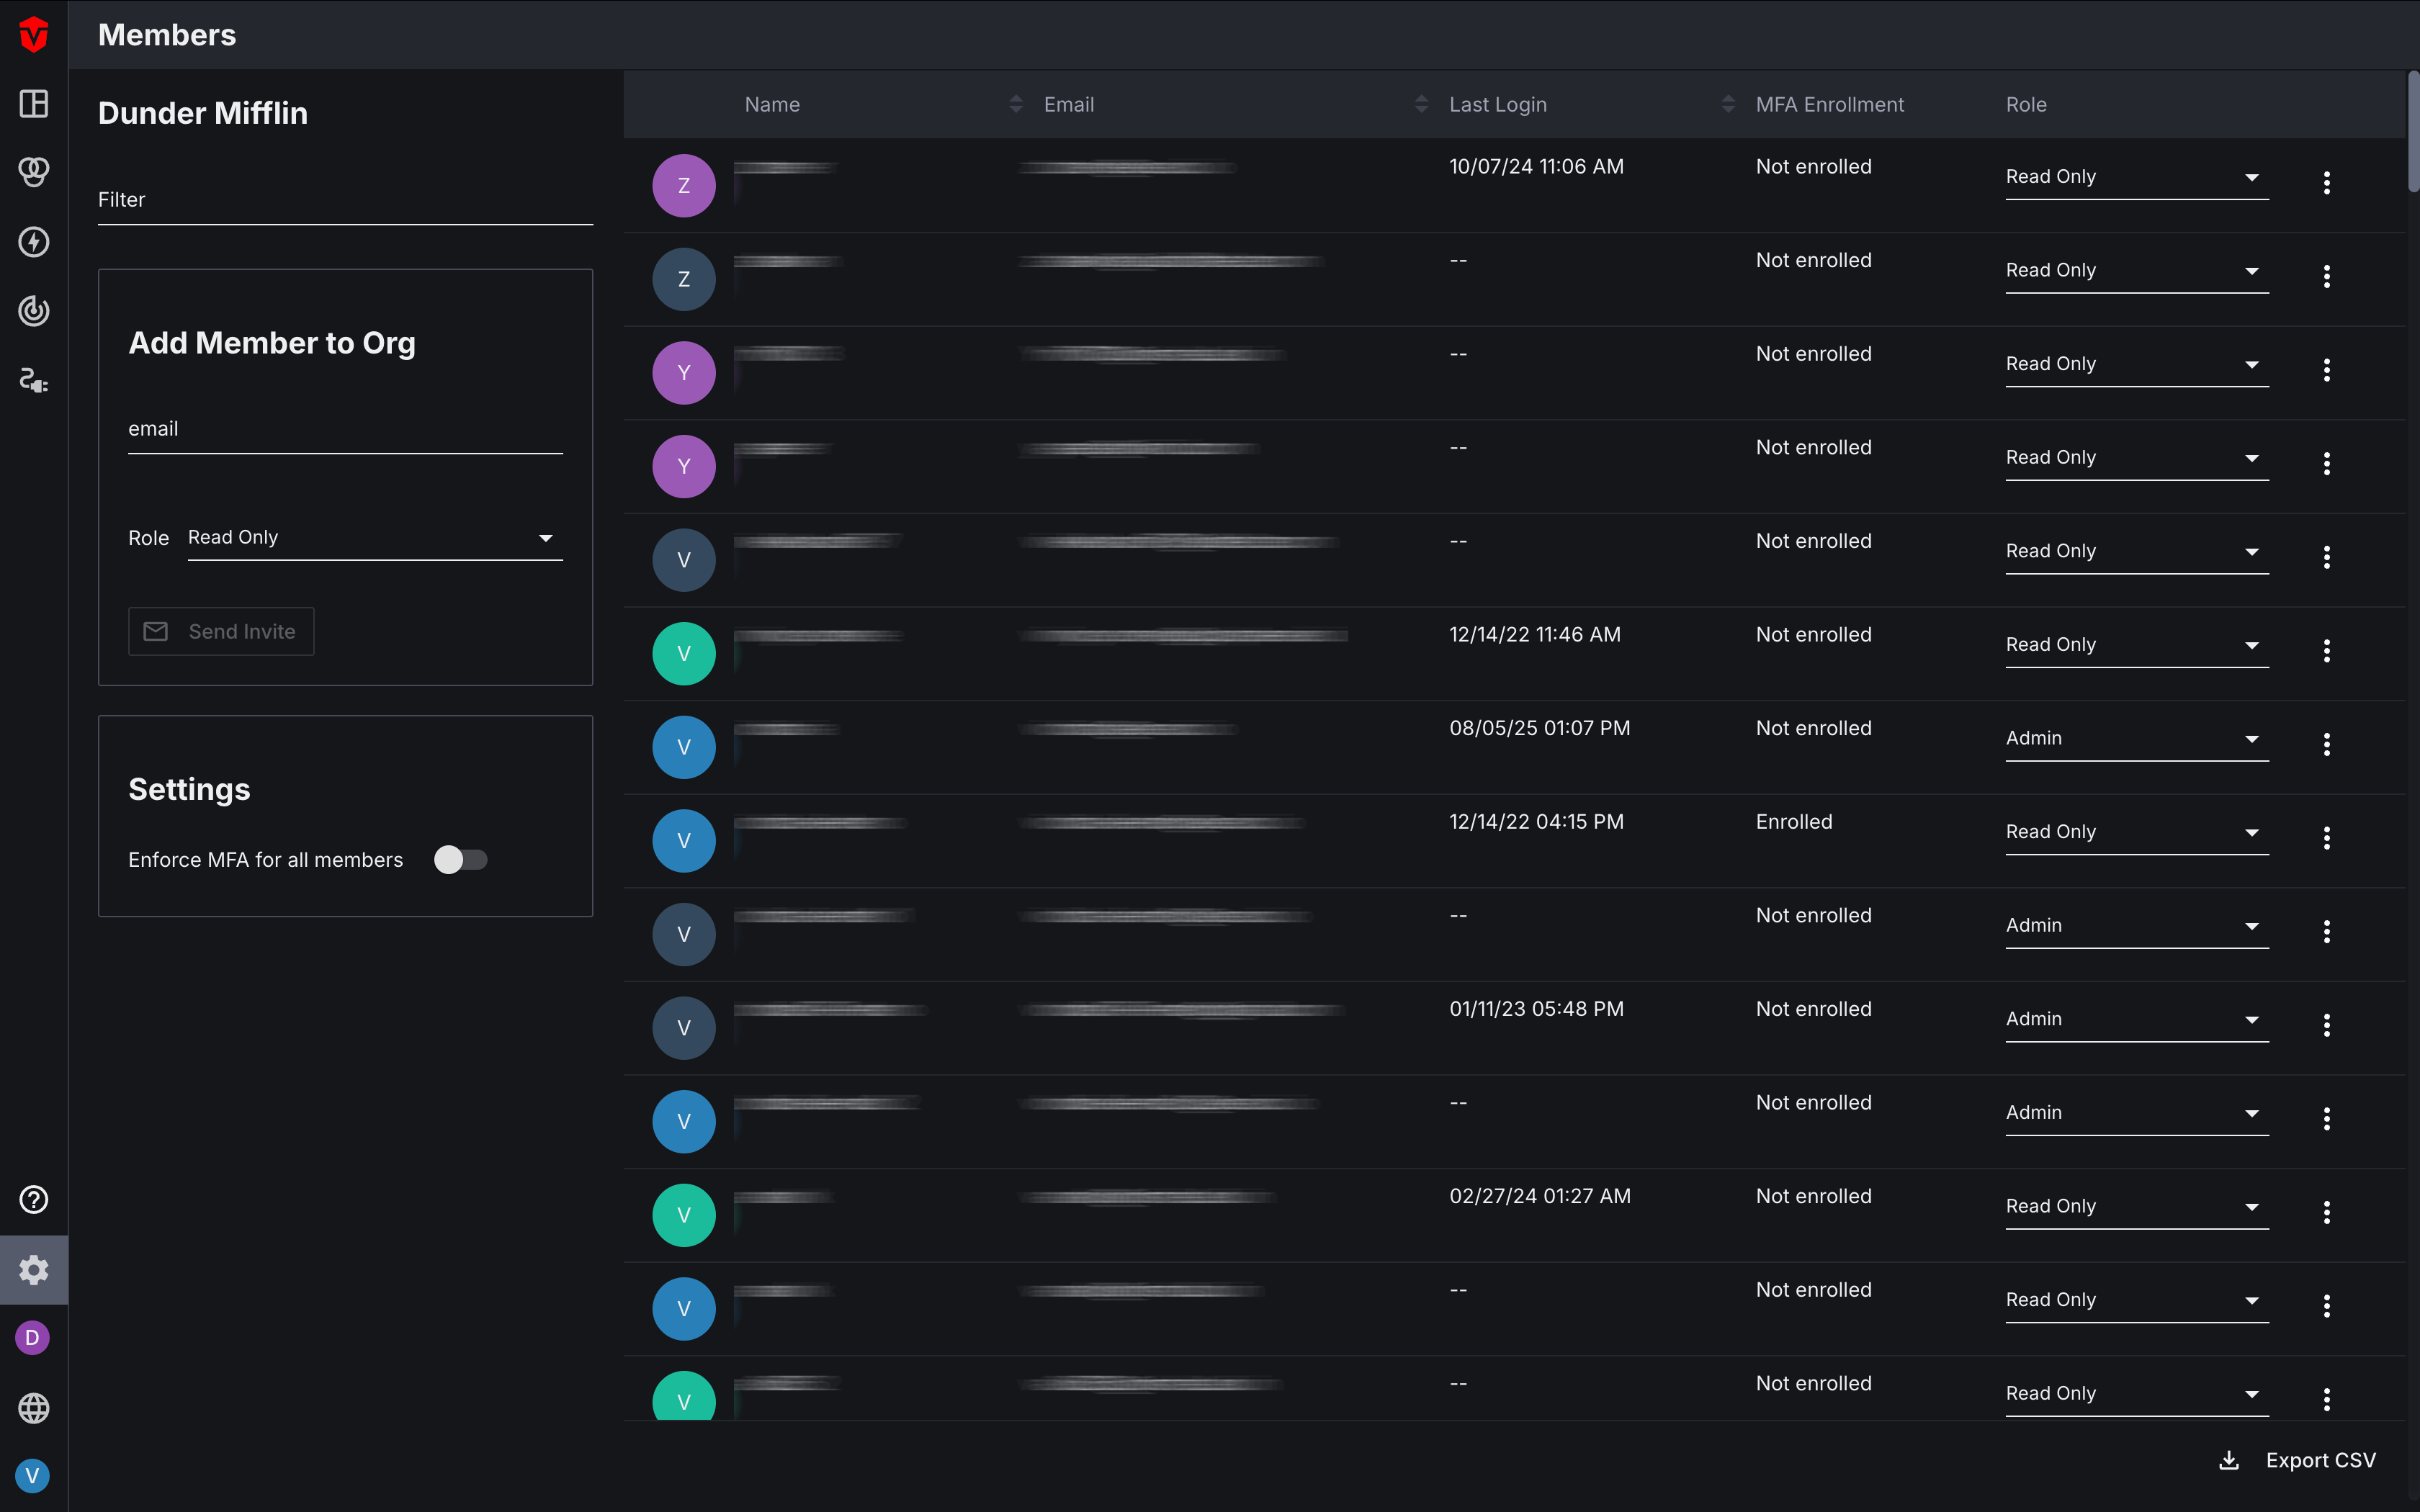
Click here to learn more about this page.
Runners
The Runners page is where you can install and monitor the Runners needed for the Aurora ASM platform to communicate with and retrieve data from on-premise Integrations. This page can be accessed by clicking the Admin icon () on the Navigation bar then select the Runners link from the dropdown menu.
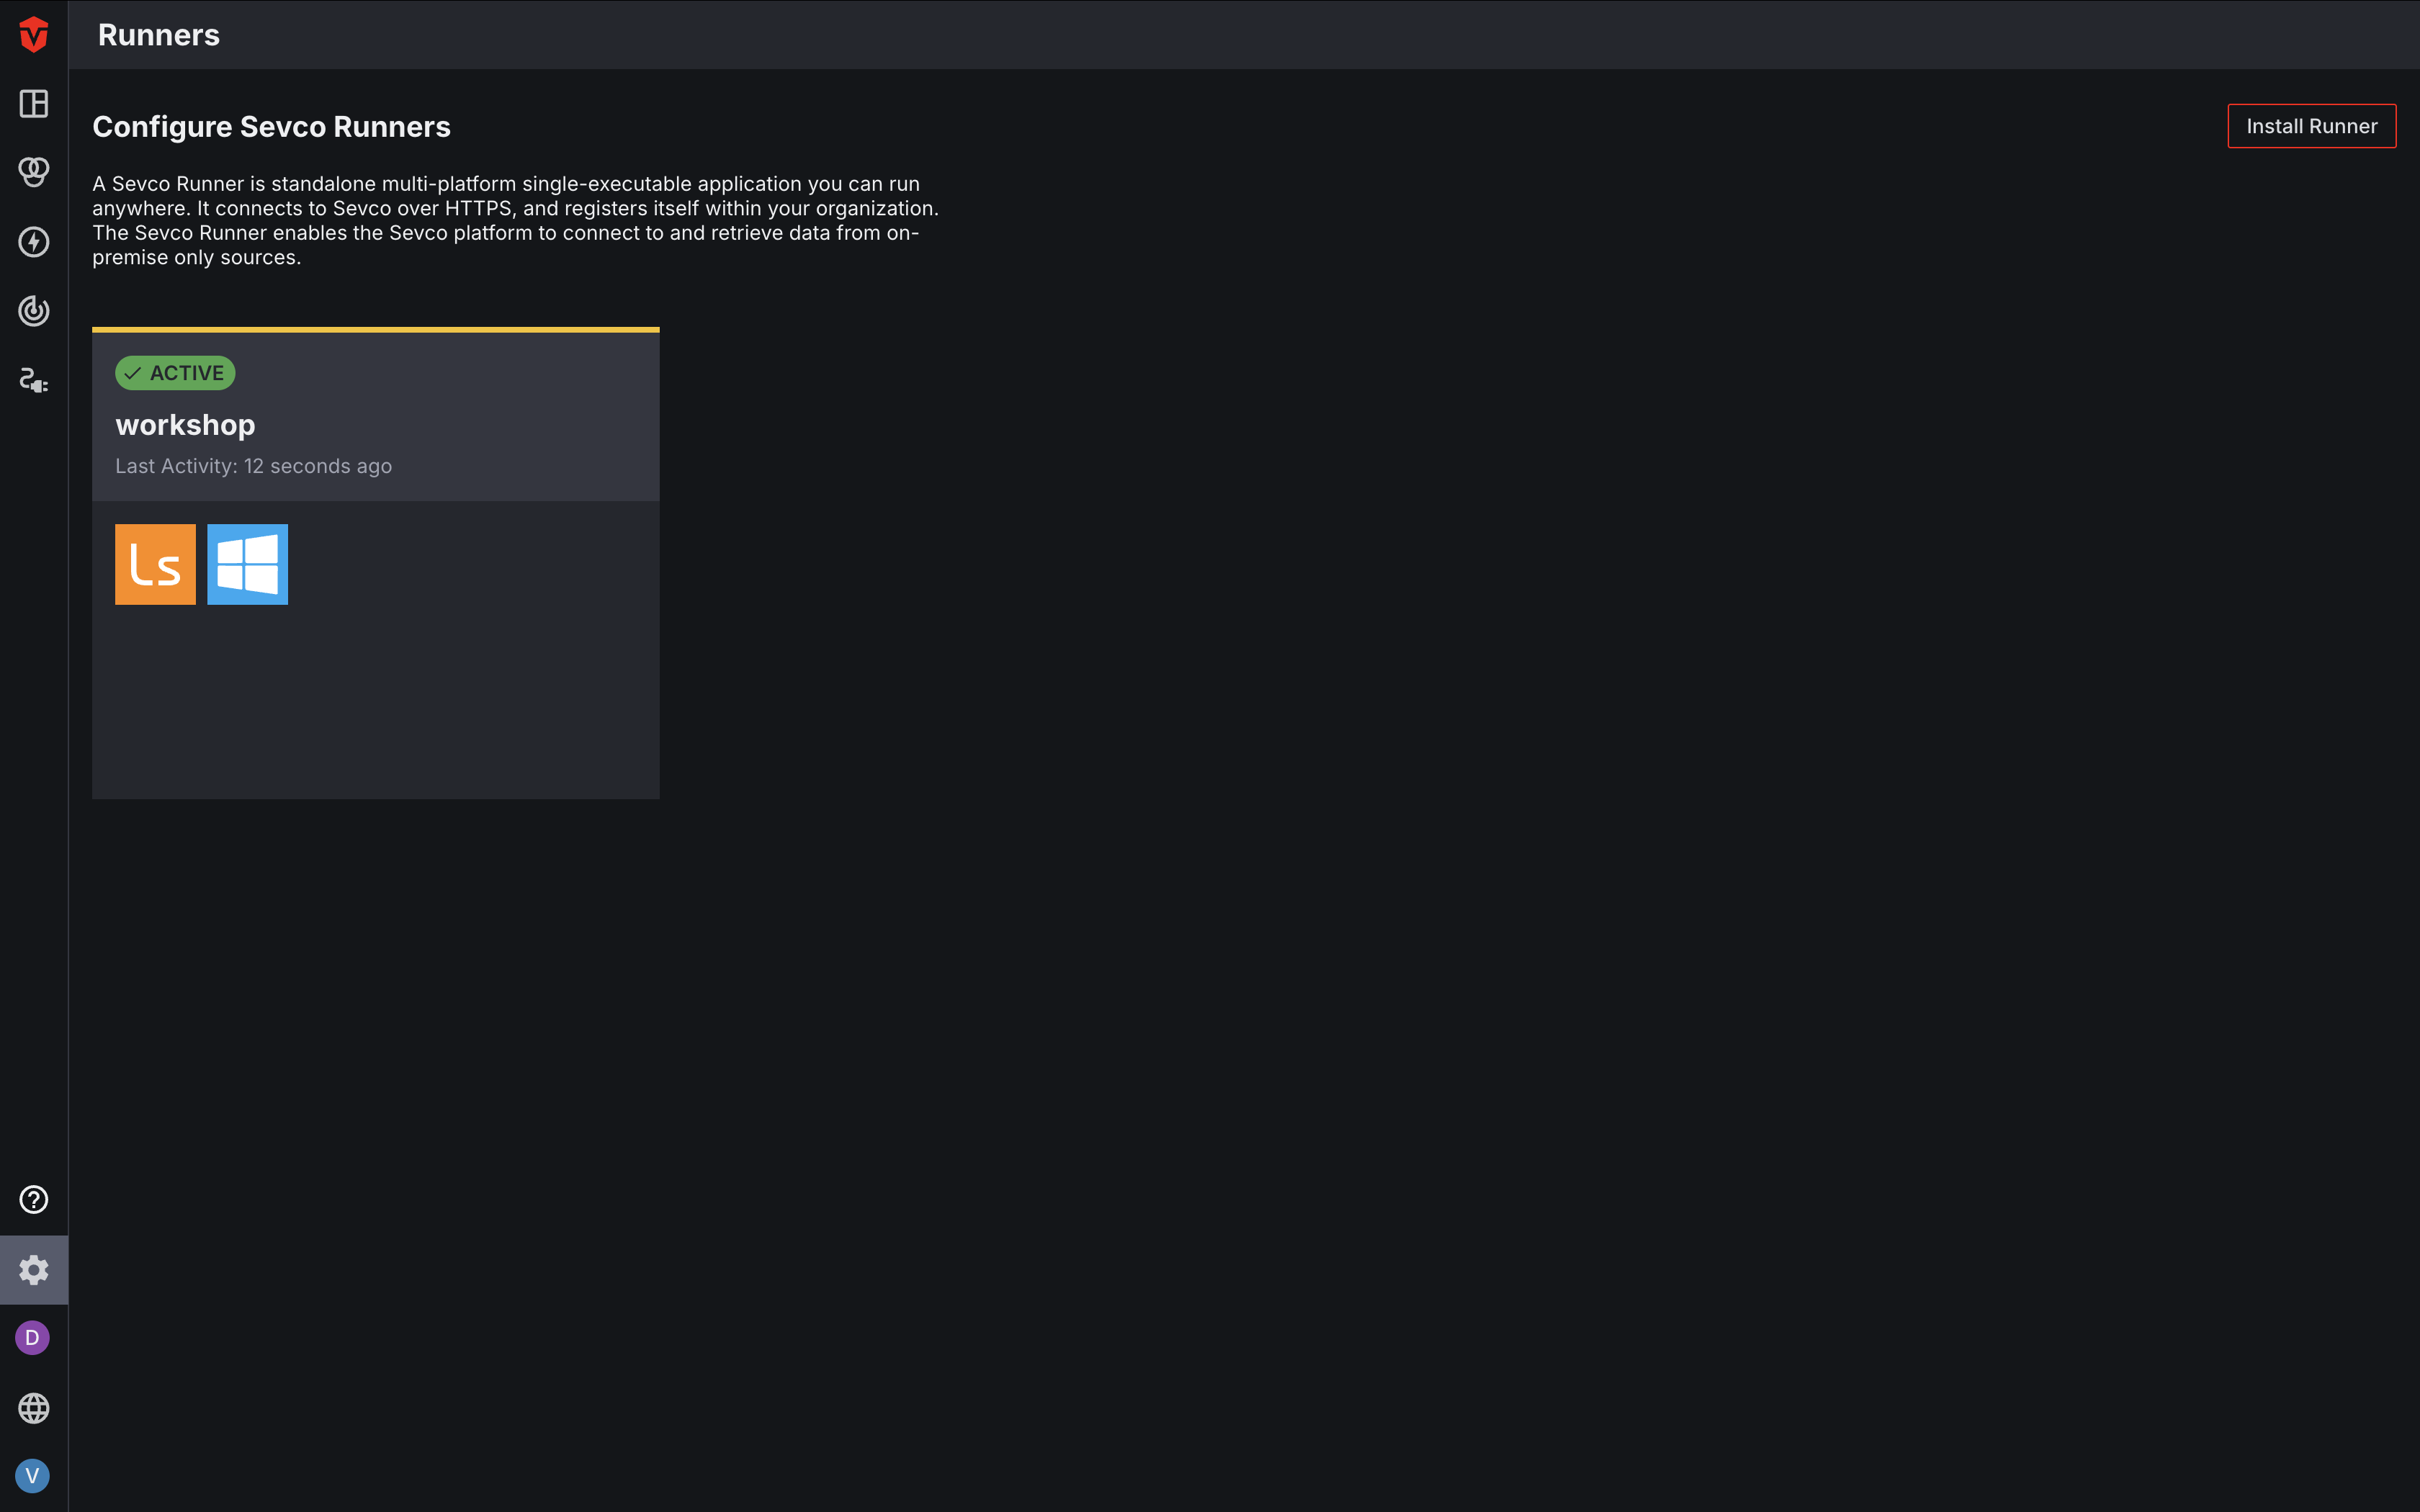
Click here to learn more about this page.
Tags
While a tag can be removed from an asset or query action, you will need to delete the tag in the Tags page to completely remove it from your environment.
The Tags page is where you can create and manage Tags that can be applied to assets on the Live Inventory and Asset Details pages in Aurora ASM. Likewise, any tags created and assigned to an asset from the two pages will automatically appear on the Tags page.
This page can be accessed by clicking the Admin icon () on the Navigation bar then select the Tags link from the dropdown menu.

Click here to learn more about tagging.
Tenants
The Tenant Management page is only available for service partners who manage multiple Aurora ASM Organizations.
The Tenant Management page allows service partners to keep track of multiple Organizations or "Tenants" using a single account. You can use this page to create new Organizations or manage existing one. Additionally, this is where you can add new members to your tenant-management team and assign roles and permissions.
The Tenants page can be accessed by selecting the Tenant Management icon ( ) on the Navigation bar.
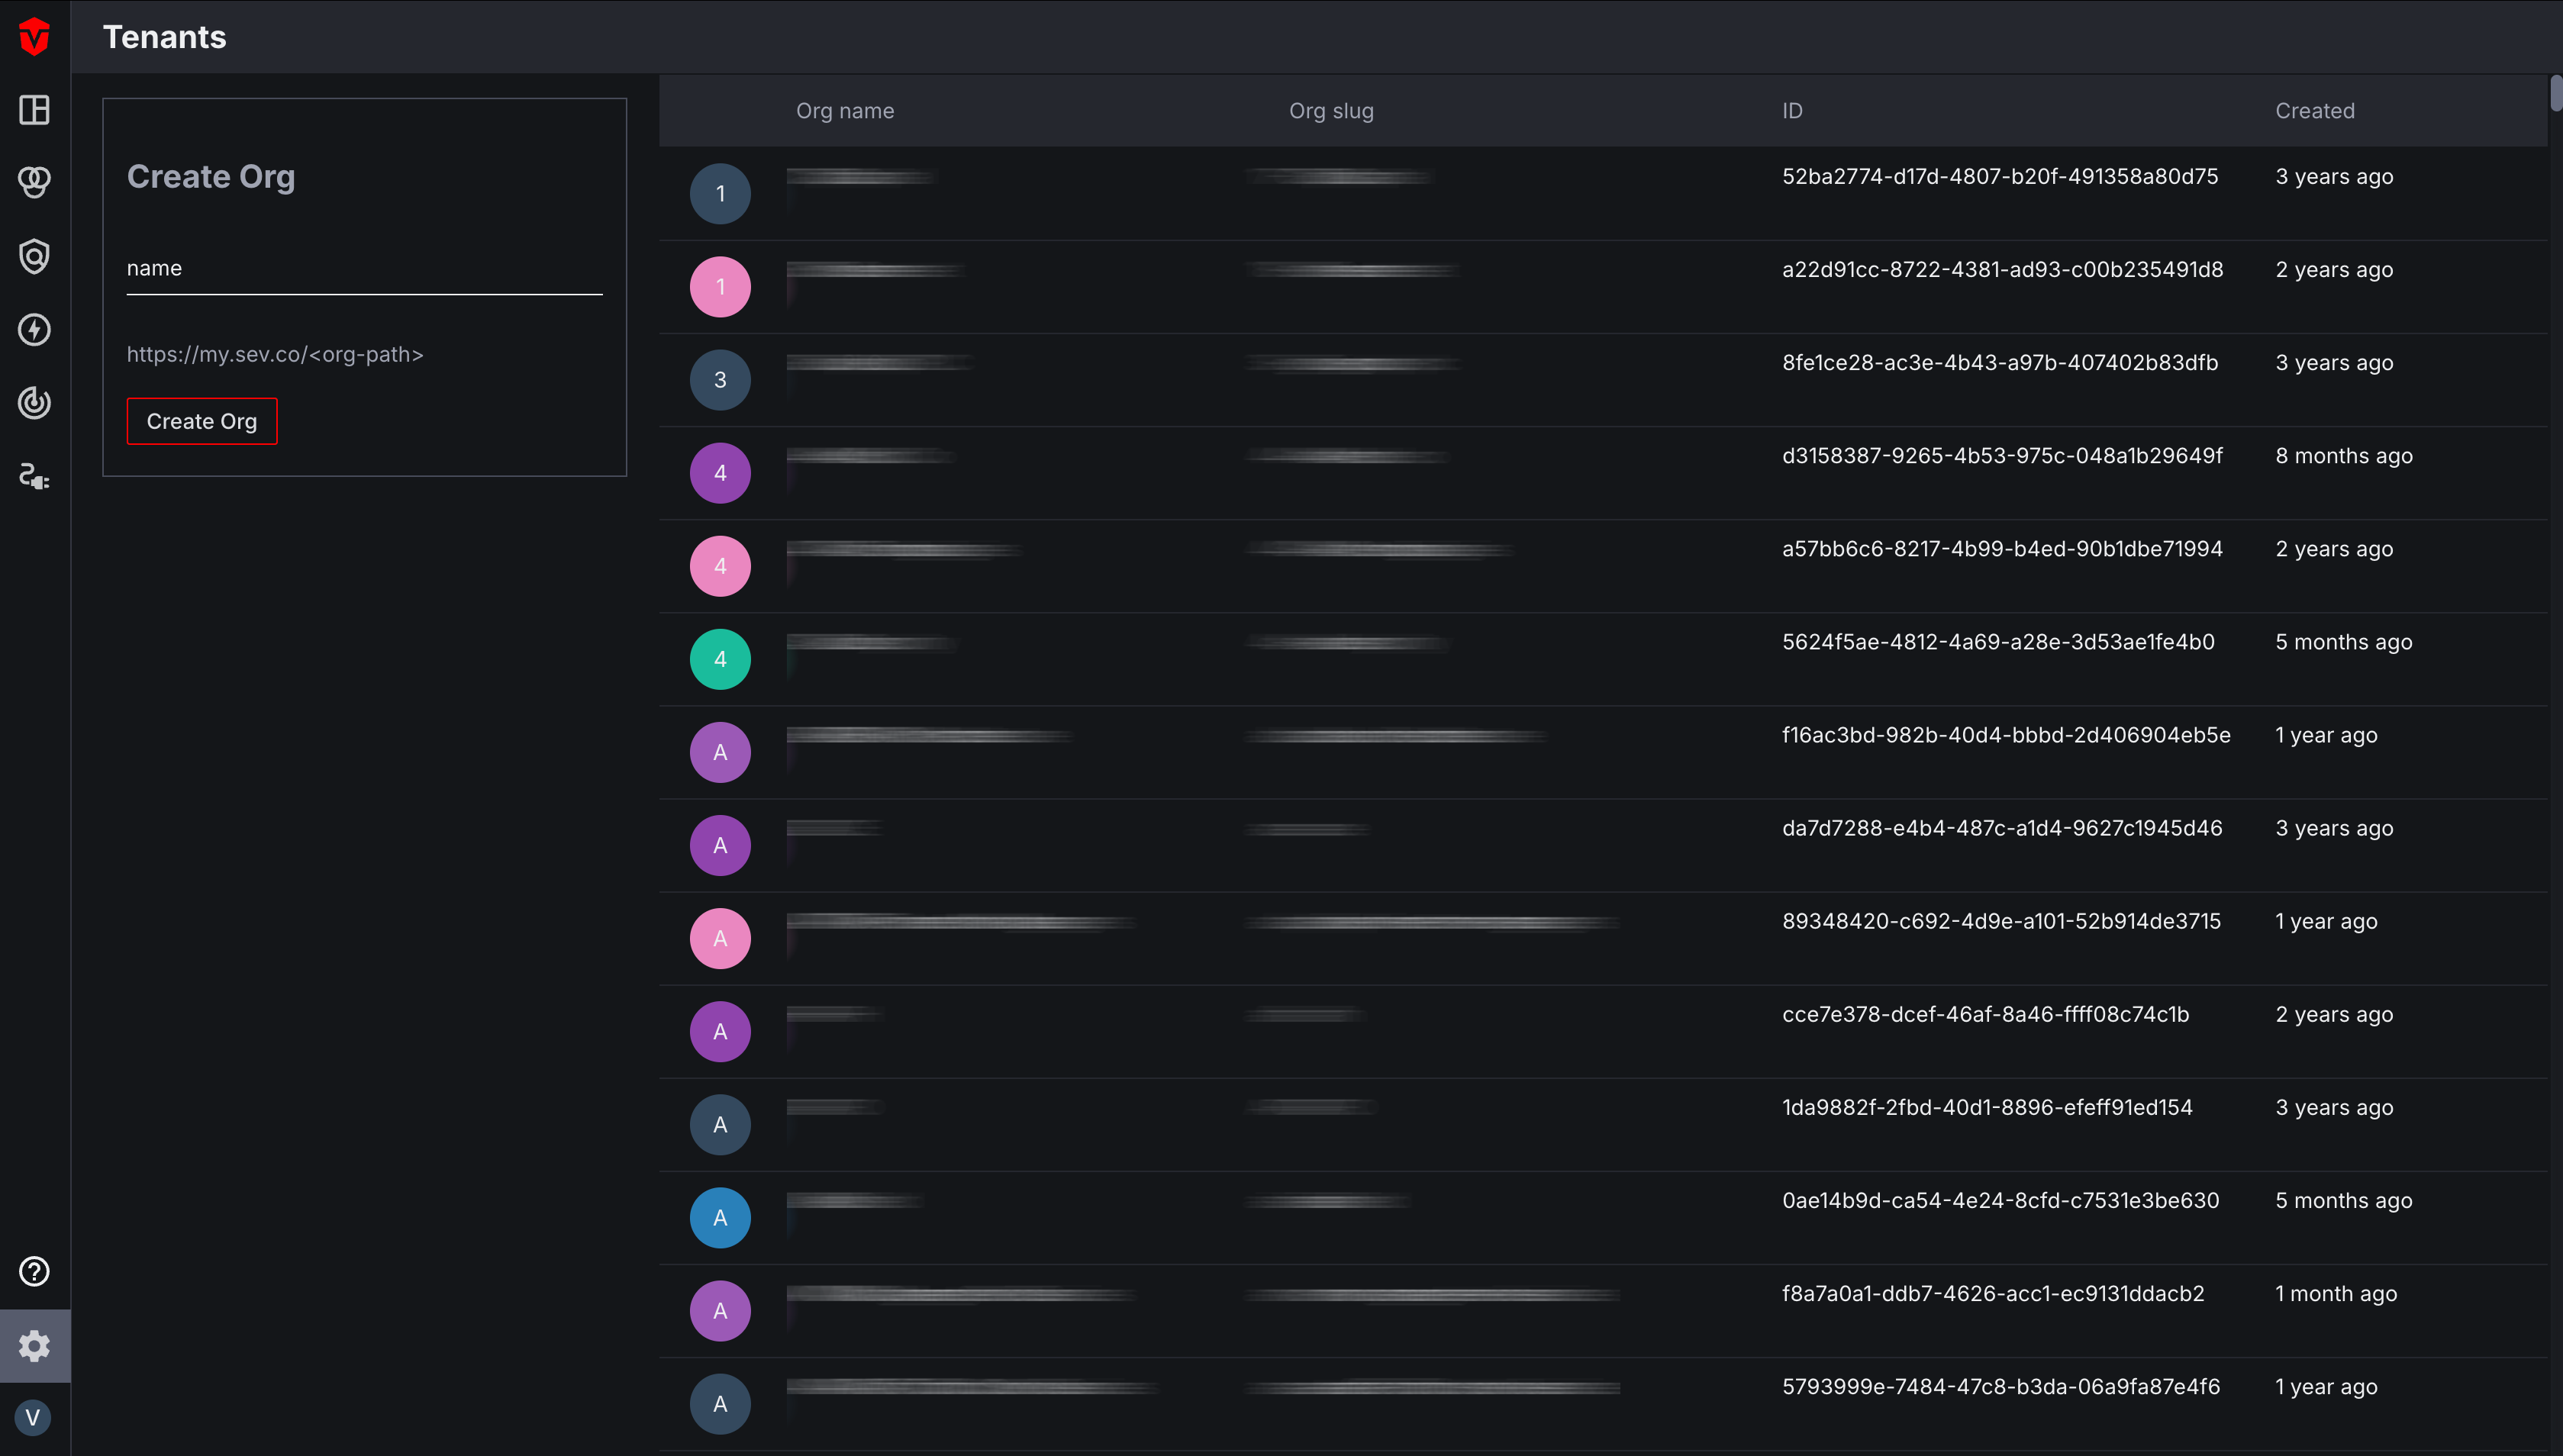
Click here to learn more about this page.
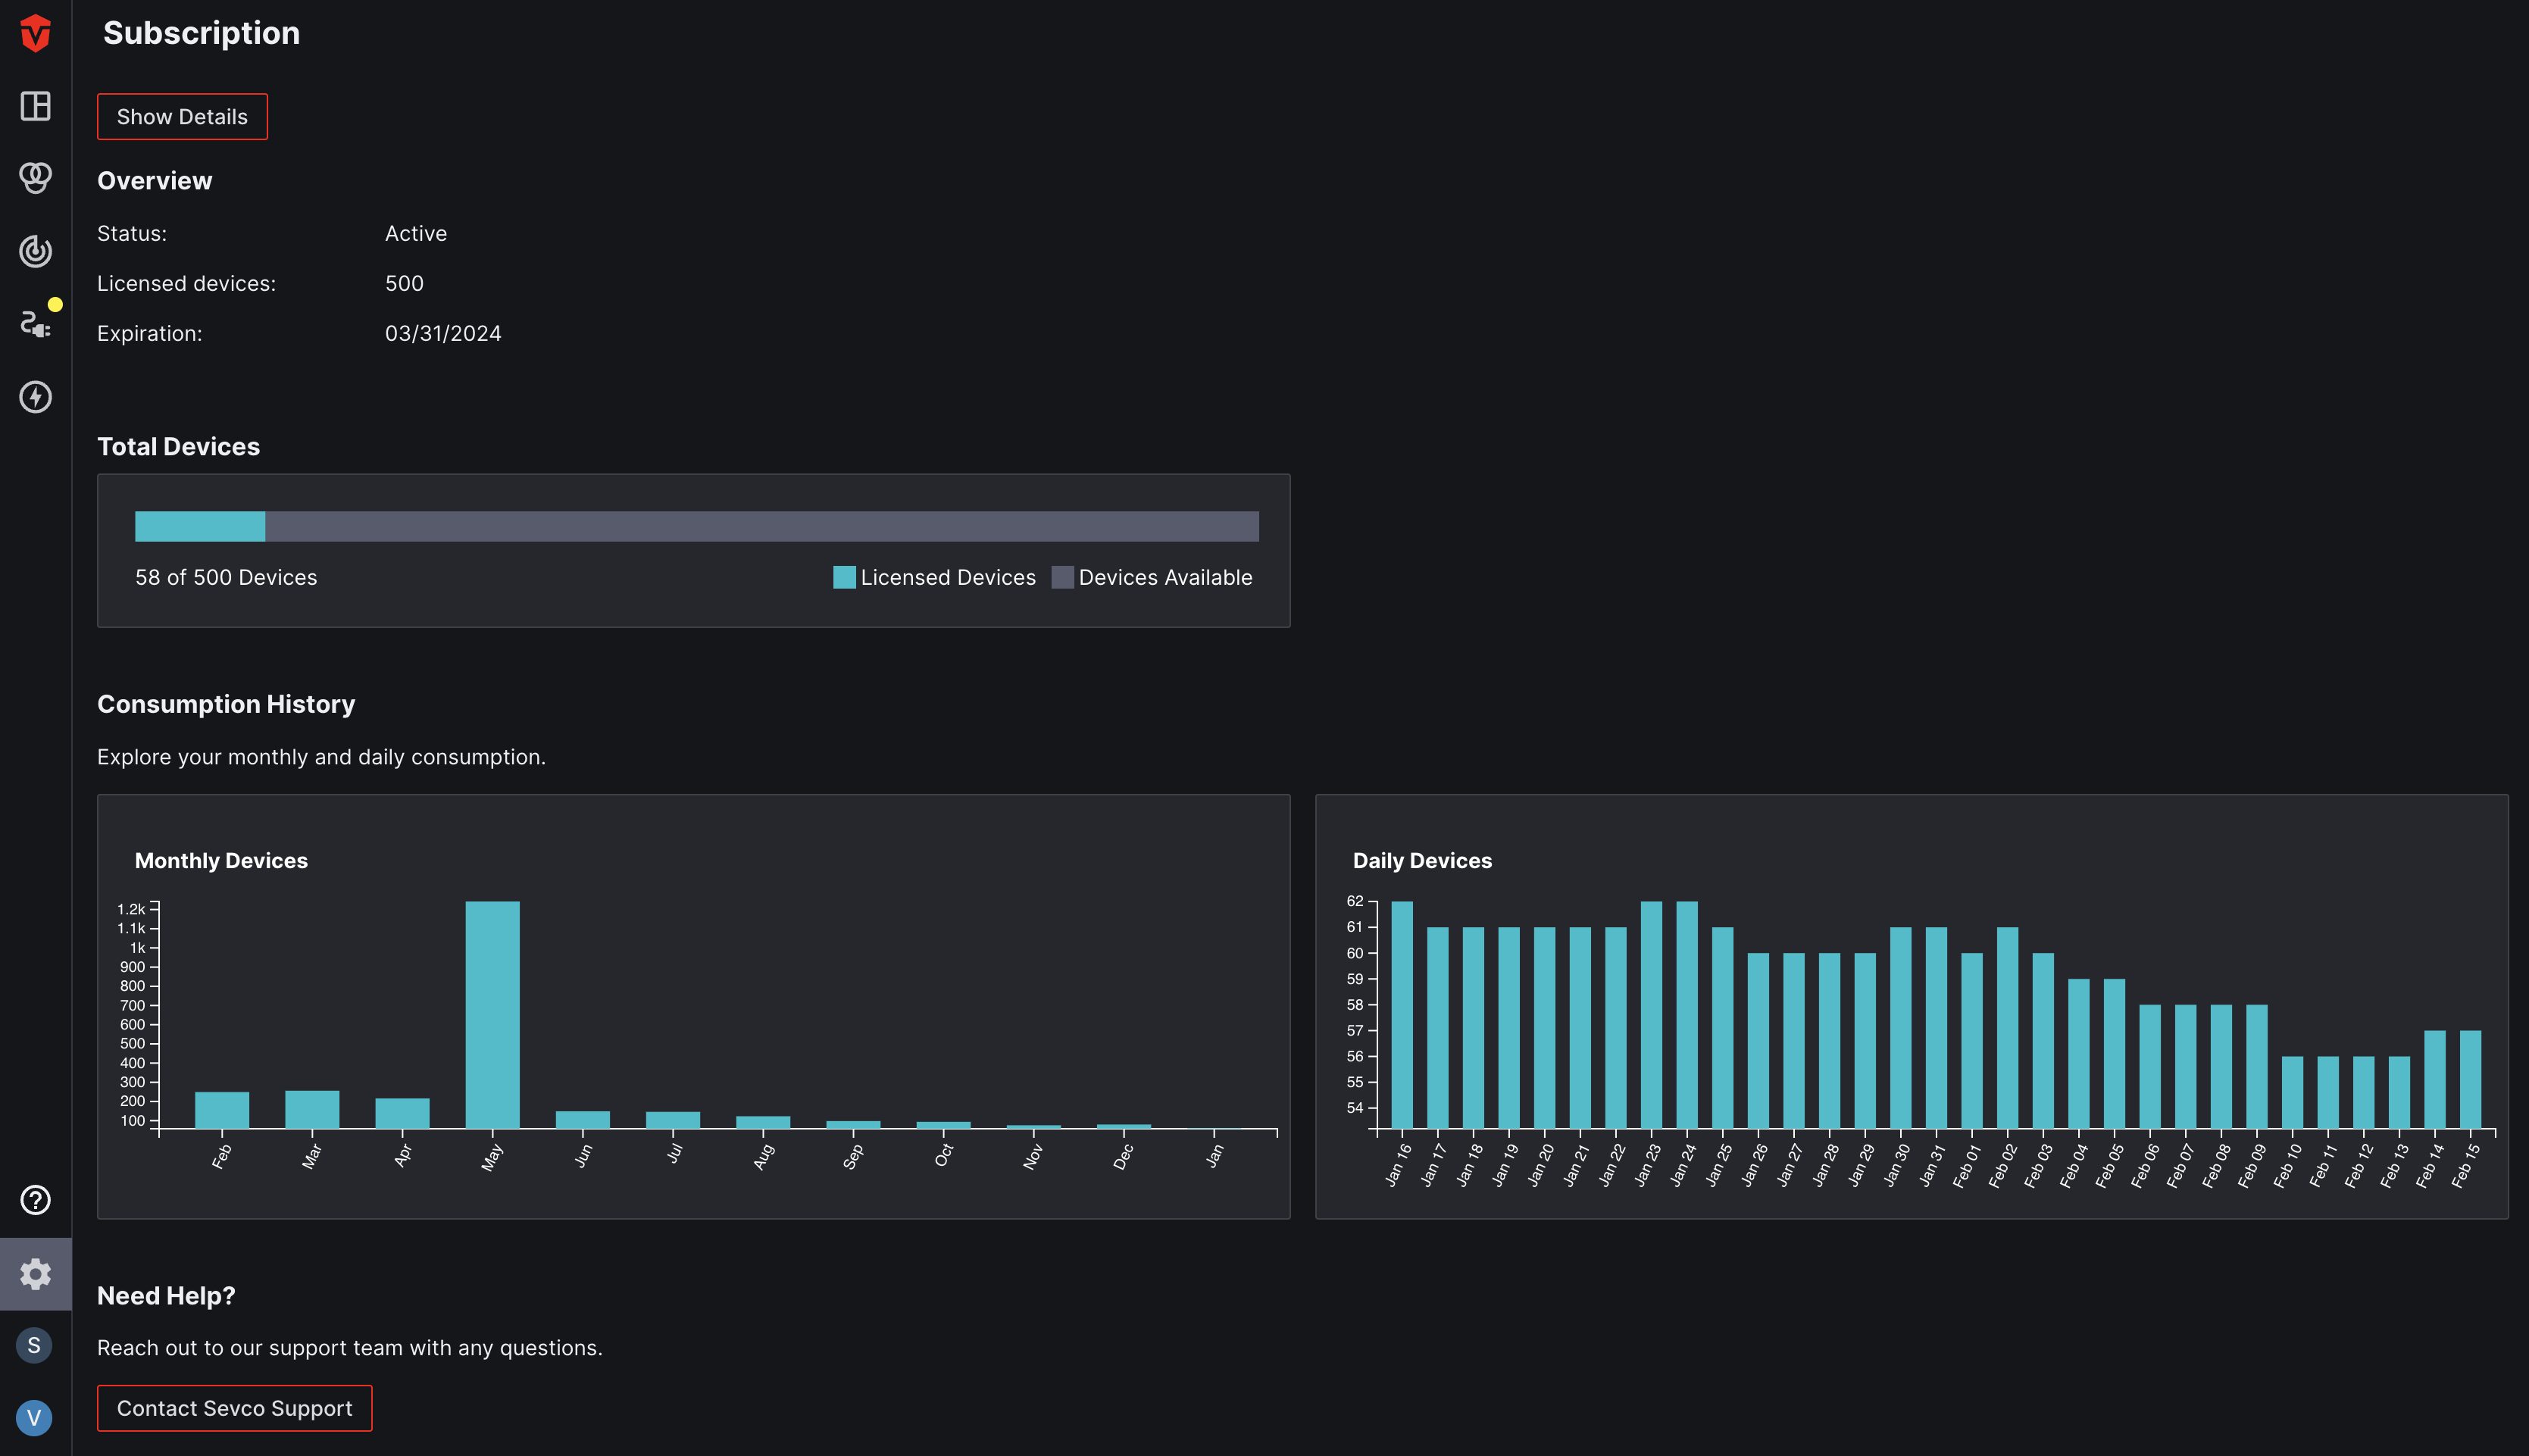
Subscription
The Subscription page provides an overview of your Device asset usage over time. Here, you can view your subscription status and expiration date along with your total Device count and alloted number of licensed devices. Additionally, you can also refer to the Consumption History section of the page to view your daily Device totals for the month as well as your monthly averages.
This page can be accessed by clicking the Admin icon () on the Navigation bar then select the Subscription link from the dropdown menu.
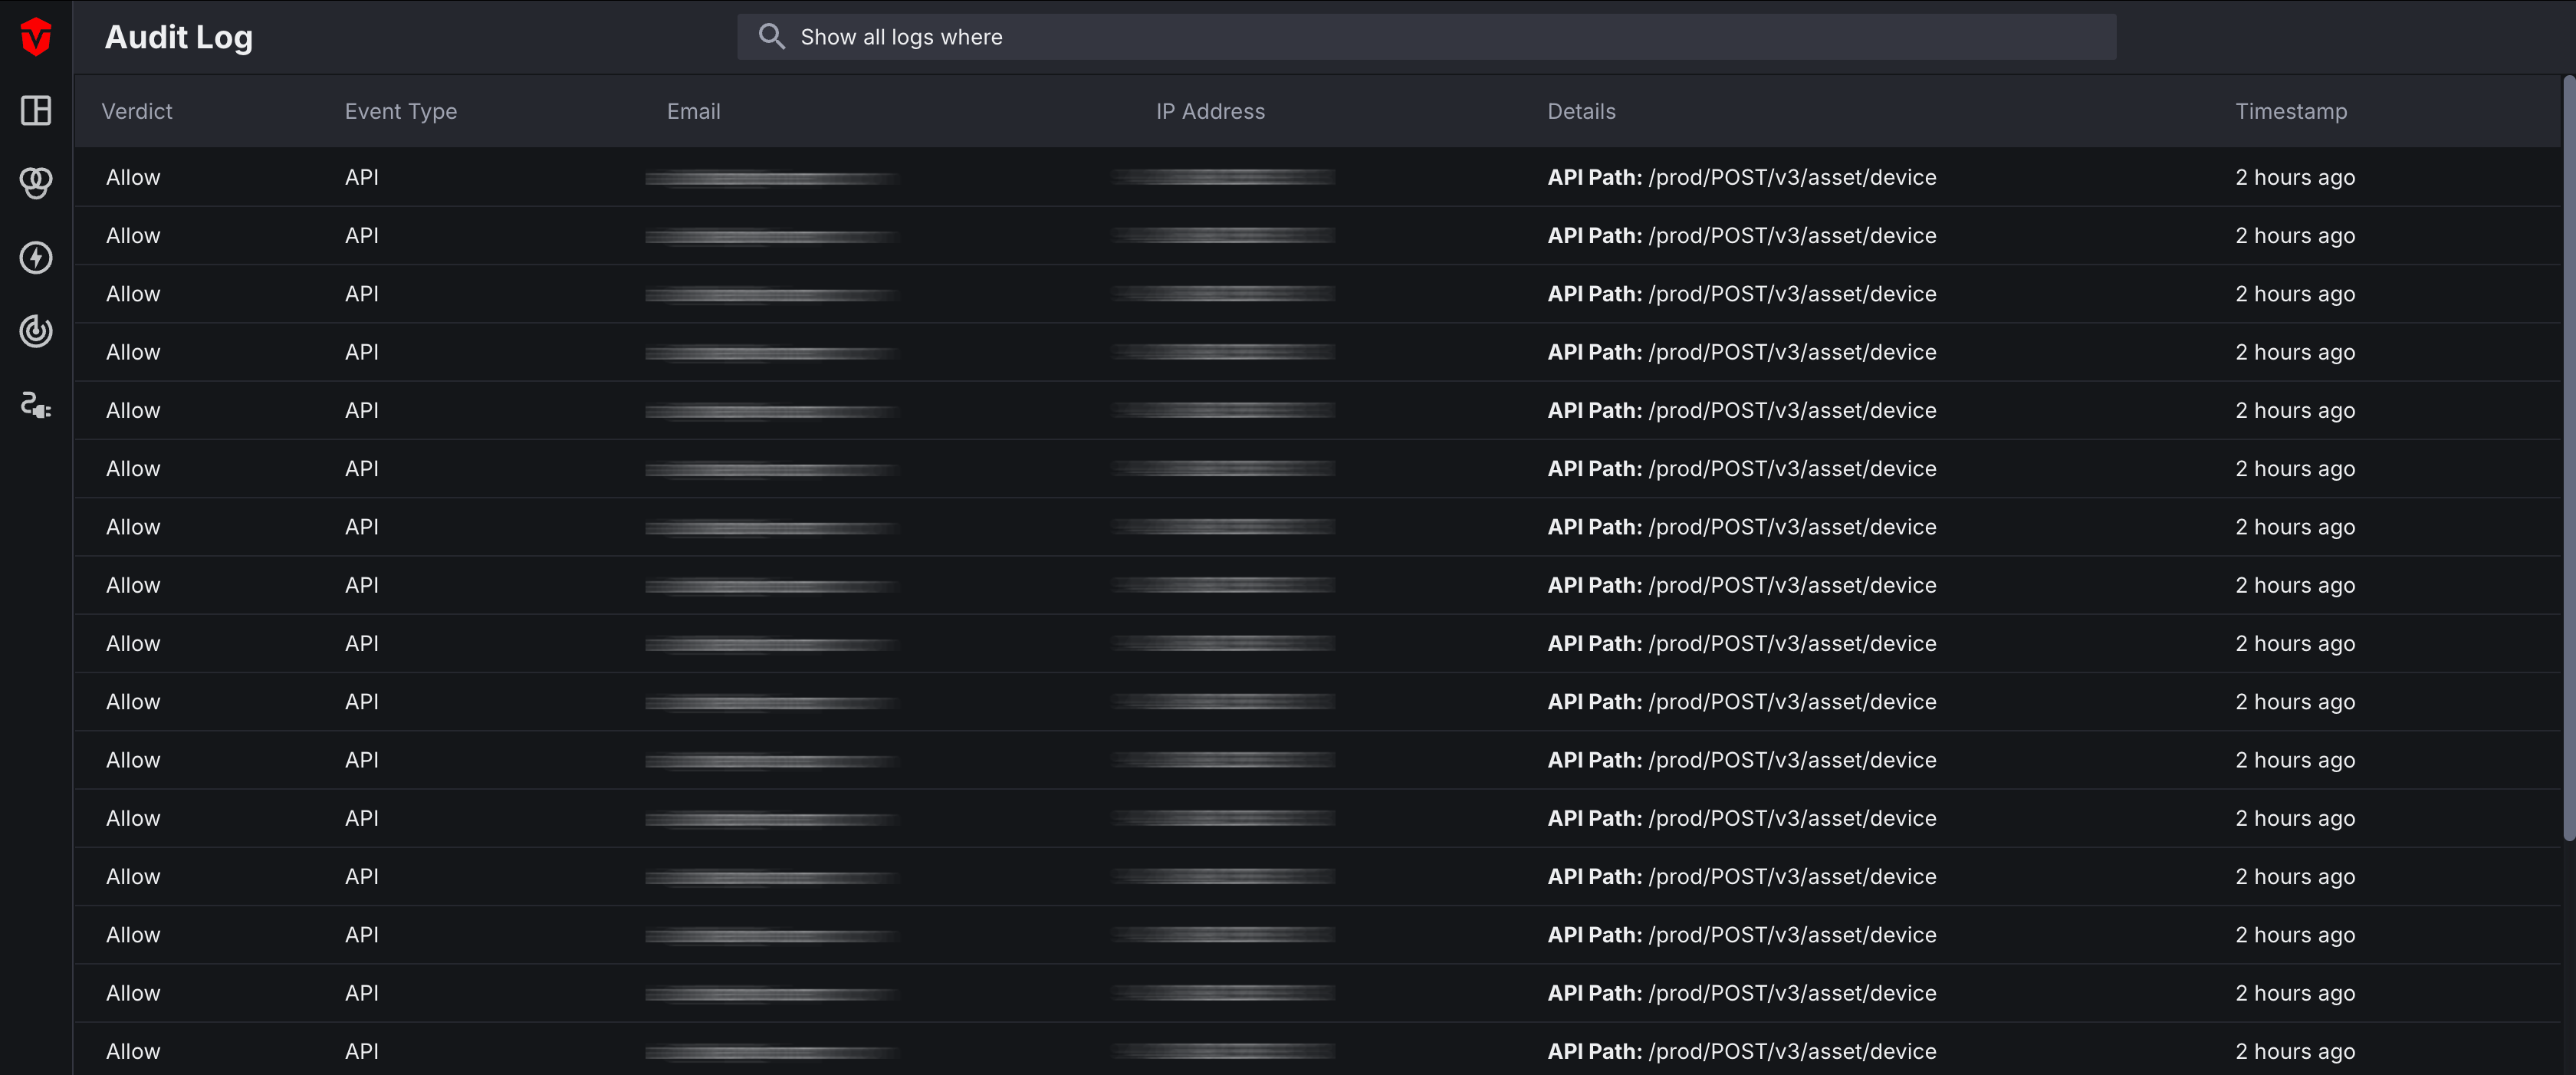
Audit Log
The Audit Log provides a chronological list of all events that have taken place in your environment along with event details, timestamps, and the users associated with them. This page can be accessed by clicking the Admin icon () on the Navigation bar then select the Audit Log link from the dropdown menu.
Help Menu
Please refer to our Help menu for information or support needs.
Resource Center
Select the Resource Center link to access the Resource Center menu. Here, you can search for help articles on our documentation site, read product announcements, access release notes, view contact information, and much more.
Support Chat
Select the Support Chat link to access our in-app chat. This is where you can submit questions, request support, and report platform issues.
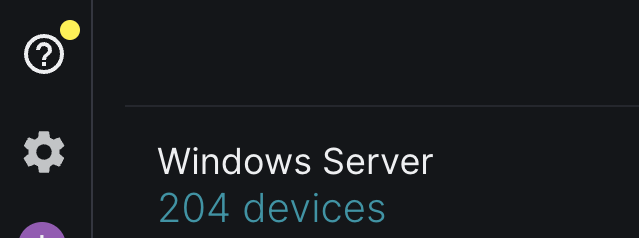
A yellow Notification icon will appear next to the Help Menu to notify you of any messages you might have missed.
Updated 2 months ago