Building a Query
Overview
The Query Builder is a querying tool used to search for assets and telemetry events with attributes meeting conditions specified in rules defined by the user. In this article, we will review the steps for building simple and complex queries.
Building a Simple Query
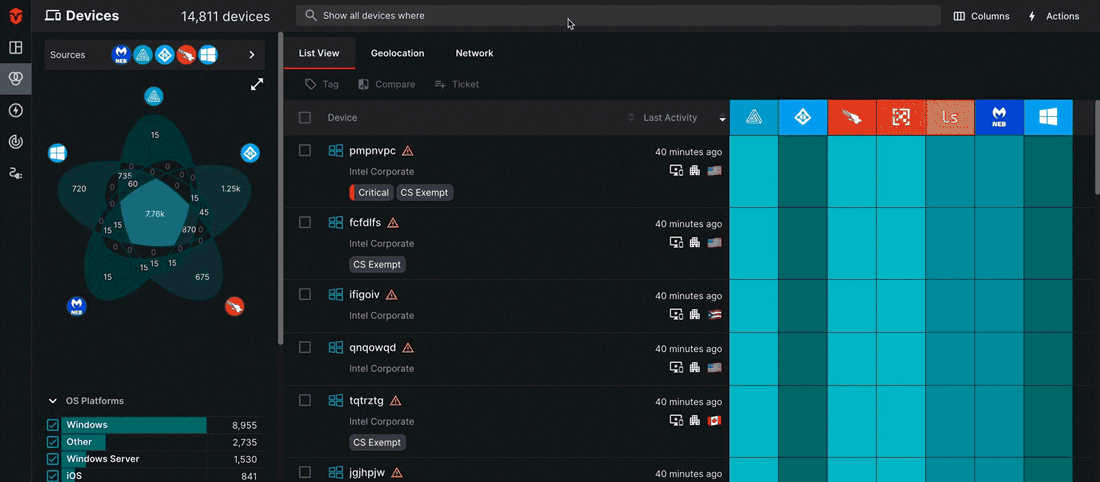
The Query Builder has three to four parameters that can be used to assemble a query, depending on what area of the platform you are in. In this example, we will be using the Query Builder in the Live Inventory page to construct our query.
Click here for an in-depth review of query parameters and attributes across the Aurora ASM platform.
Defining Query Parameters
Source Attributes
This field is only available on Live Inventory pages. Query builders on the Source Inventory and Telemetry pages only allow you to specify attributes in queries and do not support cross-asset search.
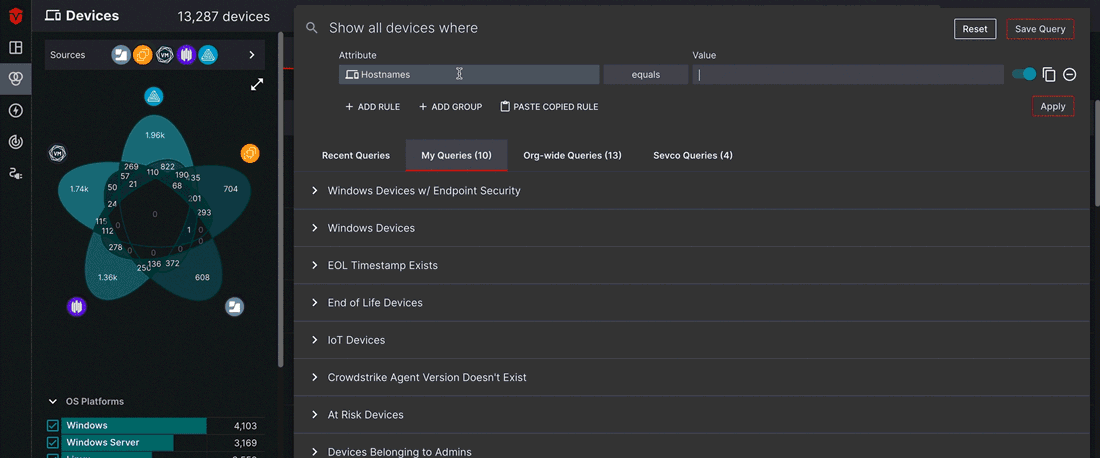
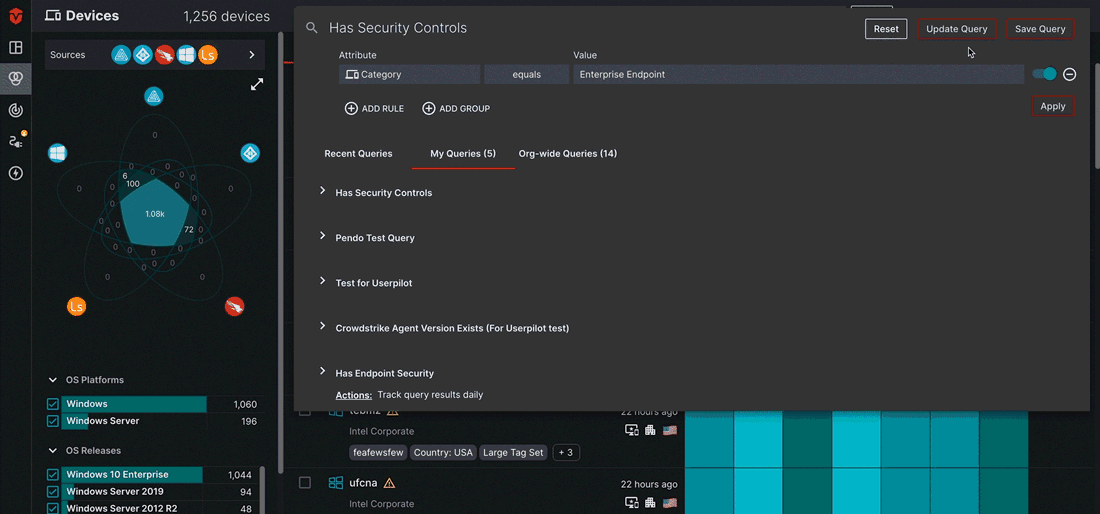
The Attribute parameters allow you to select the data attribute(s) you would like to build your query around. Select the Attribute field to begin defining this parameter.
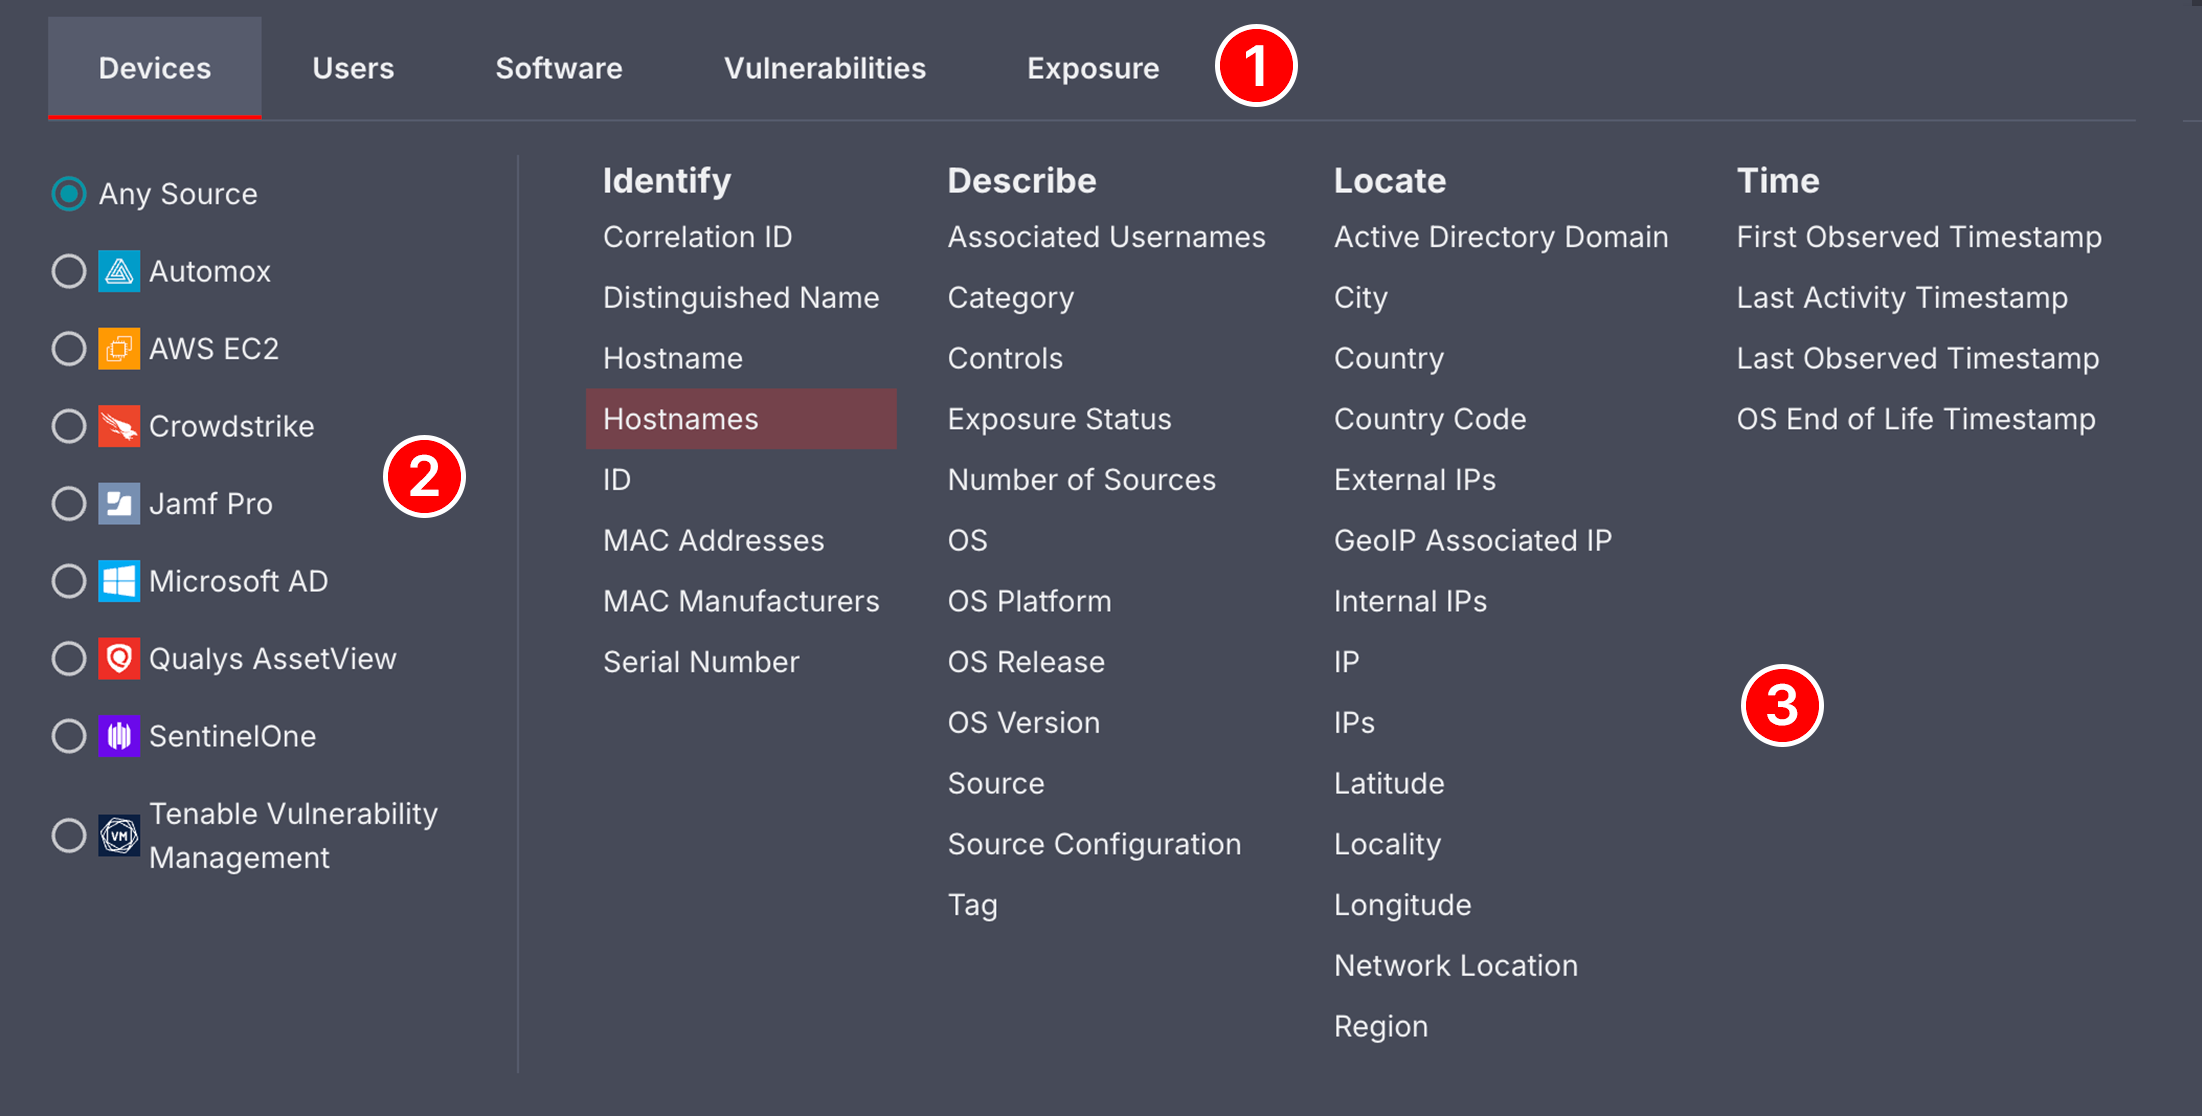
The attributes menu is broken down into several areas:
-
At the top of the menu, there are Devices and User tabs, The tab corresponding to the Live Inventory page you are on is selected by default. These tabs are primarily used for cross-asset searches, which will be covered in a later section.
-
The left-panel contains a list Sources. If needed, use this section to specify if you would only like to include assets from a specific Source in your rule's condition.
-
The right-panel is where you will select the what data Attribute(s) you would like to build your query around.
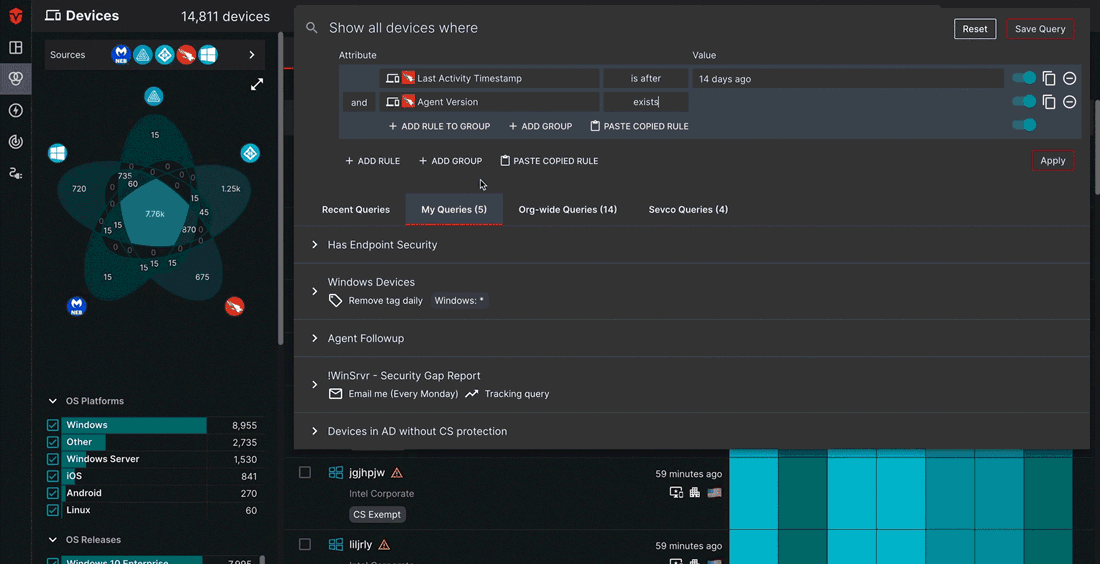
In this example, we'll be selecting Crowdstrike as our Device Source and Last Activity as our Attribute.

Click here for a full list of query attributes.
Condition
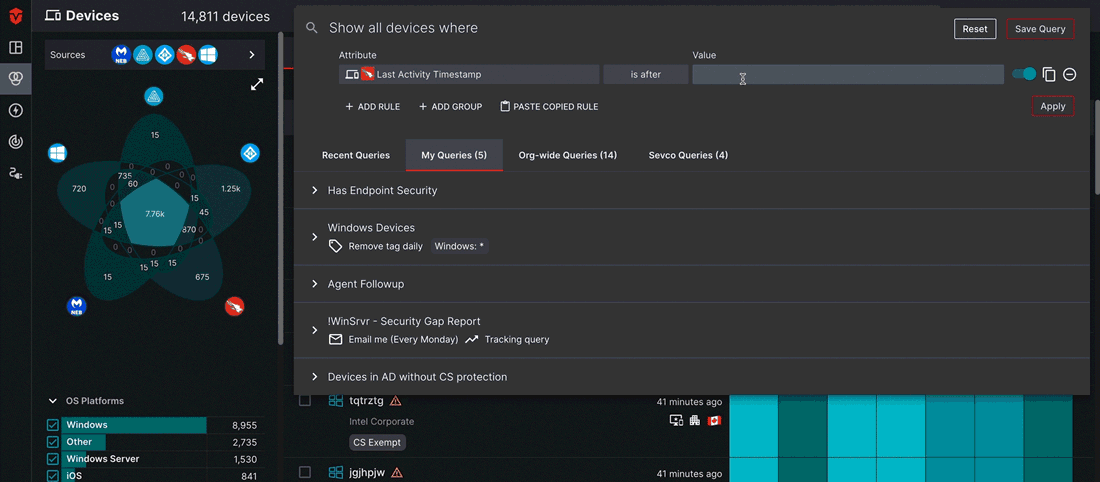
The Condition field is used to define the conditions your selected attribute must meet for an asset or telemetry event to appear in your query results.
Because we selected Last Activity as our Attribute, we'll select is after from the list of available Conditions for that attribute. Learn more about attribute conditions here.

Value
Once you've selected an attribute and condition, you will need to define the Value you will be using to determine if a condition is satisfied. Please note that this field will not display when the Exists or Does not exist Condition is selected, as the value is already defined in the condition itself.
In some instances, you may be asked to select a value from a pre-defined list of values. This is dependant on the attribute you have chosen. In this example, we will be using the Date Picker to define the cutoff date for a device's Last Activity in Crowdstrike.
Running a Query
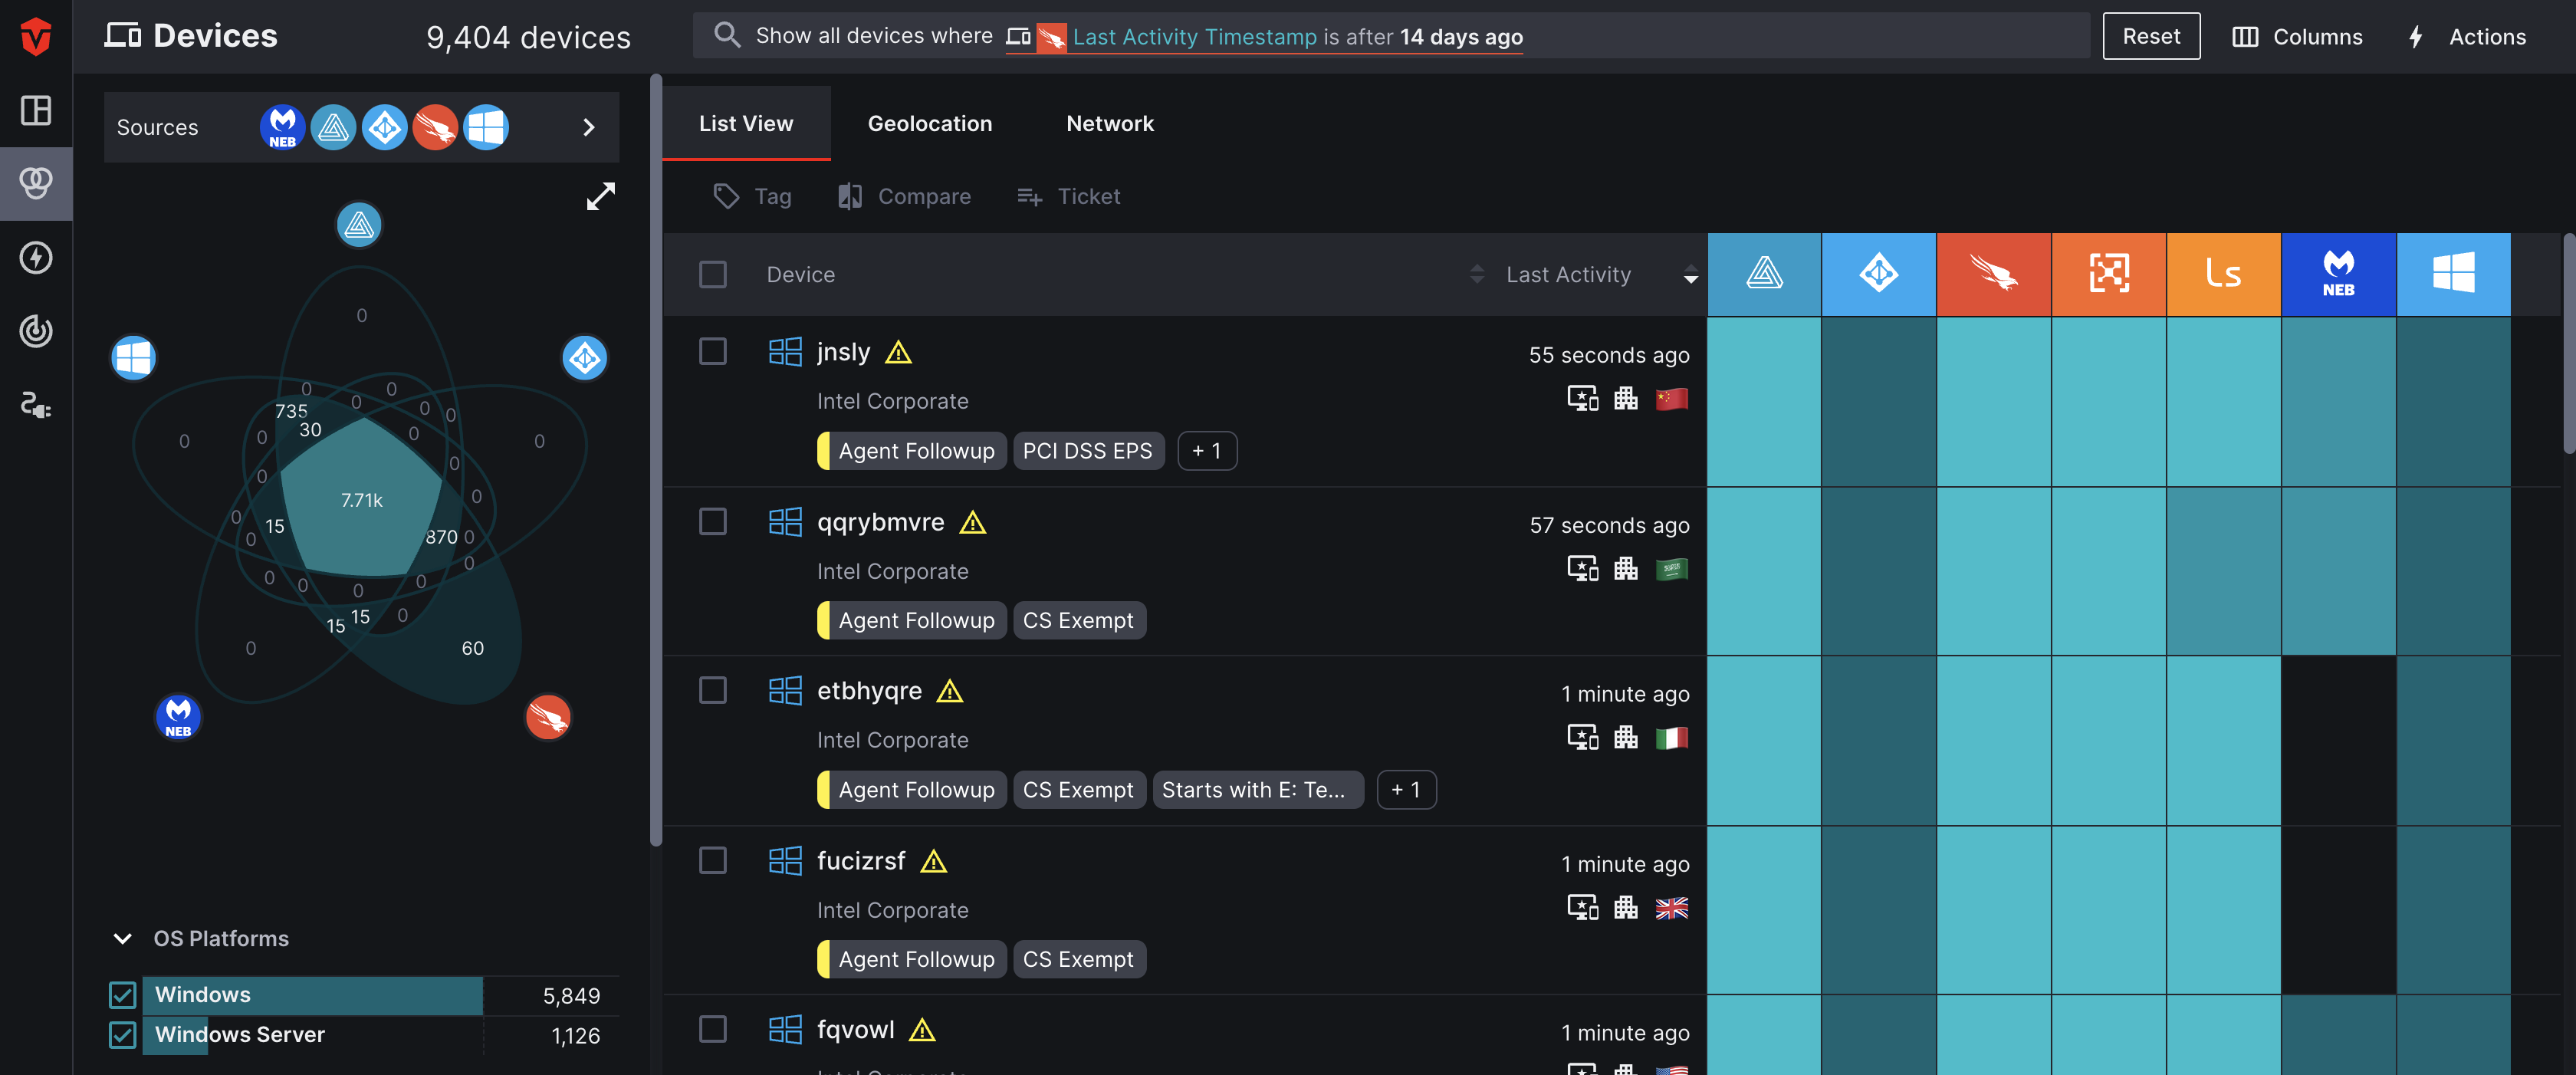
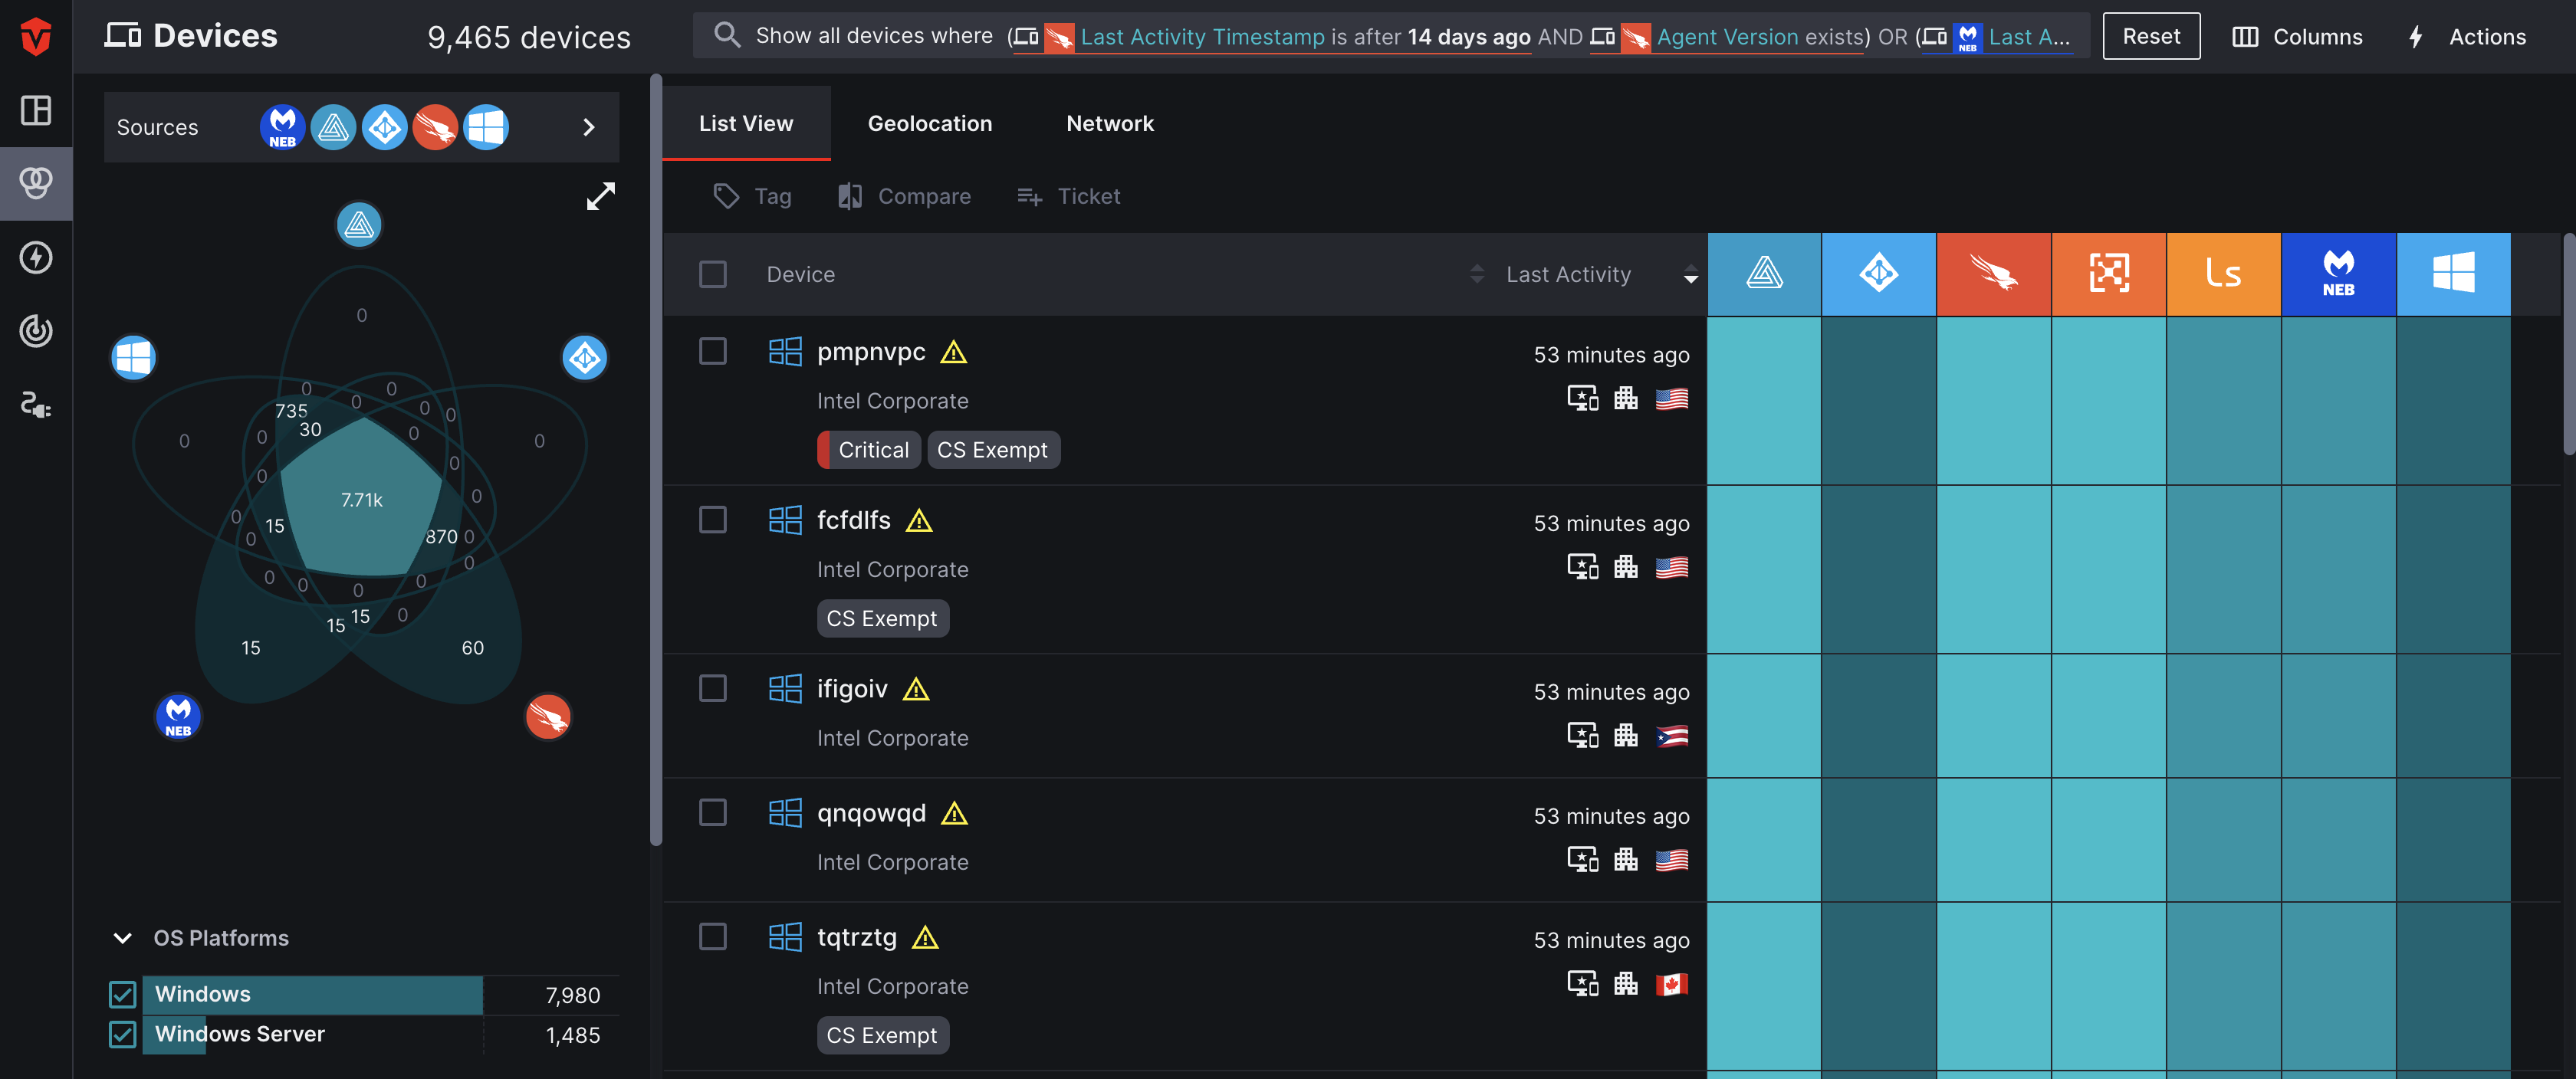
Now that you have finished constructing your query, select the Apply button to run your query.

Once the the query has been applied, you should see a filtered list of assets or telemetry events meeting the conditions of your rule. If you do not see this, check your query for accuracy and rerun it.
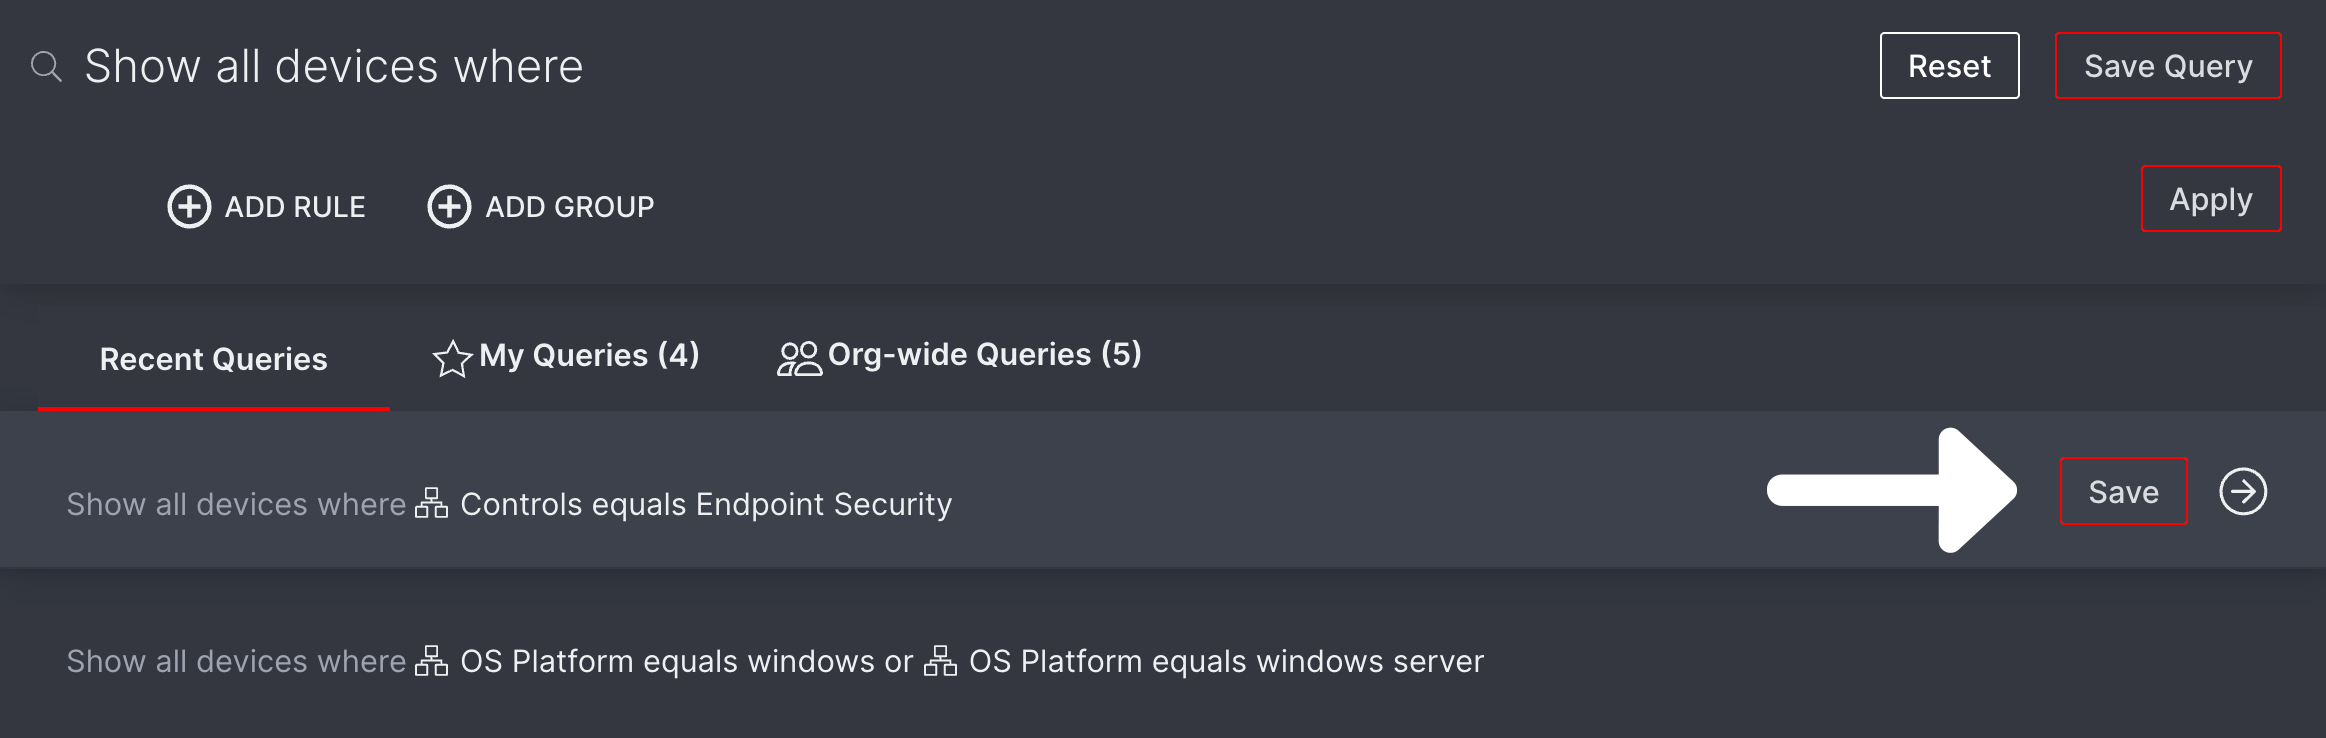
Building Complex Queries
For more complex queries, you will want to take advantage of the Add Rule and Add Group options. In this example, we will be adding additional rules
Adding a Rule
The Rule option allows you to add additional search criteria to your query. Once you've added a rule, you can use the and / or conditions to decide if the rule must be met in addition to your previous rule or if the system can include assets meeting either set of conditions in your results.

Referring back to our last example, we are going to be using an and condition to add a rule where the Scope is Crowdstrike the Attribute is Agent Version and the Condition is exists. We will use the and Condition to specify that both rule must be met.

Adding a Group
Groups are not automatically created when the query builder is opened. Select the Reset button followed by the Add Group button to create a new group if you have two or more rules that you'd like to compare against another group.
Once you have selected and or or as a Condition for two rules, all subsequent rules in that group must also use that condition. The Group option allows you to group rules in complex queries.
The and / or conditions function exactly the same for groups as they do rules. Once you have selected a condition, all groups must use that condition.

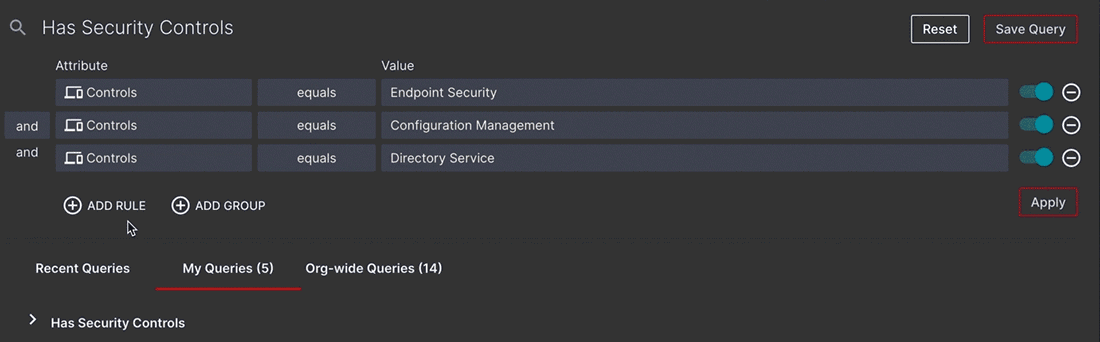
Continuing where we left off, we are going to add one group and select the or Condition. This will tell system to generate a list of devices meeting the conditions in either group.
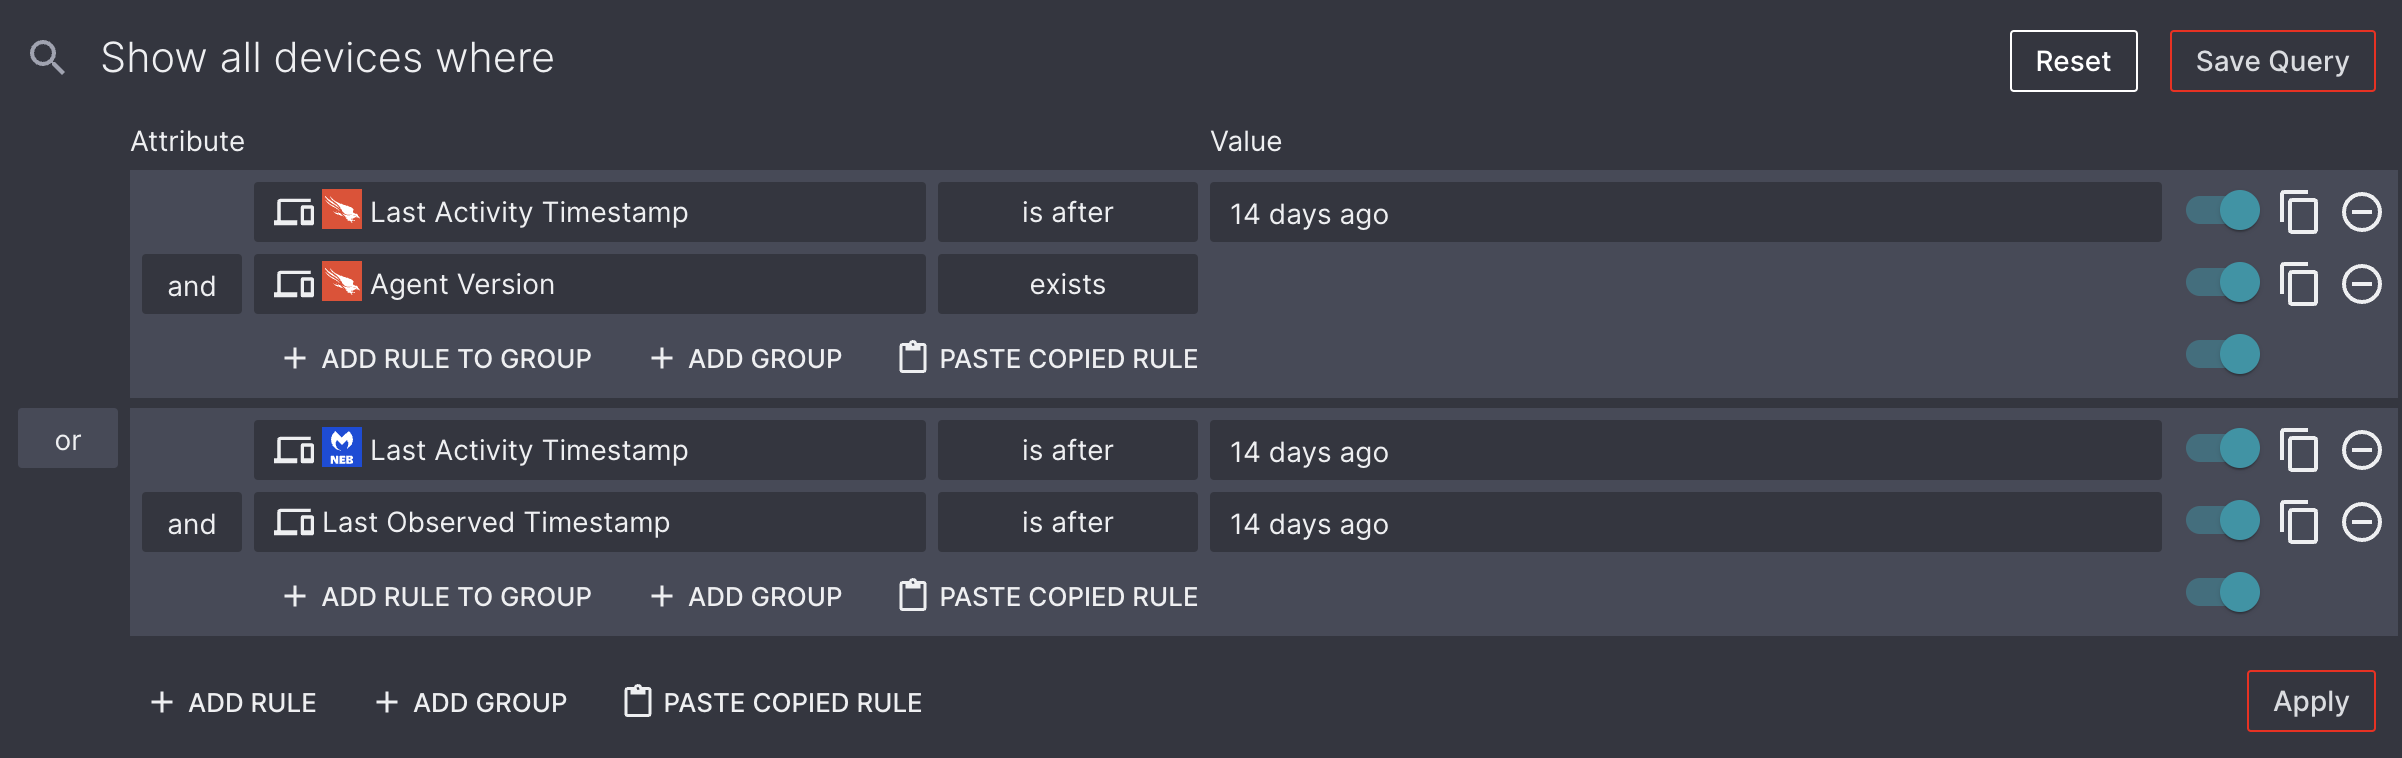
Once the Apply button has been selected, you will notice that the device list is longer. This is because there are additional devices meeting the second group's conditions that didn't meet the first group's.
Cross-asset Search Queries
Cross-asset Search queries allow users to run queries that take correlations between different asset classes into account. For example, you may wish to run a query that searches across assets to:
- View Devices that have associated Users who are in an Active Directory Group
- Determine what Users have one or more Devices that do not have an Endpoint Protection agent installed
- Identify recently-observed Devices with associated Users that have no recent activity reported

Example Cross-asset Queries
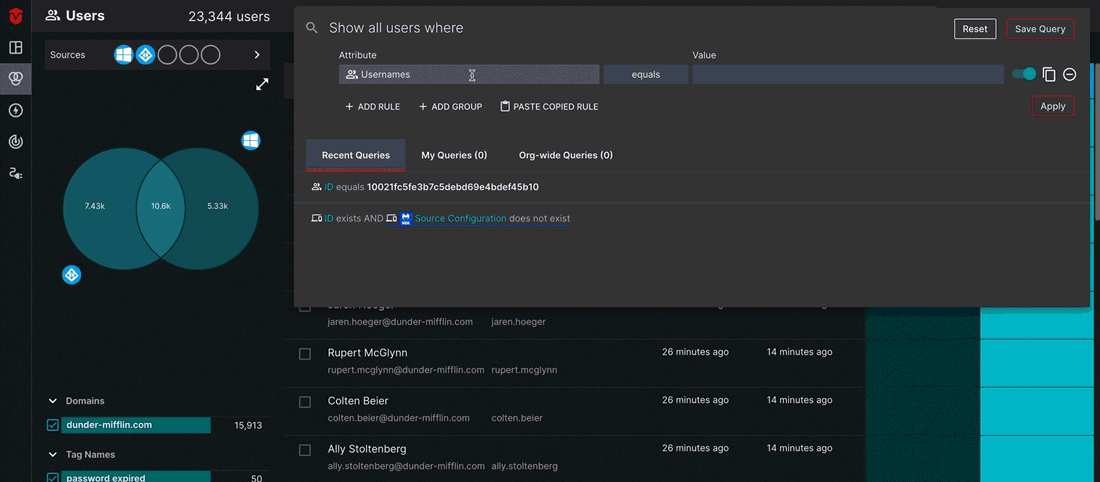
Query 1: User Live Inventory
In this query, we will ask Aurora ASM to identify any Users associated with a Device (ID) that does not have the Source Configuration, MalwareBytes Nebula installed on it.
We will start from the User Live Inventory page, as we are searching for Users who meet a certain criteria.
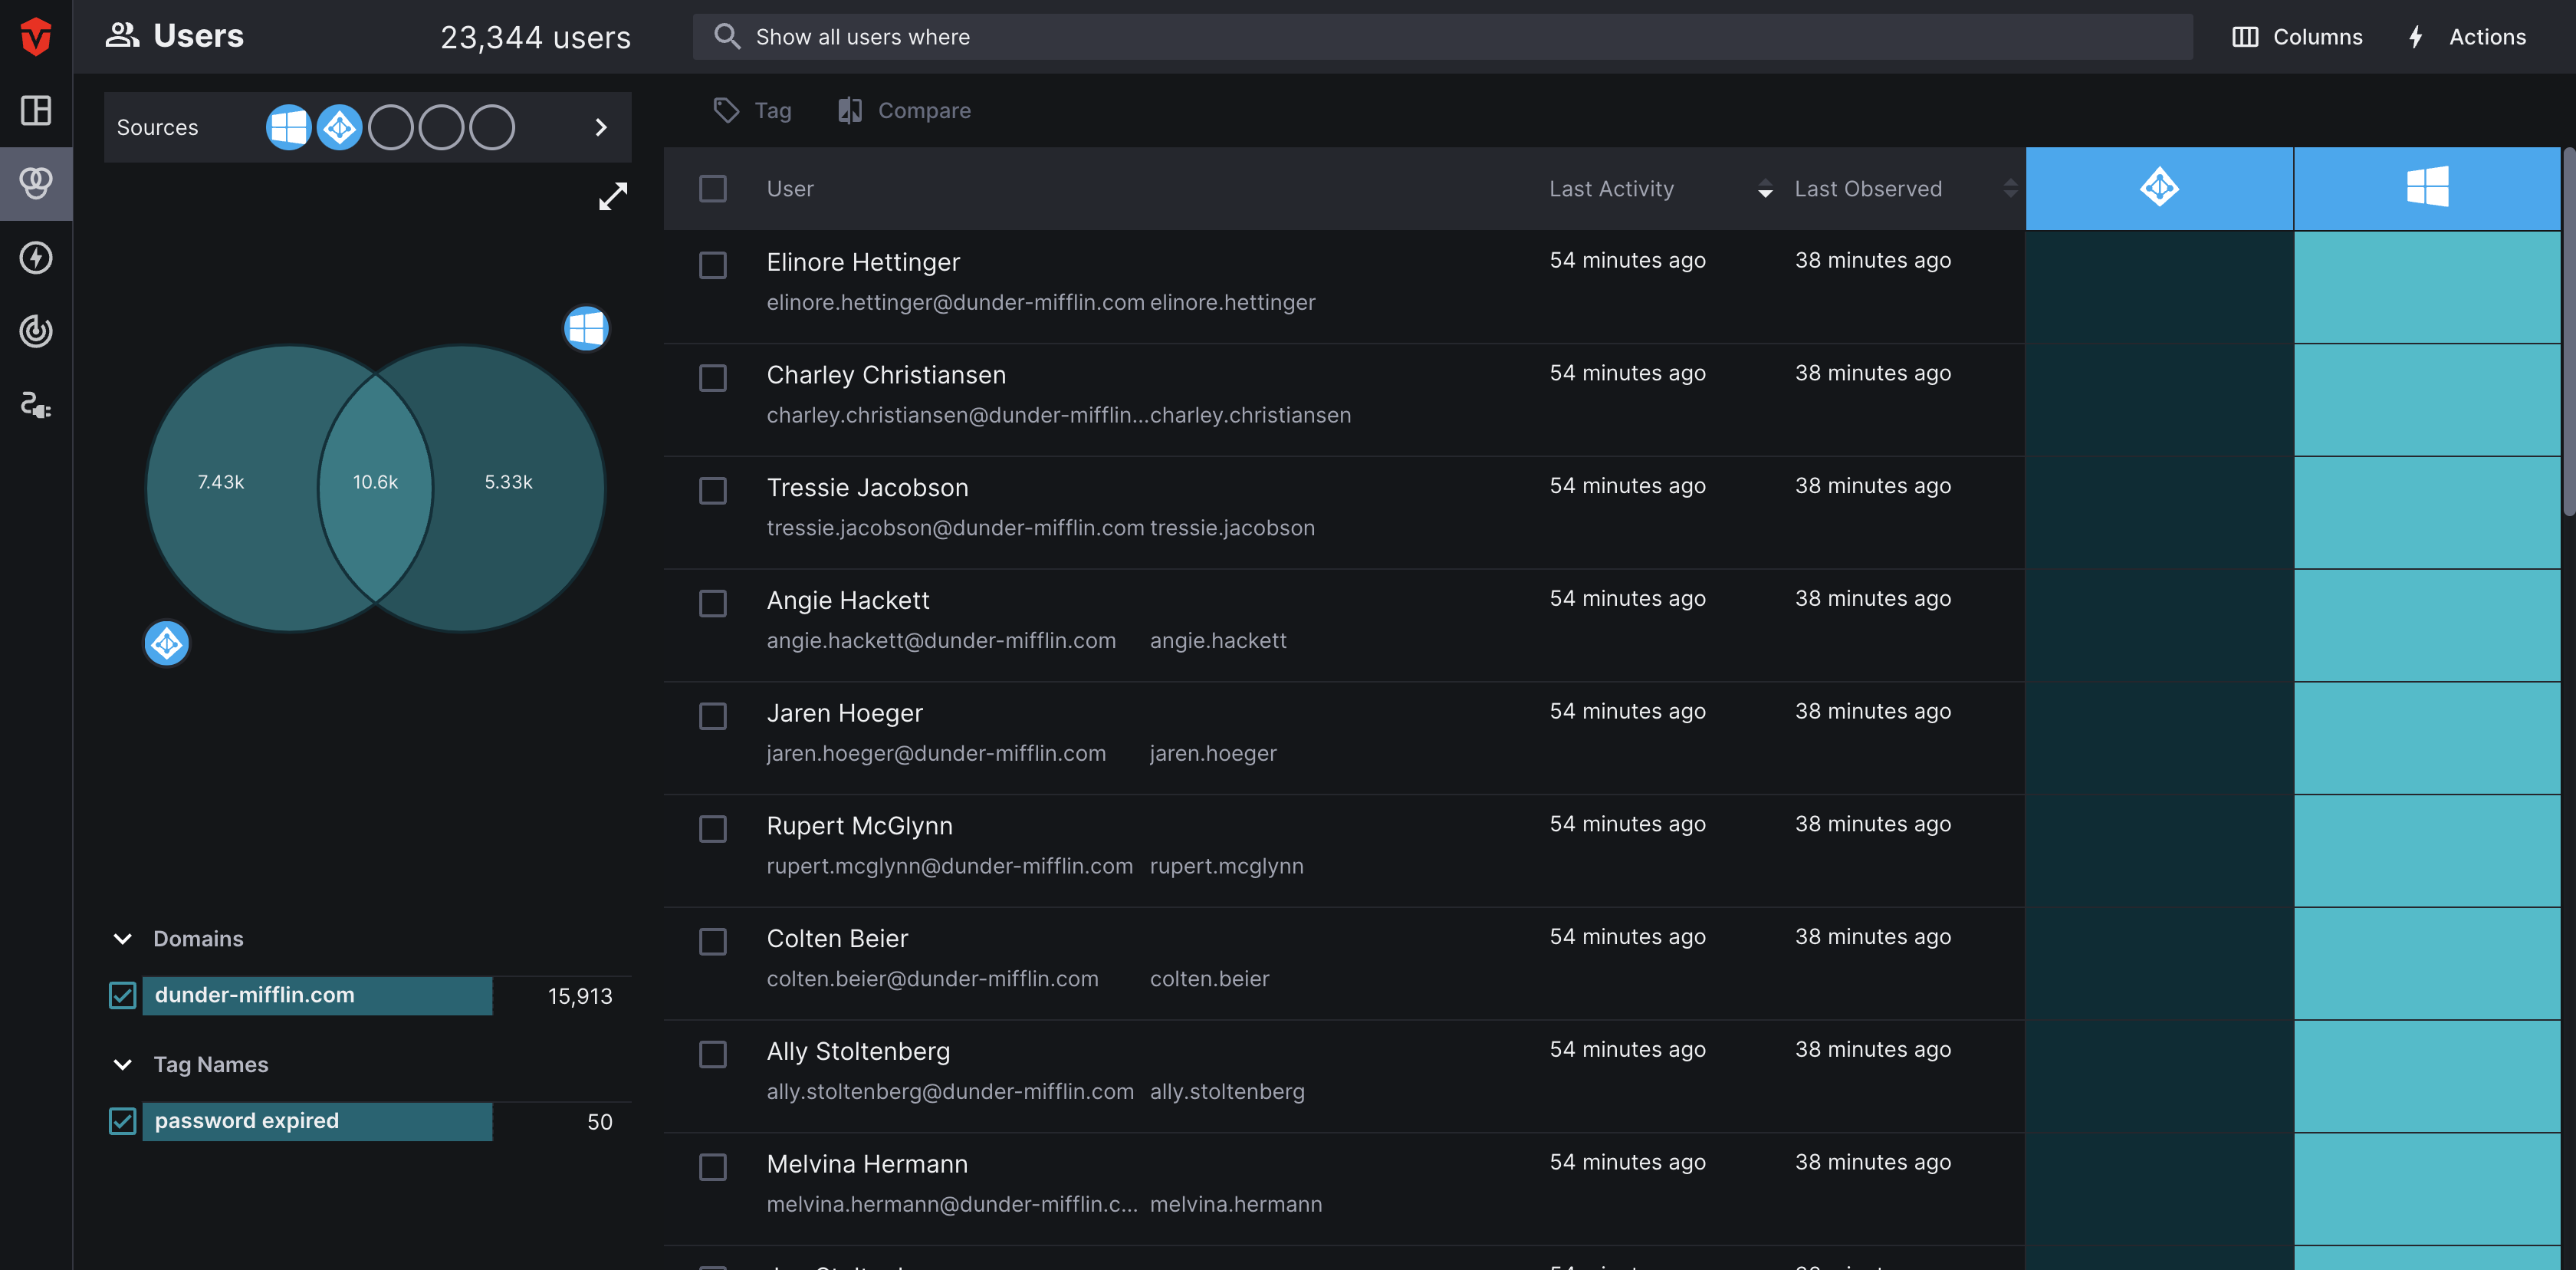
Next, select the Attribute field in the query builder. Because we are in the User Live Inventory, the attribute menu will default to the Users tab. Select the Devices tab, we will be using attributes from Device Sources to determine whether or not Users meet the criteria for our search.

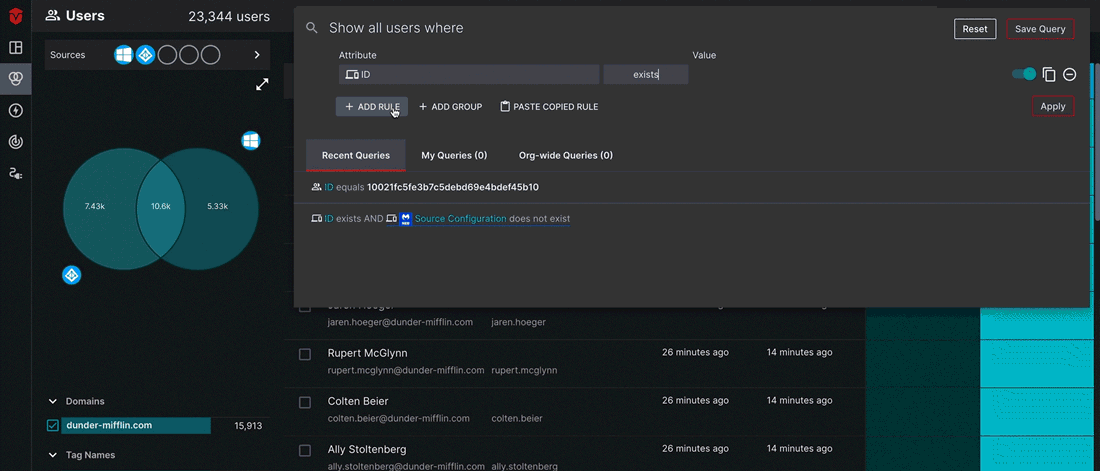
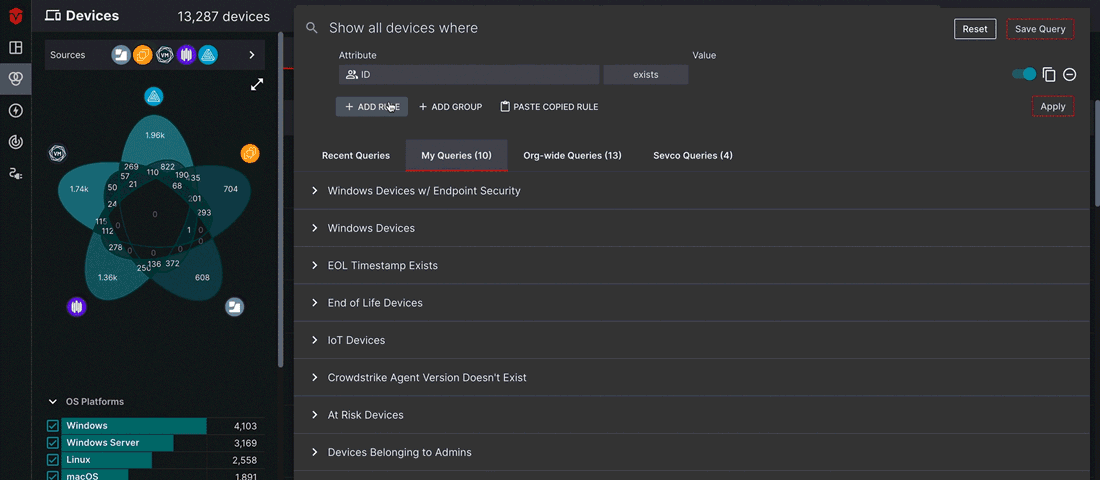
For the first rule in our query, we will select Device ID as our Attribute without specifying a Source. Next, we will set its Condition to exists. This will tell Aurora ASM to only show users associated with at least one Device.
For the second rule in our query, we will return to the Devices tab, select MalwareBytes Nebula as our Source, Source Configuration as our Attribute, and does not exist as our Condition.
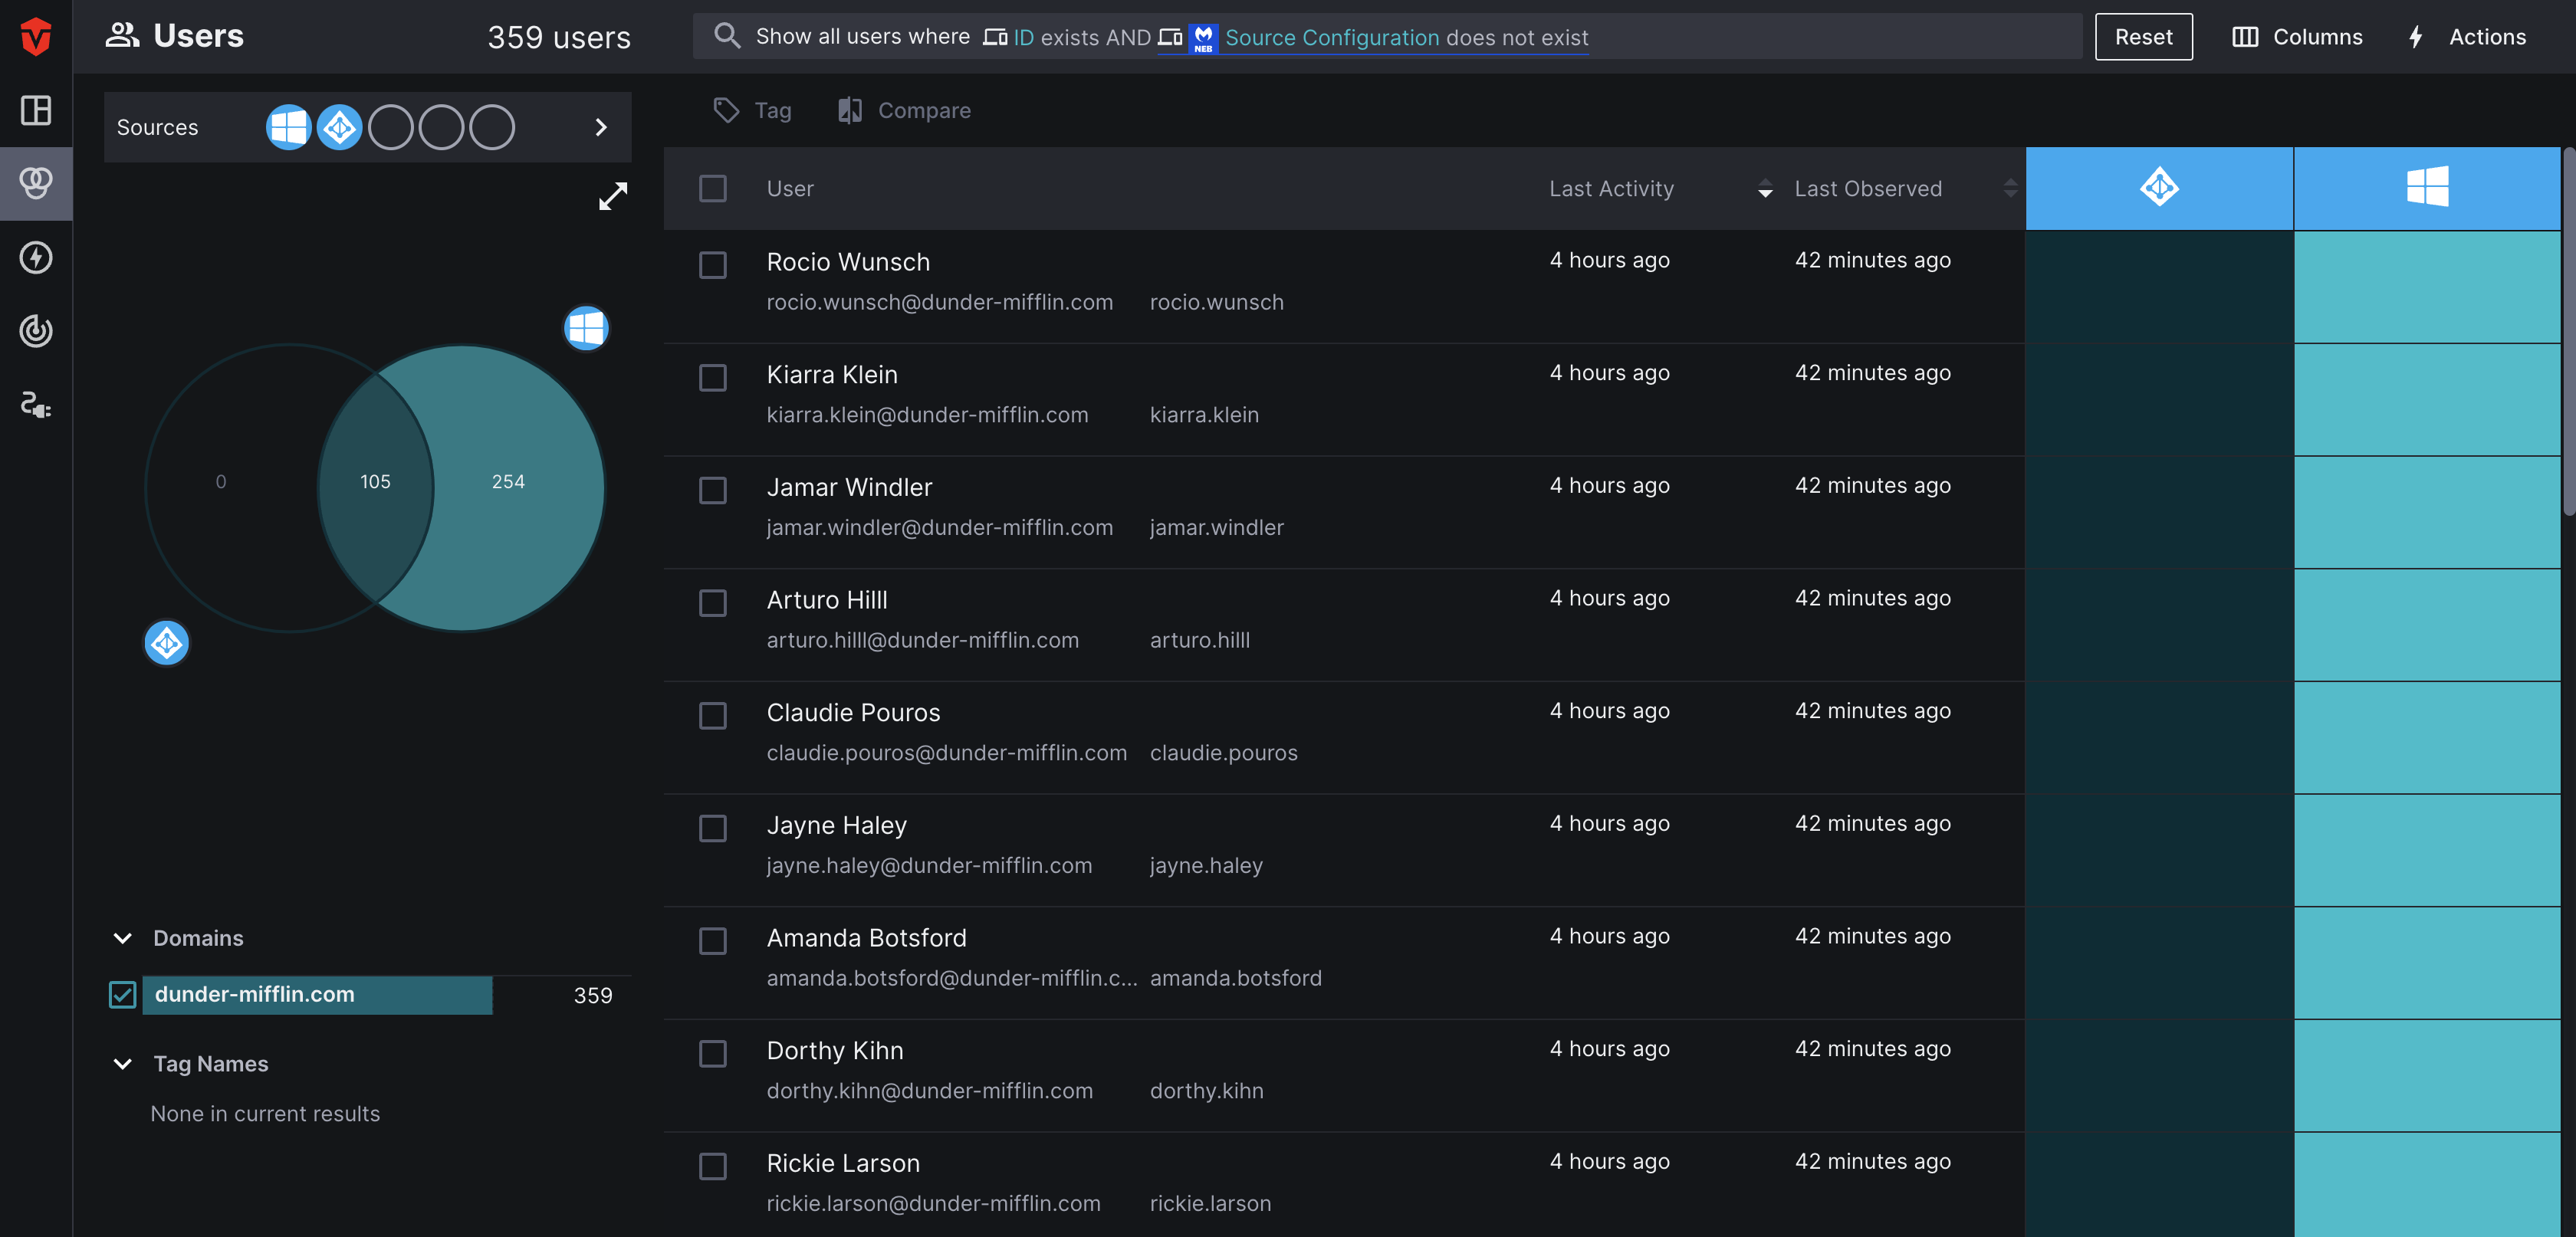
Once we Apply the query, the user list will only display Users with devices that do not have Malware Bytes installed.
Query 2: Device Live Inventory
Let's say that your company has recently asked its employees to install a new software on their computers and you want to check and see who hasn't installed it yet. If you have a Software Source configured in your Aurora ASM environment, you can perform a cross-asset search identify these employees.
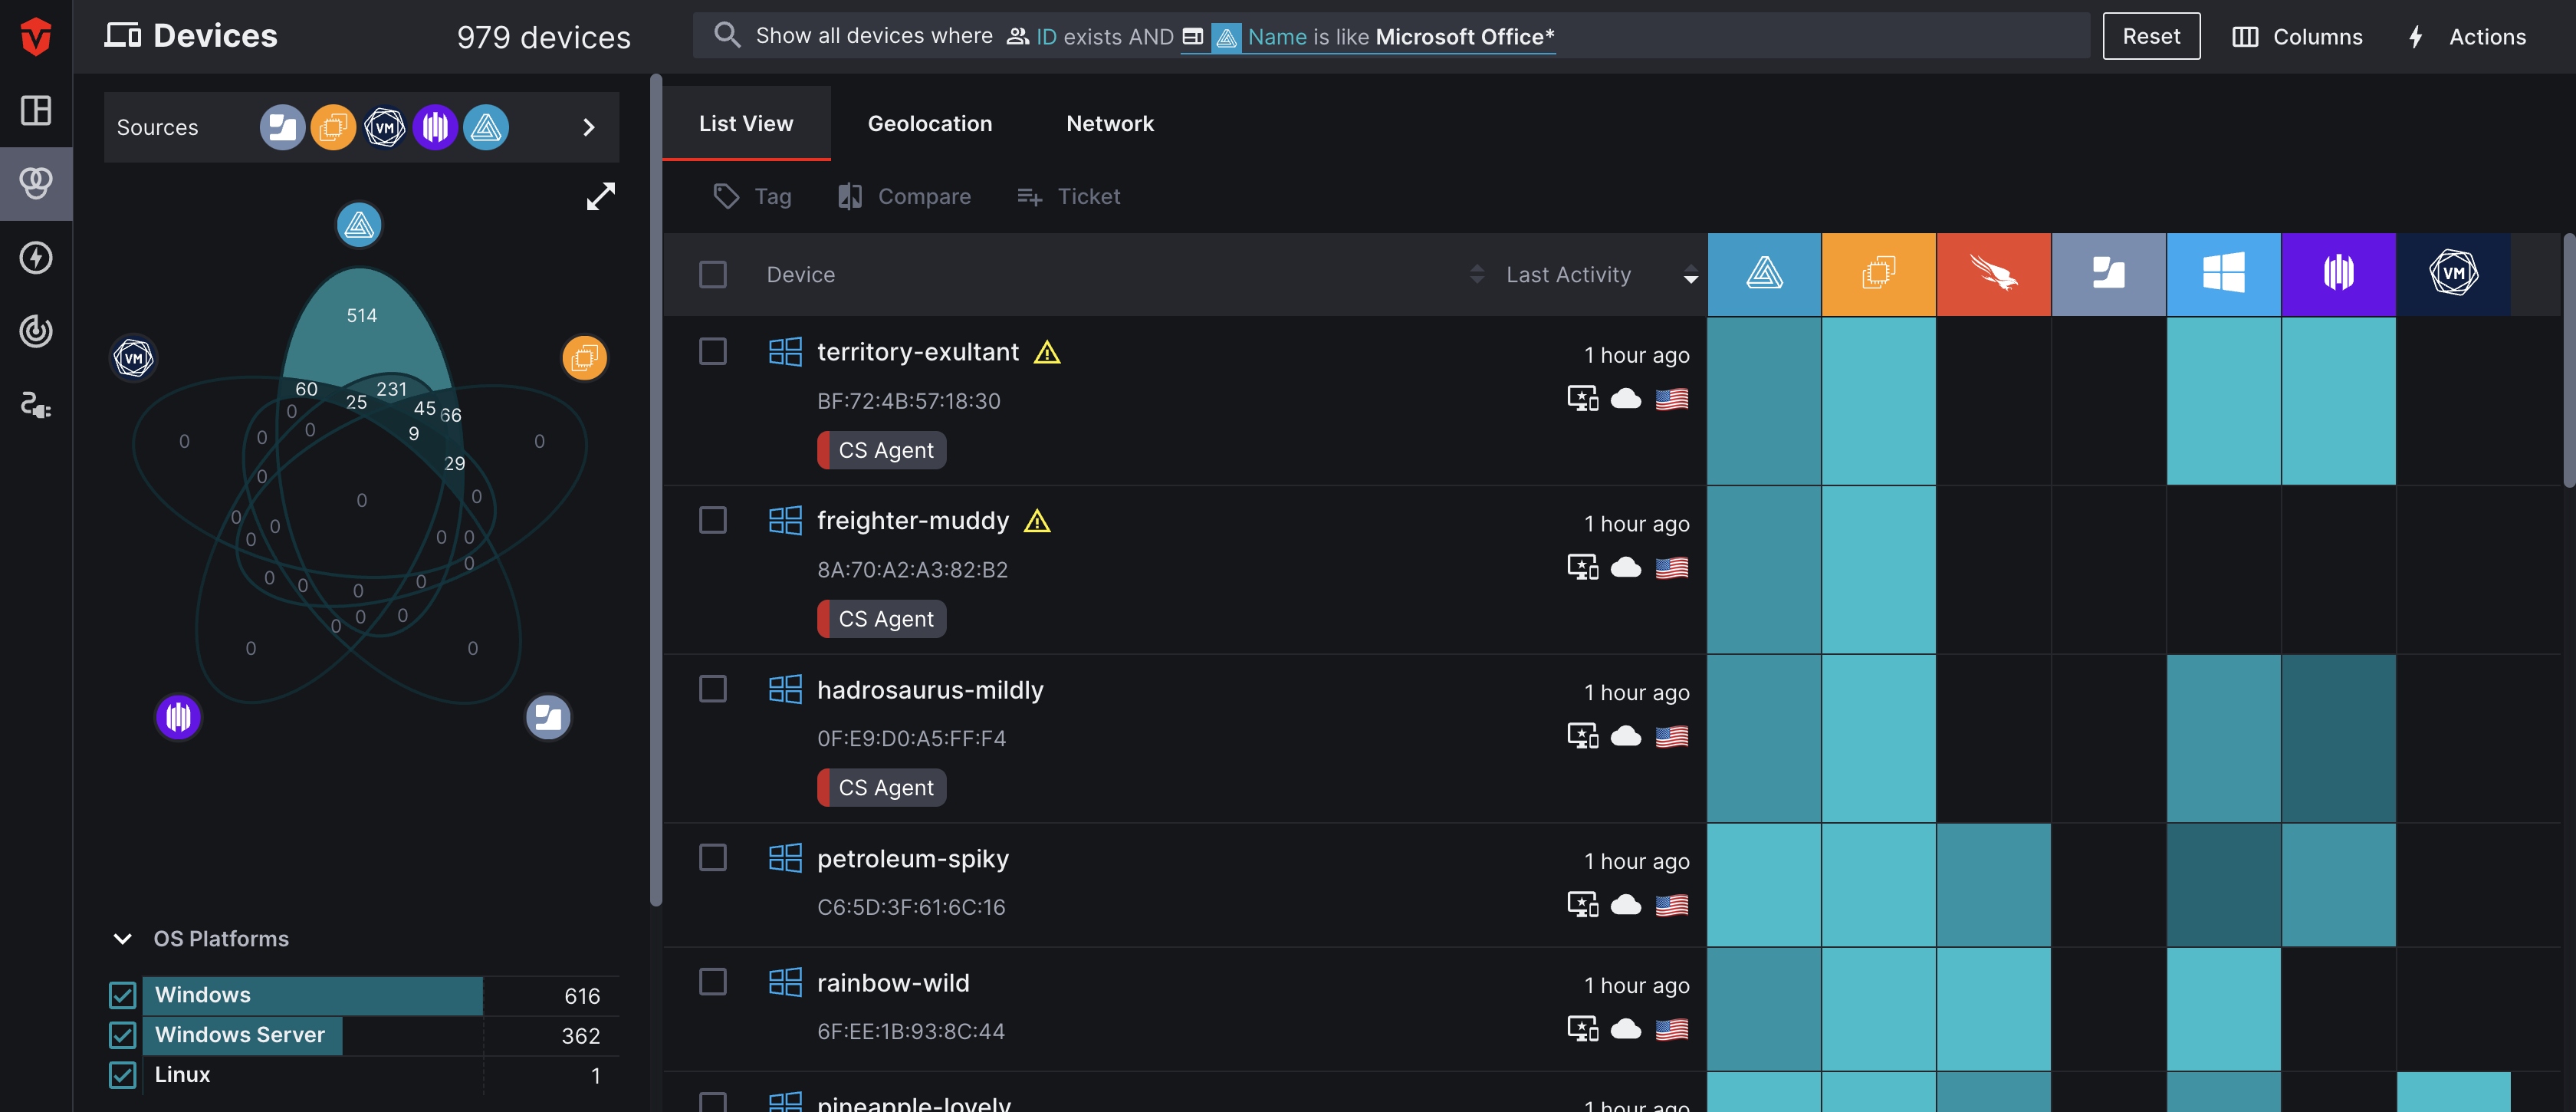
In this example, we will be searching for Devices that have an associated User (ID) that also do not have Microsoft Office installed.
We'll start from the Device Live Inventory page, as it'll allow us to identify both the specific Device assets that do not have the software installed as well as their associated users.
To begin, we are going to select the Attribute field followed by the Users tab in the attribute menu. For our first rule, we will select ID as our Attribute and exists as our Condition. This will ensure that only Devices that have an associated user appear in our query results.
For our second rule, we will select the Attribute field followed by the Software tab and select Automox as our Software Source. From there, we will select Name as our Attribute, is like as our Condition, and enter Microsoft Office* as our Value.
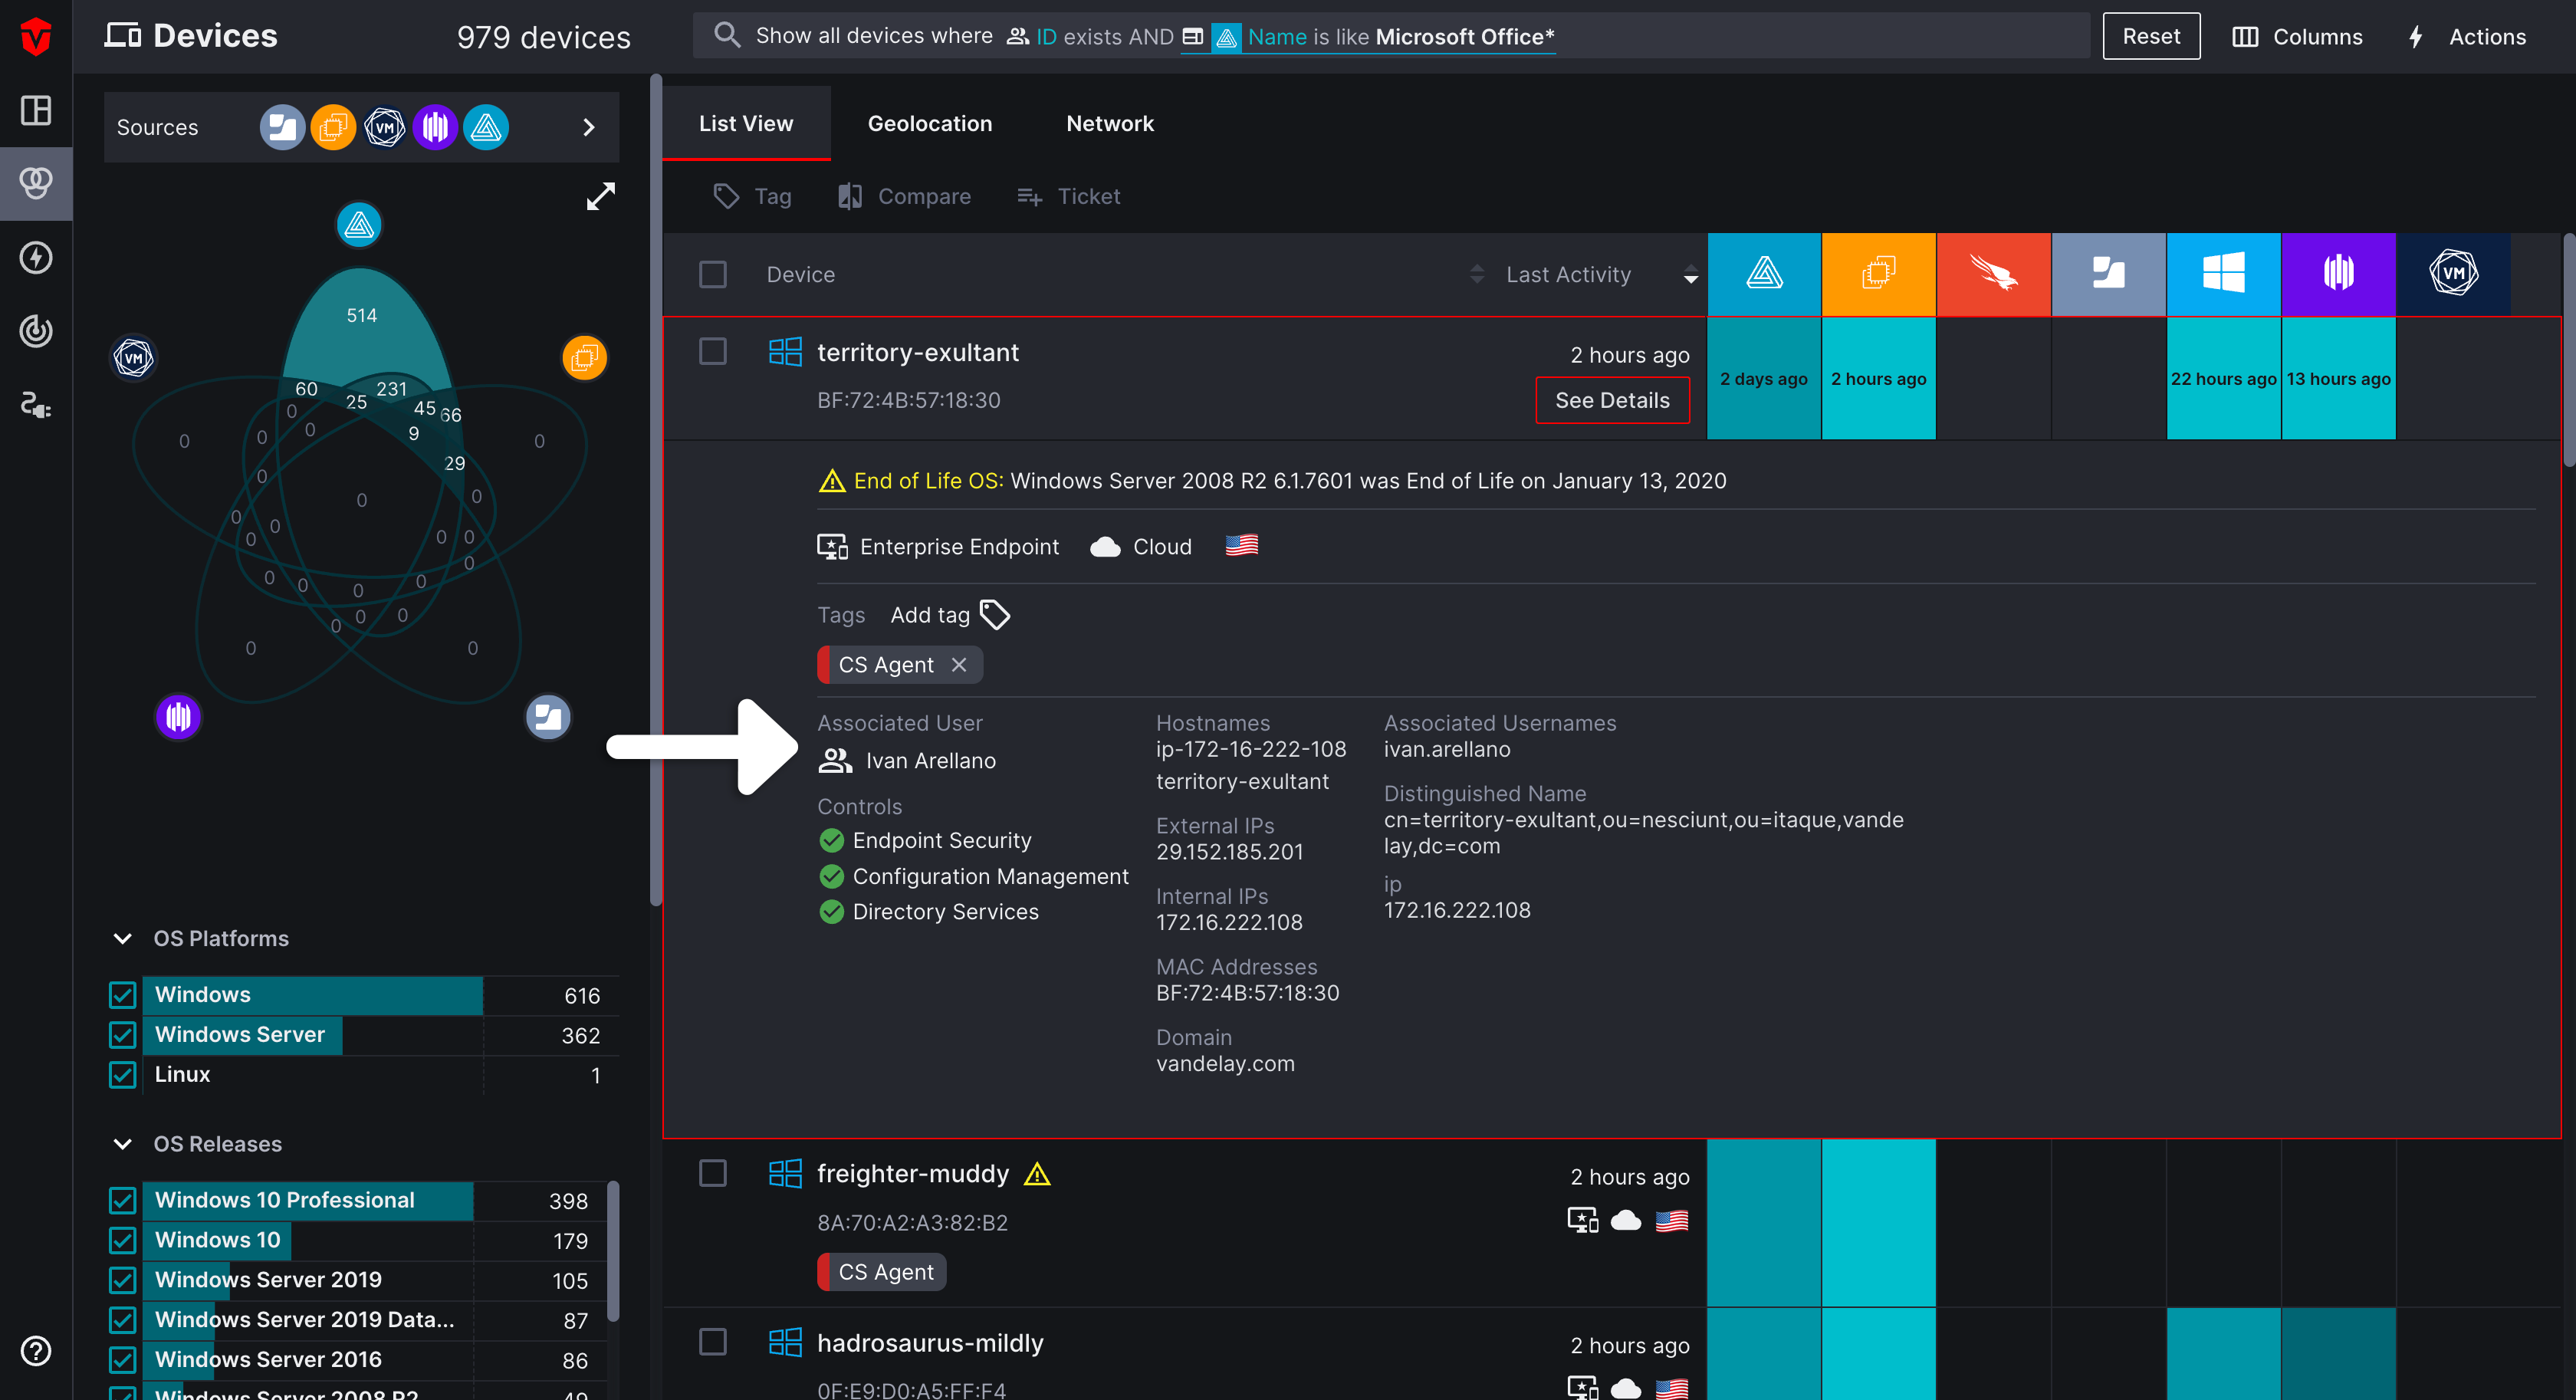
Once we apply the query, the device list will only display Devices that have an associated user and also do not have Microsoft Office Suite installation identified by Automox.
To view what employee is associated with a Device, select it from the list and refer to the Associated User section.
Saving a Query
Once your query has been built, you can save it by selecting the Save Query button in the top-right corner of the query builder to add it to the My Queries or Org-wide Queries Tab.
- Queries saved to the My Queries list are only viewable to you.
- Queries saved to the Org-wide Queries list are viewable to all members in your Organization.
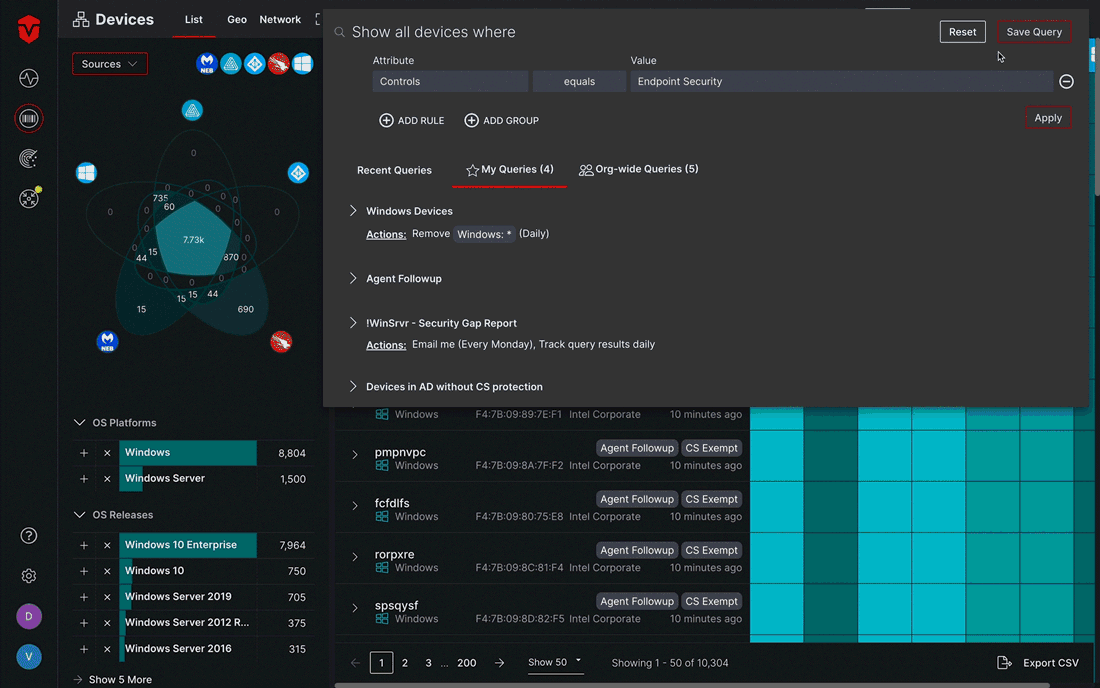
If you've already run your query, you can save it from the Recent Queries tab. Hover over the query you'd like to save and select the Save button to add it.
Editing a Query
Graphs for queries added to the Query Reports page will not be reset or altered when a query is edited. Data will continue to be added to the same graph even after a query has been edited.
After a query has been saved, you have the option to edit and update it. This is done directly in the query builder
Select the query you would like to edit from the My or Org-wide Queries tab.

After the query has been run, open the query builder. From here, you can begin making edits. Note the Update Query button that appears as soon as you begin making edits.
Once you have finished making edits to your query, select the Update Query button. A popup will appear.
- If necessary, use the Query Name field to update the name of your query
- Your Previous and Updated Query rules are displayed in the window
Verify that the changes you've made are correct, then click the Save button.
A "Saved query successfully updated" message will appear, indicating that your query has been successfully updated

Query Building Tips
The following are some query-building tips to help improve your workflow:
- For complex queries, list out the conditions for your query ahead of time to prevent having to reset the query builder over a misplaced rule or
and/orCondition. - Disable rules using the disable toggle (
 ) to troubleshoot queries that are producing unexpected results.
 - Save queries to your My Queries list that you run regularly. For queries run by multiple members in your organization, save them to the Org-wide Queries list. Learn more
- Set up email notifications for your saved queries. Learn more
- Promote queries from My Queries or Org-wide Queries lists to the Query Reports page, so you can track them from the Dashboard without having to rerun them. Learn more
Updated about 2 months ago