Manage Aurora ASM Runners
Install, manage, delete, and uninstall Aurora ASM Runners
The Aurora ASM Runner enables the Aurora ASM platform to connect to and retrieve data from on-premise only Integrations. Many integrations are cloud-based services that do not require us to access your network. Those integrations do not need an Aurora ASM Runner (refer to the Manage Aurora ASM Integrations article instead). However, if your integration is within your on-premises network (we call this an "on prem" integration), it requires an Aurora ASM Runner.
Understand Aurora ASM Runners
The Runner is a shell program that you use to deploy in your environment. Instead of Aurora ASM reaching into your network, our Runner reaches out from your network to Aurora ASM. This creates a pipe between your network and the Aurora ASM backend that collects data from the integrated platform. The Aurora ASM Runner is a standalone multi-platform single-executable application you can run anywhere. It connects to Aurora ASM over HTTPS, and registers itself within your organization.
Once you install it, the Runner reaches out to Aurora ASM, downloads the required plugin, and starts running the plugin on that machine, collecting data from your network and sending it to Aurora ASM. One Runner can run 10 on-prem integrations; for more than 10 integrations, install another Runner.
System Requirements
The Aurora ASM Runner can be installed on Windows, Mac, and Linux. They are statically linked executables and have no external library dependencies.
Minimum Operating System
- Windows (7+, Windows Server 2016+)
- Mac OS (10.7 or later)
- Linux (kernel 2.6.32+, glibc 2.17+)
Minimum Hardware
- CPU: 2 64-bit core processors.
- RAM: 8GB
- Storage: OS minimum
Note: For organizations using less than 5 integrations, a minimum of 1GB of RAM per integration will be required.*
Communication
HTTPS (TCP 443) outbound access to the following domains:
api.sev.coplugins.api.sev.co
For Windows runners:
Aurora ASM recommends that Windows runners be installed on a device which is a member of the domain.
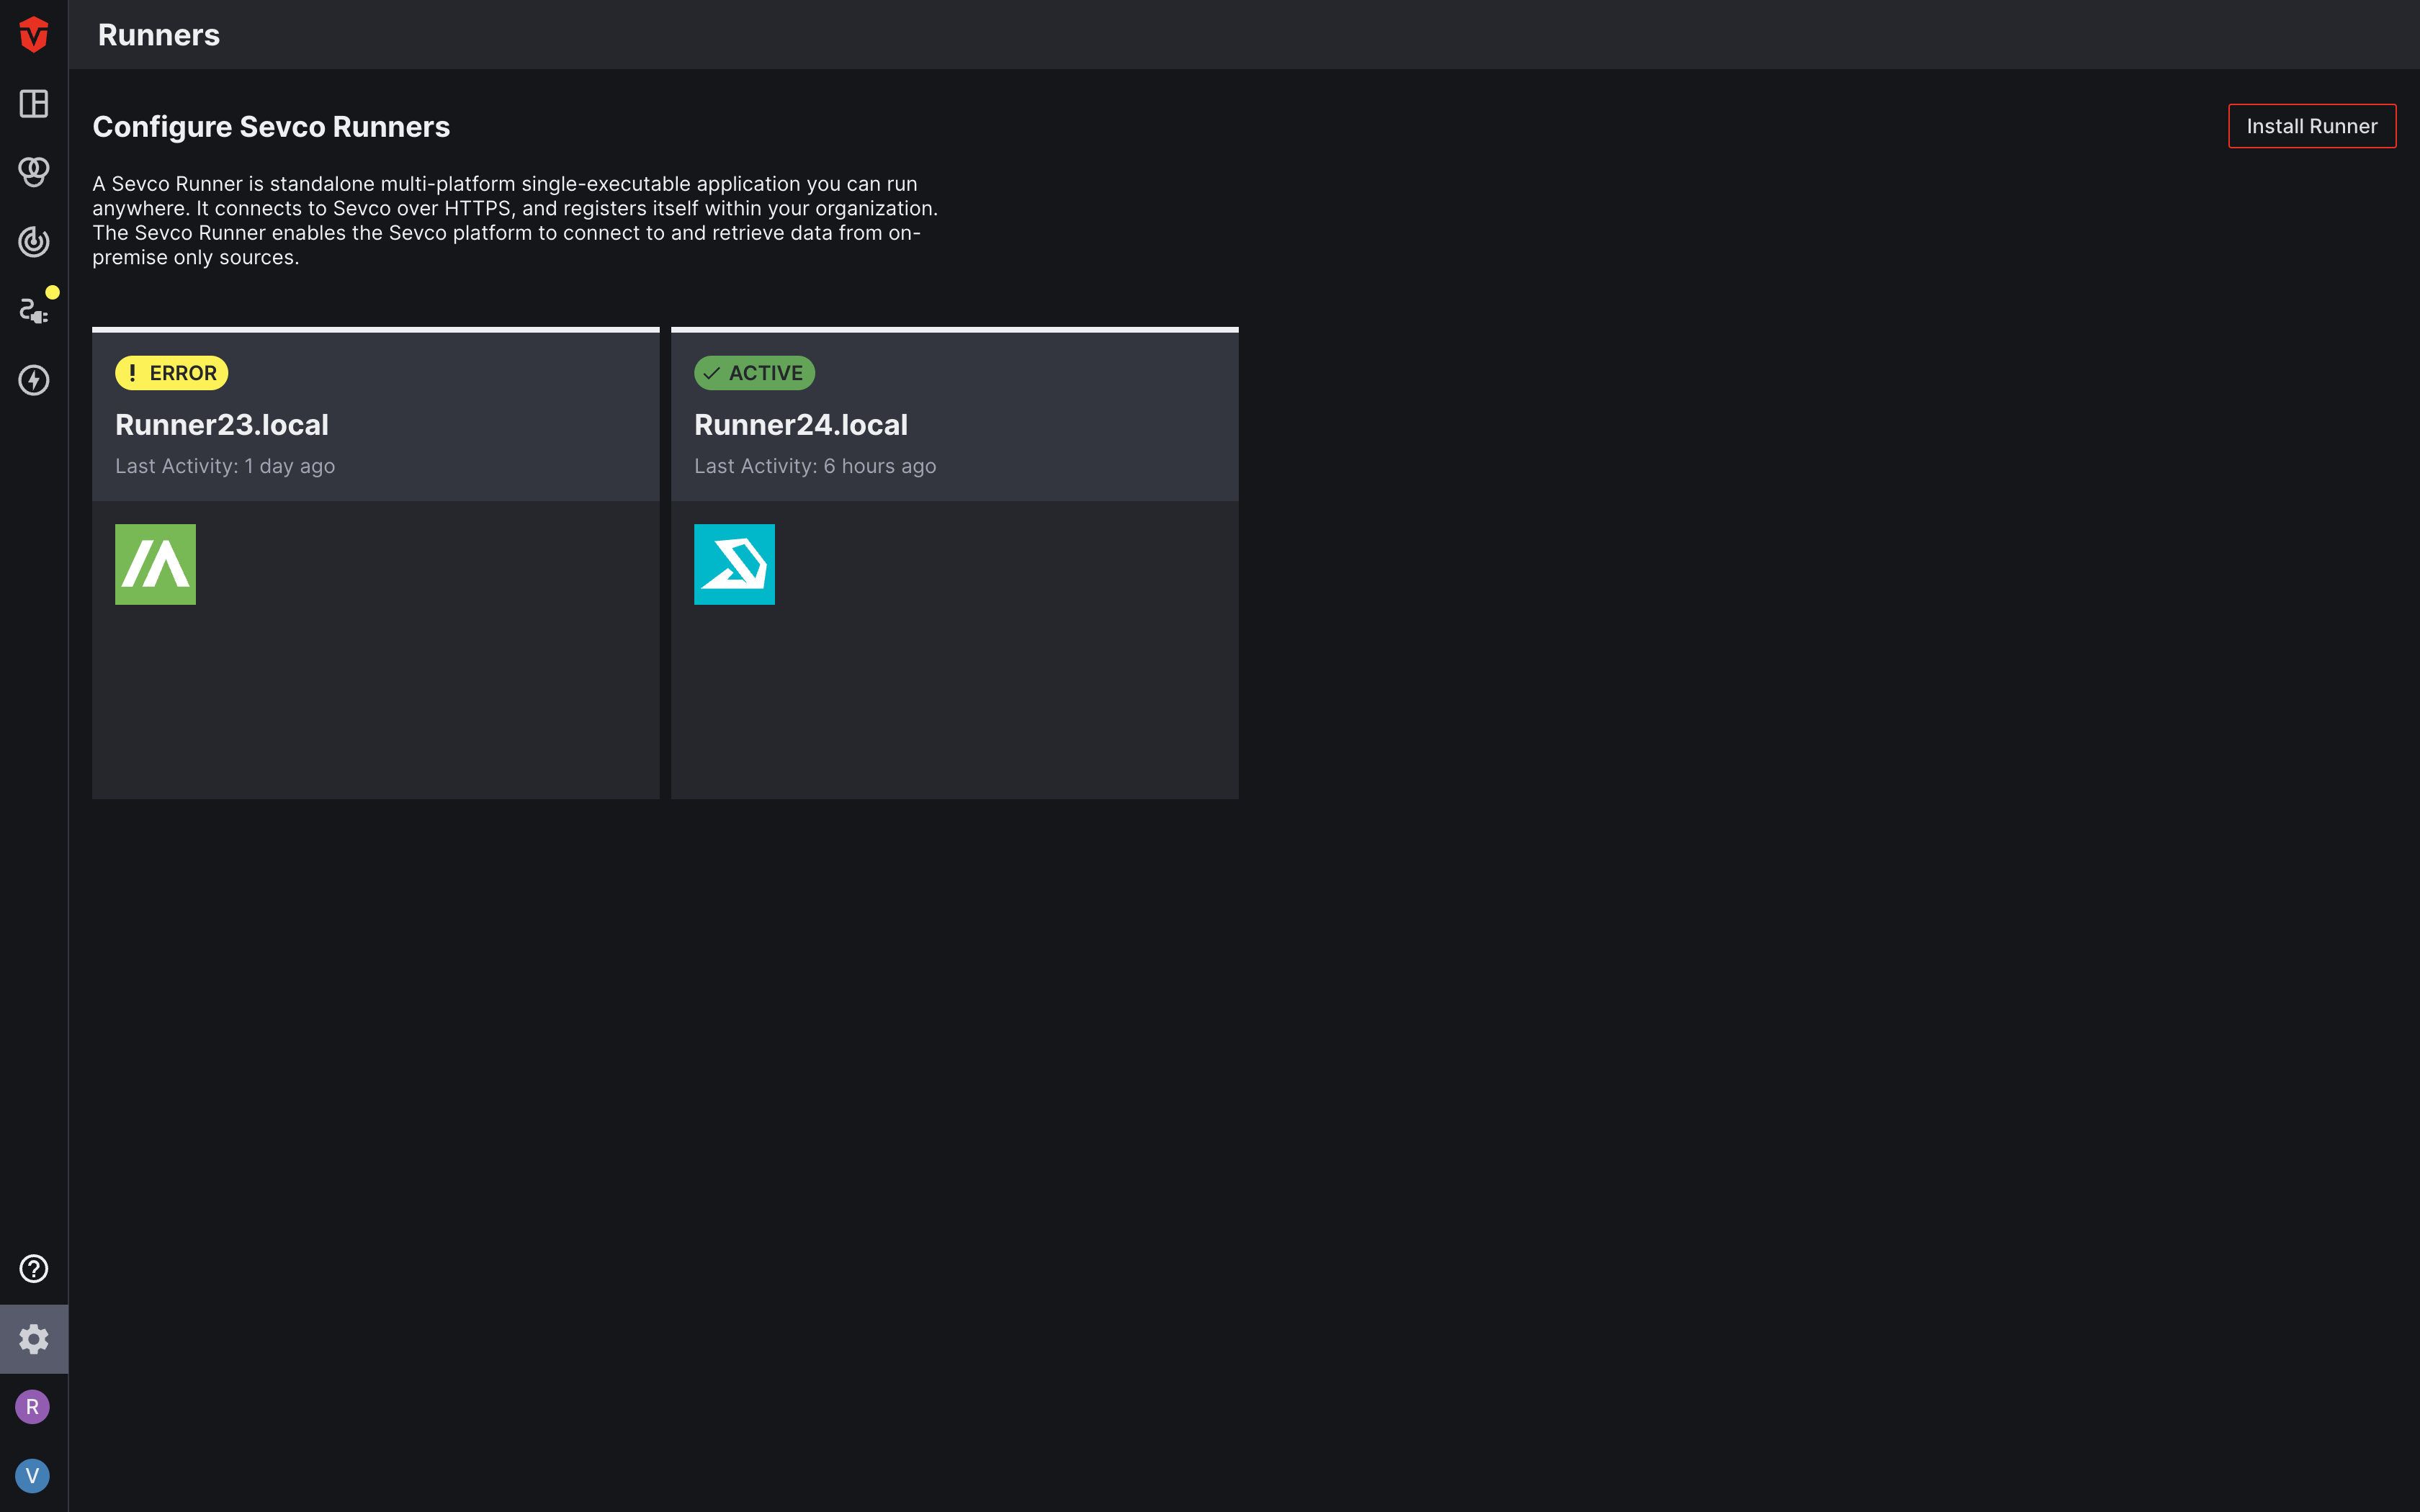
Runners Page
When the Runners page is initially opened, it will appear blank. Once a runner has been installed, it will appear as a card on the page and display information about its Last Activity as well as a list of any integrations that are currently using it. Select the name of runner to view additional information about it on the Runner Details page.
Install an Aurora ASM Runner
Users running on MacOS may run into permissions issues when attempting to run the runner's installer. Please refer to Apple's documentation on bypassing these permissions.
To add an Aurora ASM Runner:
Select the Install Runner button. A popup will appear. Download and install the OS-specific file as shown below.
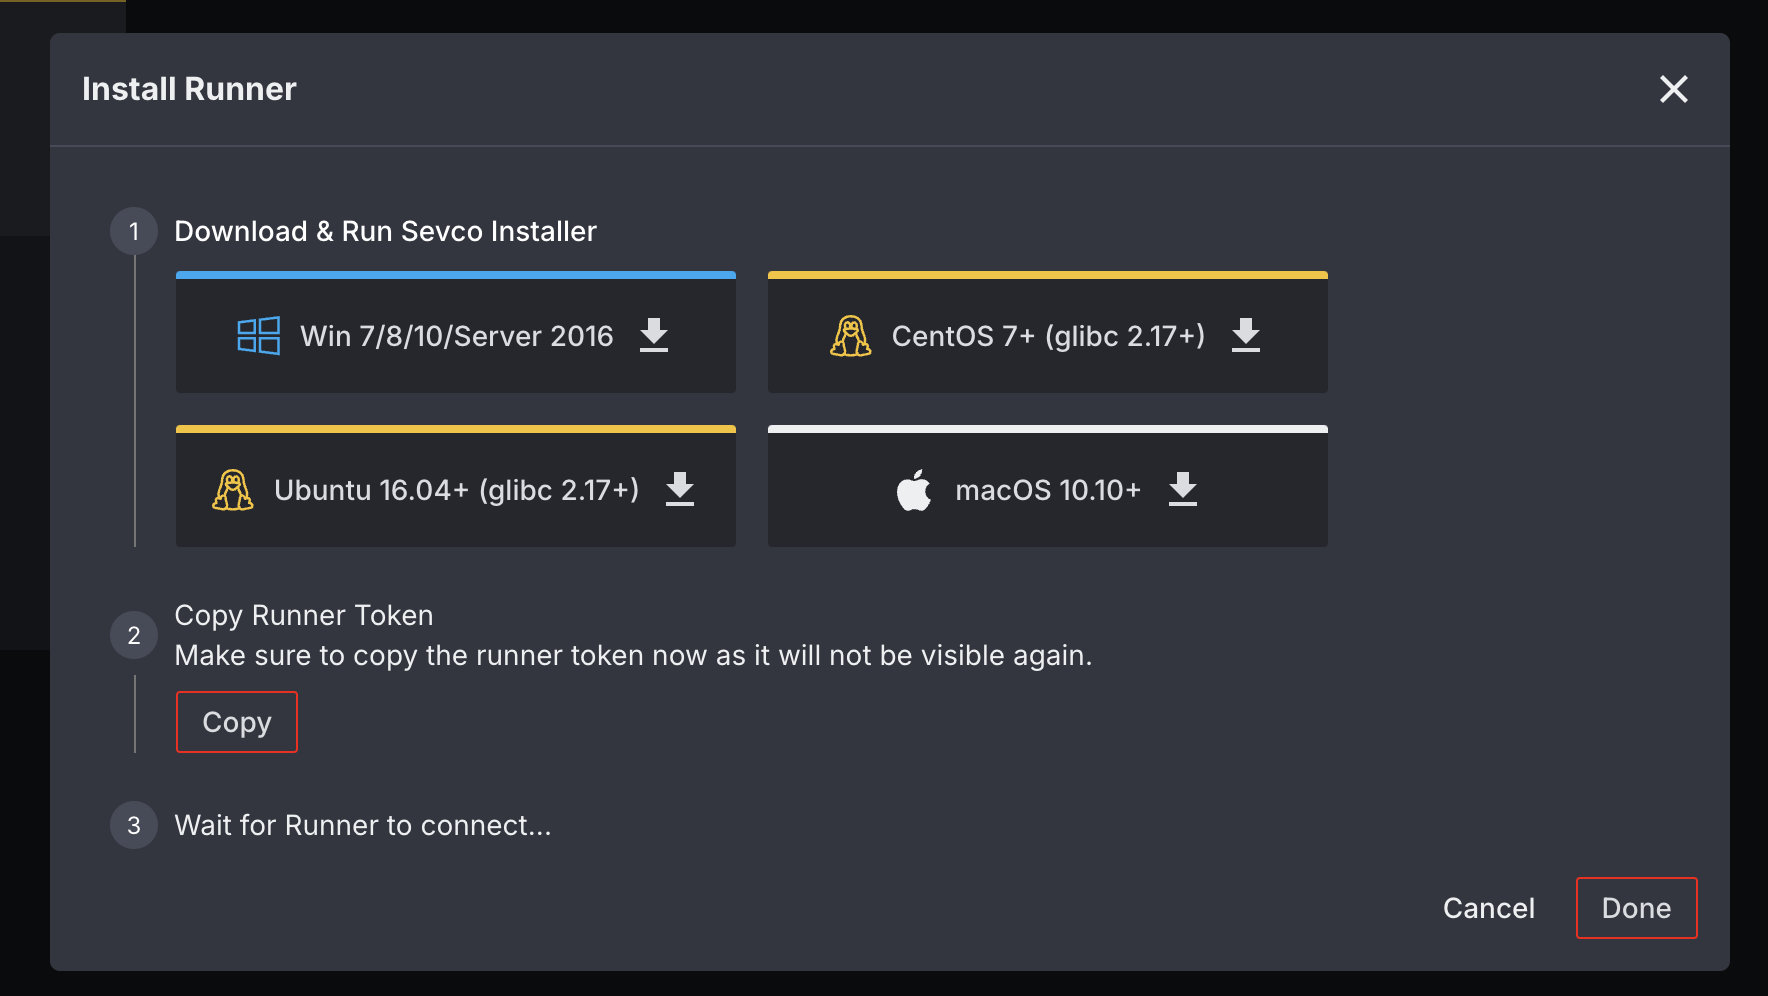
When prompted during install, copy and paste the runner token into the provided field to connect your runner.

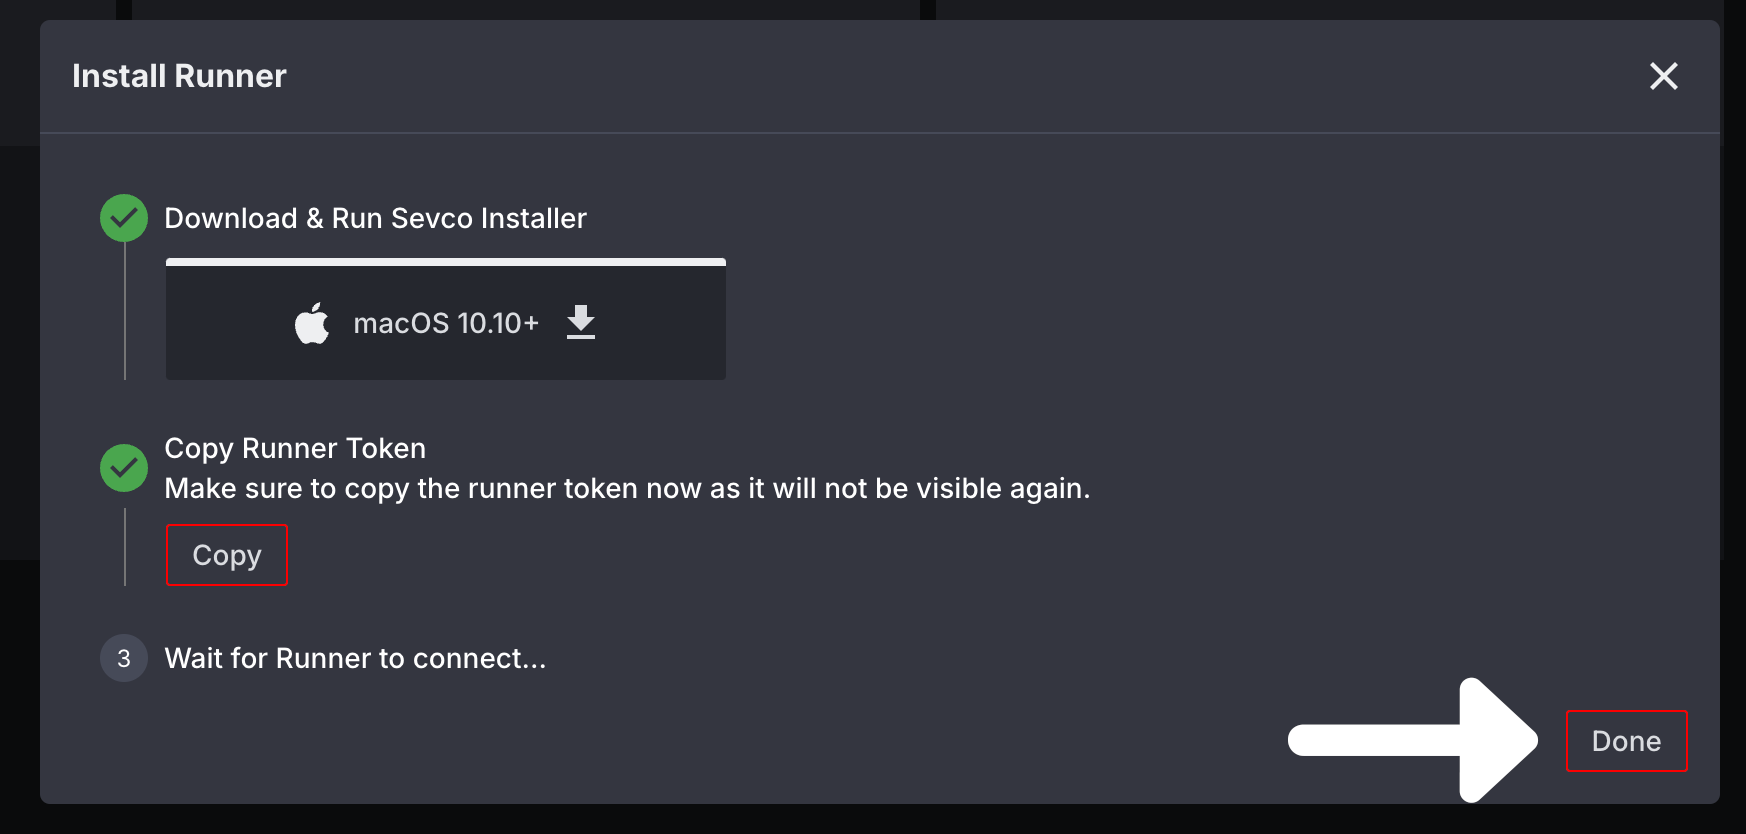
Once you've completed your runner installation, select the Done button on the Install Runner popup. Your Runner will appear in the Runners list.
From here, you must configure your integration for the Runner. This can be done from the Integrations page.
Upgrade an Aurora ASM Runner
If your runner version is outdated, we may suggest a new version to ensure you stay up to date with the latest enhancements and fixes. This is indicated by an Upgrade Runner button on the Runner Details page for a runner. If you see this button, you should upgrade your runner as soon as possible.
To upgrade a runner, select it from the Runners page. You will be redirected to its Runner Details page. Next, select the Upgrade Runner button from the top of the screen.

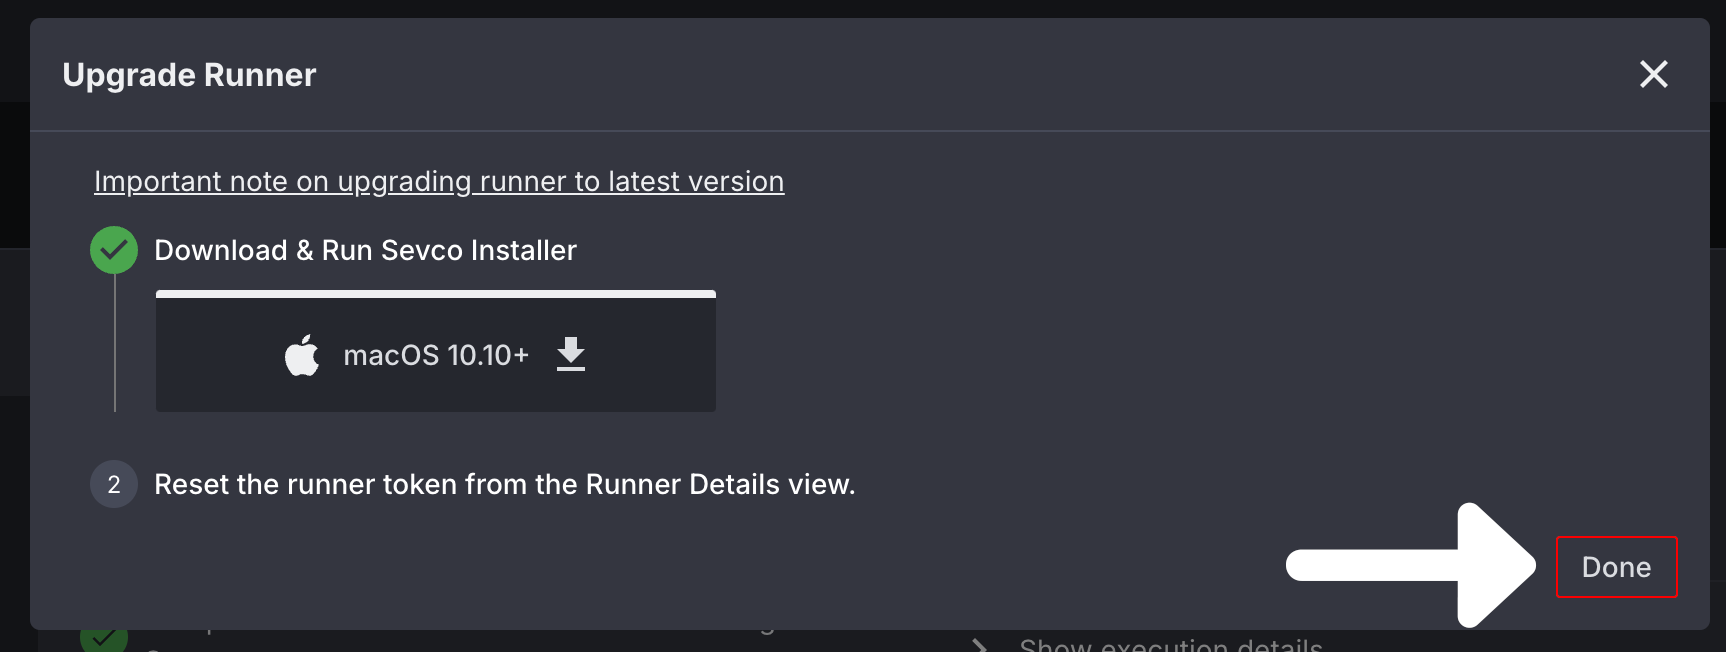
A window will appear. Select the installer that corresponds to your operating system then close out of the window.
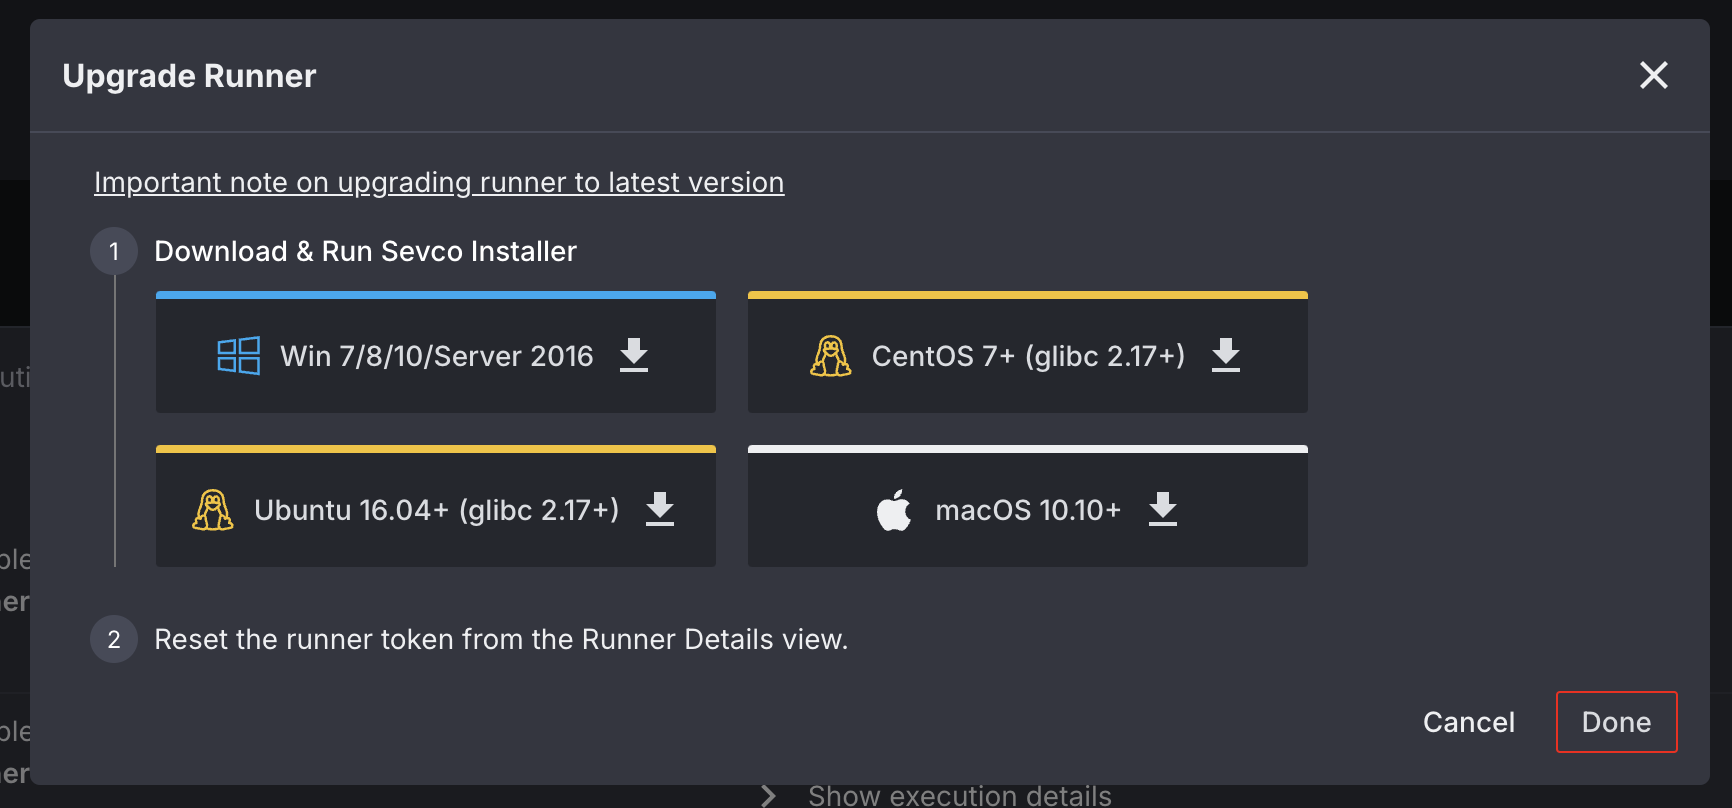
Select the Reset Runner Token button at the top of the Runner Details page. A popup will appear. Select the Reset Runner Token button in the popup to copy a new runner token to your clipboard.
Your runner will not connect properly if an old runner token is used. You will need to copy the new runner token from the Install Runner popup on your screen to complete your install successfully.
When prompted during install, paste the runner token into the provided field.

Once you've completed your runner upgrade installation, select the Done button on the Upgrade Runner popup to complete this process.
Reset a Runner Token
All runners associated with a runner token will stop uploading to Aurora ASM immediately after the Reset Runner Token button is selected. You must apply your new runner token to resume.
Before resetting a runner token, it is important to note that doing so may reset the runner token for one or more runners, depending on the Version the runner is running on.
- Resetting a runner token for a runner running on version
20240222or later will only reset the runner token for the selected runner. - Resetting the runner token for a runner running on an earlier version (i.e. version
20231005) will reset the runner token for all runners running on versions earlier than20240222
You can reset the runner token for your organization from the Runners page. Start by selecting the Runner you would like to reset the runner token for. You will be redirected to its Runner Details page.

Next, select the Reset Runner Token button to reset your token. A popup will appear. Select the Reset Runner Token button in the popup to copy a new runner token to your clipboard.

From here, you can follow the instructions for your operating system to complete this process.
Windows
- Navigate to
C:\Program Files\Sevco\then openconfig.xmlin Notepad or a similar editor. - Edit
<Params api_key="YOUR TOKEN">by removing your old token and replacing it with your new one. - Open
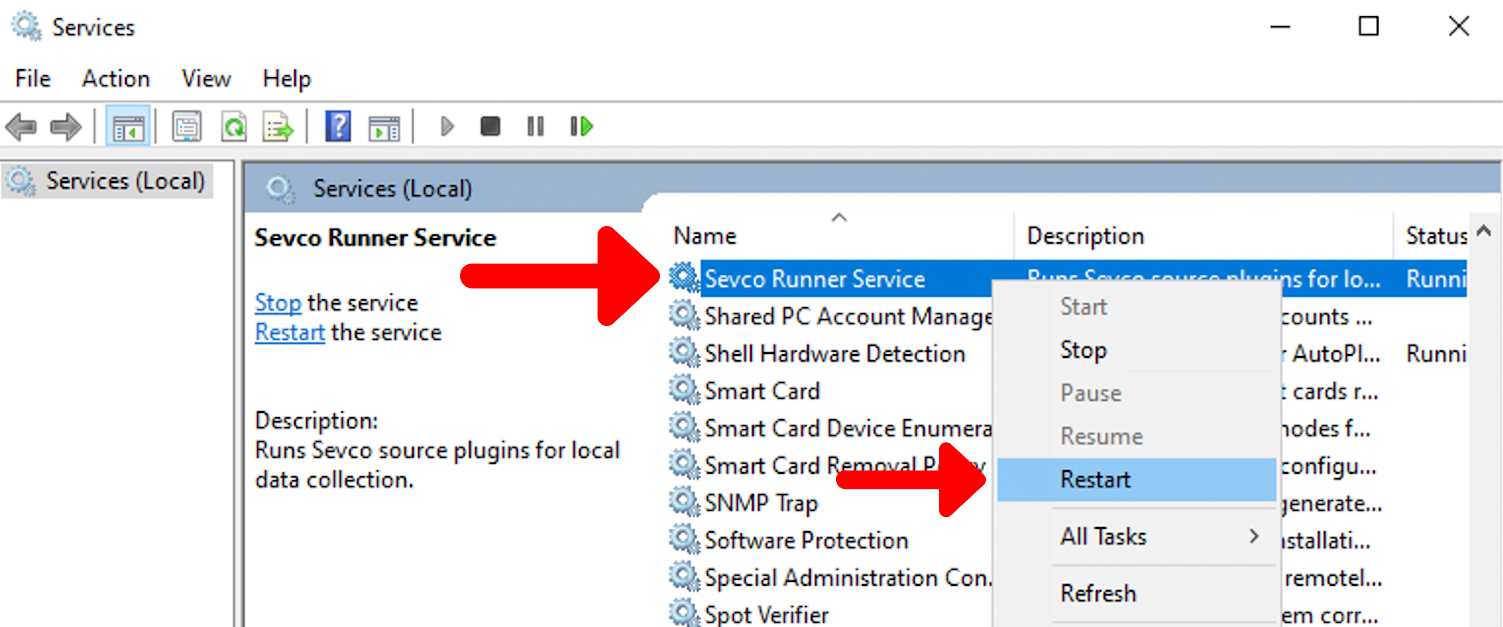
Servicesand locateSevco Runner Service. Right-click and selectRestartto complete this process.
CentOS, RHEL, Ubuntu, Debian
- Edit
/opt/sevco/runner-environmentby replacing your old token with your new one inSEVCO_API_KEY="YOUR TOKEN”. - Run
systemctl restart sevco-runnerto complete this process.
MacOS
- Navigate to
/etc/sevco/then openrunner.confin TextEdit or a similar editor. - Edit
api_key: "YOUR TOKEN"by removing your old token and replacing it with your new one. - Run
launchctl kickstart -k system/com.sevco.runnervia the command line to complete this process.
Delete an Aurora ASM Runner
All Integrations must be removed from a runner before you can delete it. Please refer to this document for updating your Integration configuration.
Deleting an Aurora ASM runner removes it from your environment. However, to completely remove the services and files associated with an Aurora ASM runner that were installed on the client hardware, you will need to follow the instructions in the Uninstall an Aurora ASM Runner section of this document.
To delete an Aurora ASM Runner, select the runner you would like to delete to go to its Runner Details page.
From the Runner Detail page, select the Delete button in the top-right corner of the screen. A popup will appear, asking you to confirm that you would like to delete the runner. Select the Delete button to complete this process.
Uninstall an Aurora ASM Runner
First, delete the Aurora ASM runner from the Aurora ASM platform as instructed in the previous section. Then, follow the instructions for your operating system to uninstall the Aurora ASM runner.
Windows
- Uninstall Aurora ASM runner services right in the Windows desktop:
- You can go to Settings → Apps, and select Sevco from the Apps & features list. Click Uninstall.
- You can also click the Windows icon in the lower left corner of your desktop, scroll to Aurora ASM in the list of apps that displays, right-click on it, and select Uninstall.
- Follow the standard wizard to remove the Aurora ASM runner services.
- Complete the file cleanup by deleting the
C:\Program Files\Sevcofolder.
CentOS / RHEL
- Uninstall Aurora ASM runner services via the CentOS cmdline:
rpm -e sevco-runner. - Complete the file cleanup with this command:
rm -rf /opt/sevco.
Ubuntu / Debian
- Uninstall Aurora ASM runner services via the cmdline:
dpkg -P sevco-runner. - Complete the file cleanup with this command:
rm -rf /opt/sevco.
macOS
- Uninstall Aurora ASM runner services via the command line:
launchctl remove com.sevco.runner. - Complete the file cleanup with these two commands:
rm /usr/local/bin/sevco_runnerrm /etc/sevco/runner.conf
Updated about 1 month ago